The best import export plugin for WordPress & WooCommerce.

How to Import Meta Box Custom Fields
To import Meta Box custom fields, go to All Import › New Import and start a new import process with the post type or custom post type that has the Meta Box custom fields attached. Drag and drop your fields in the Meta Box Add-On section to bring the Meta Box custom fields into WordPress.
The Meta Box fields should be created and set to show in the field settings for the desired post type before you import their data.
Table of Contents
- Step 1: Create a New Meta Box Fields Import
- Step 2: Review the Import Data
- Step 3: Map Incoming Data to Meta Box Custom Fields
- Step 4: Define Import Settings
- Step 5: Run the Import and Check Your Meta Box Fields
Advanced Topics
Step 1: Create a New Meta Box Fields Import
Navigate to All Import › New Import and provide a valid import file. Select the post type with the attached Meta Box custom fields from the dropdown menu.
In this example, we're importing Meta Box custom fields to Properties.
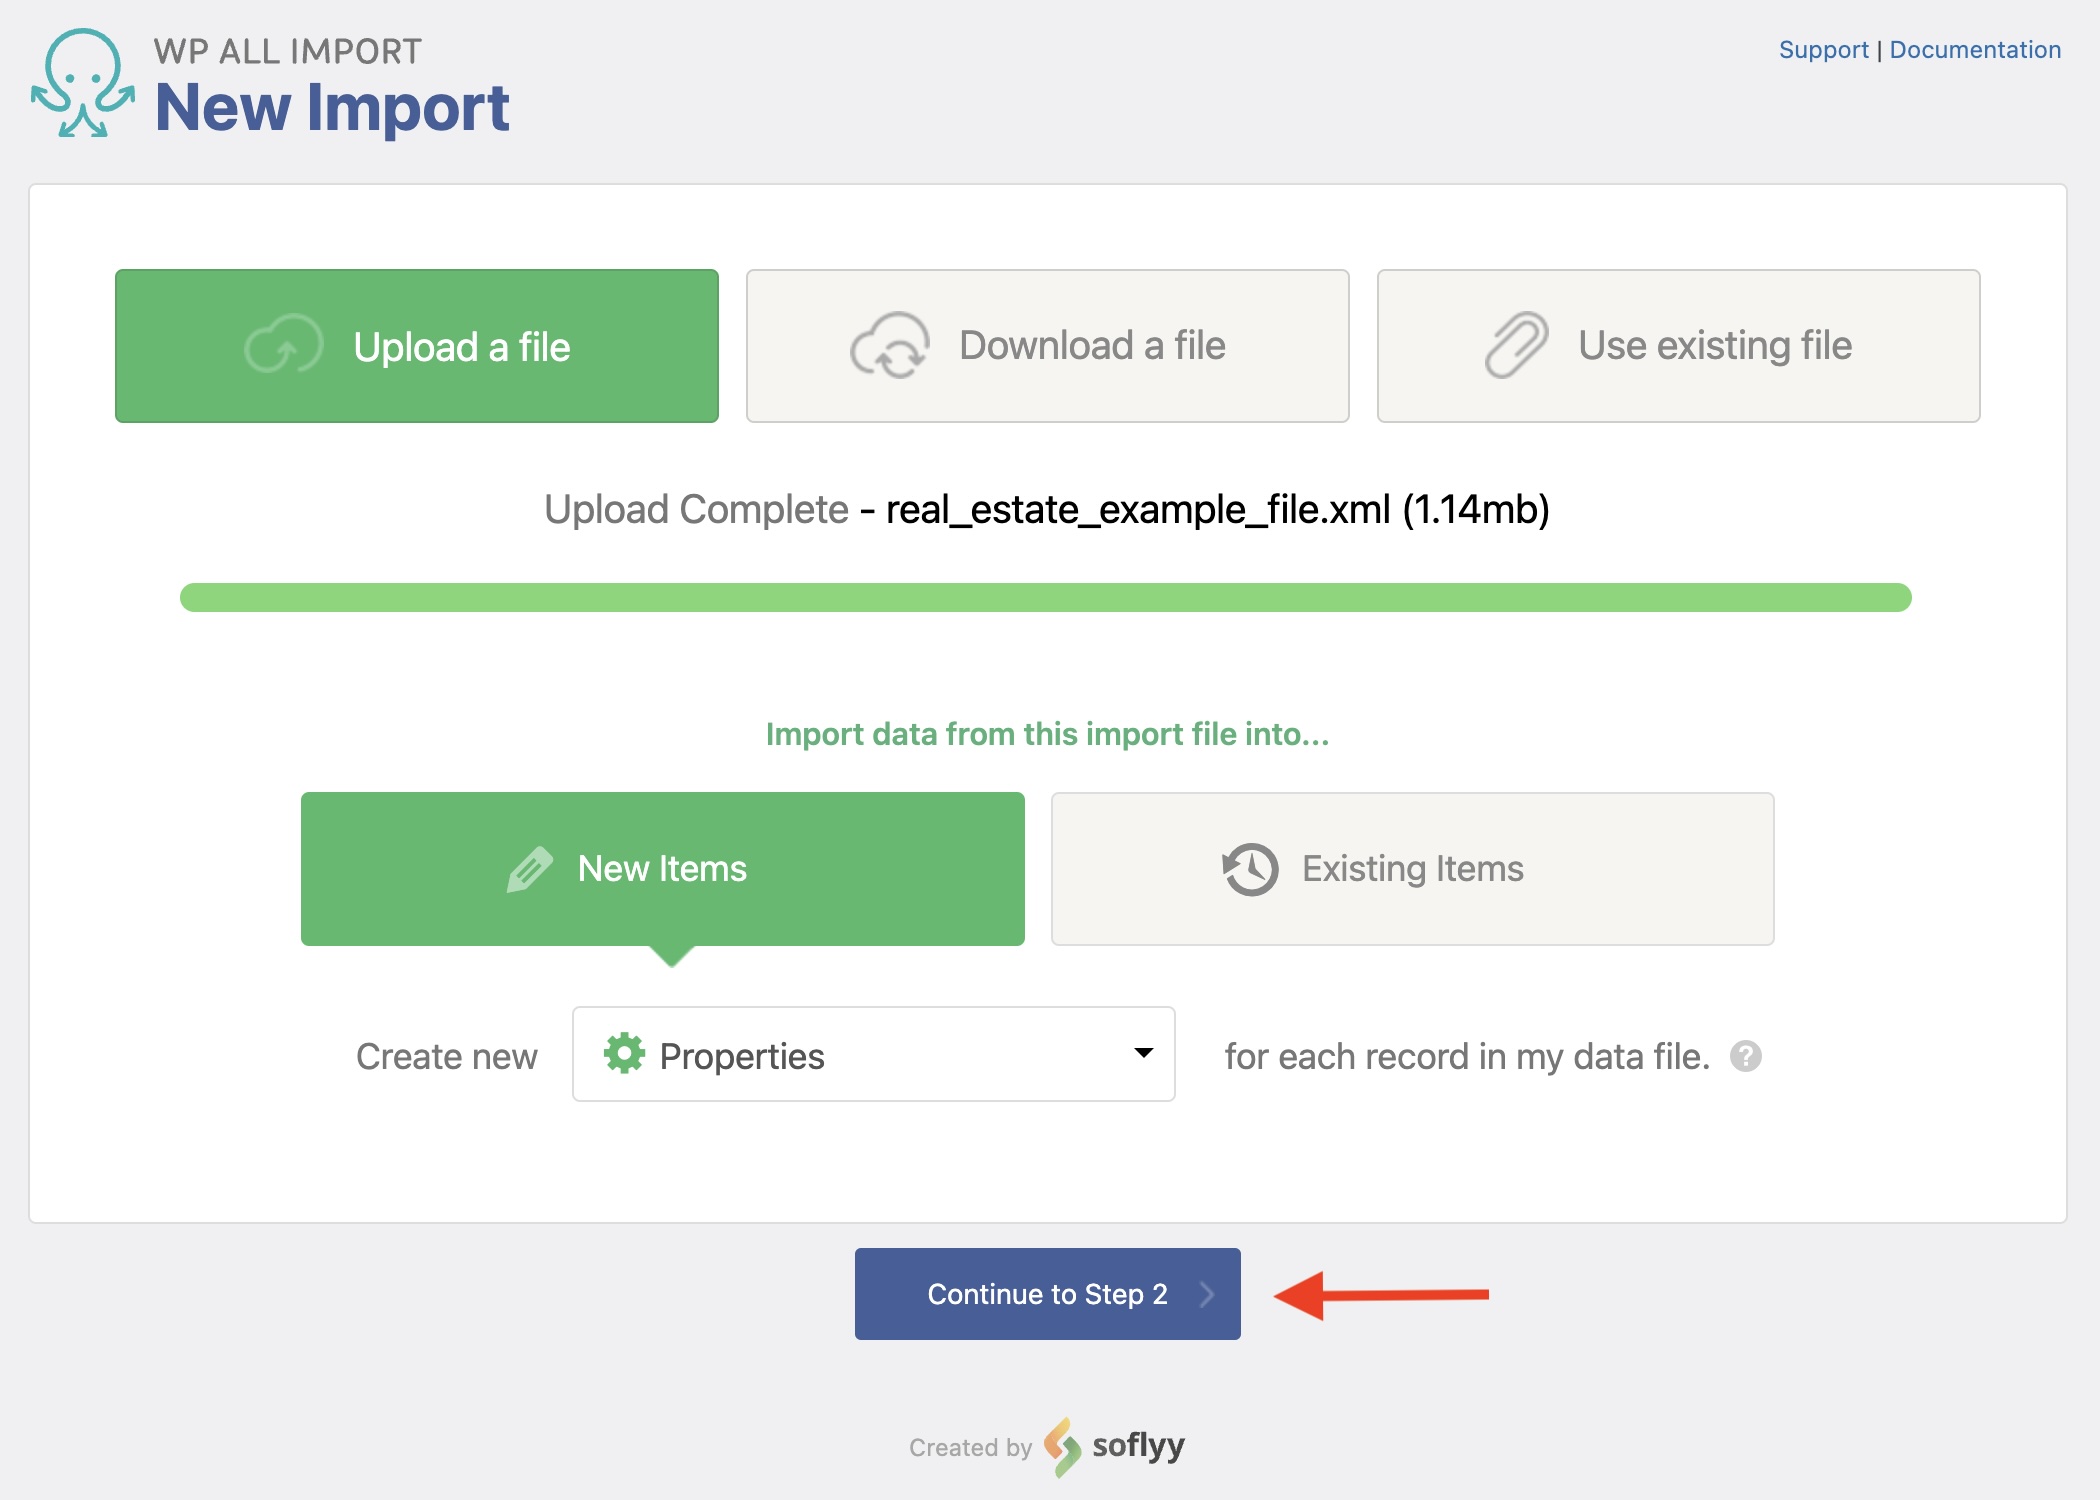
Next, click Continue to Step 2.
Step 2: Review the Import Data
The Review Import File screen appears, which lets you validate the import file and its data:
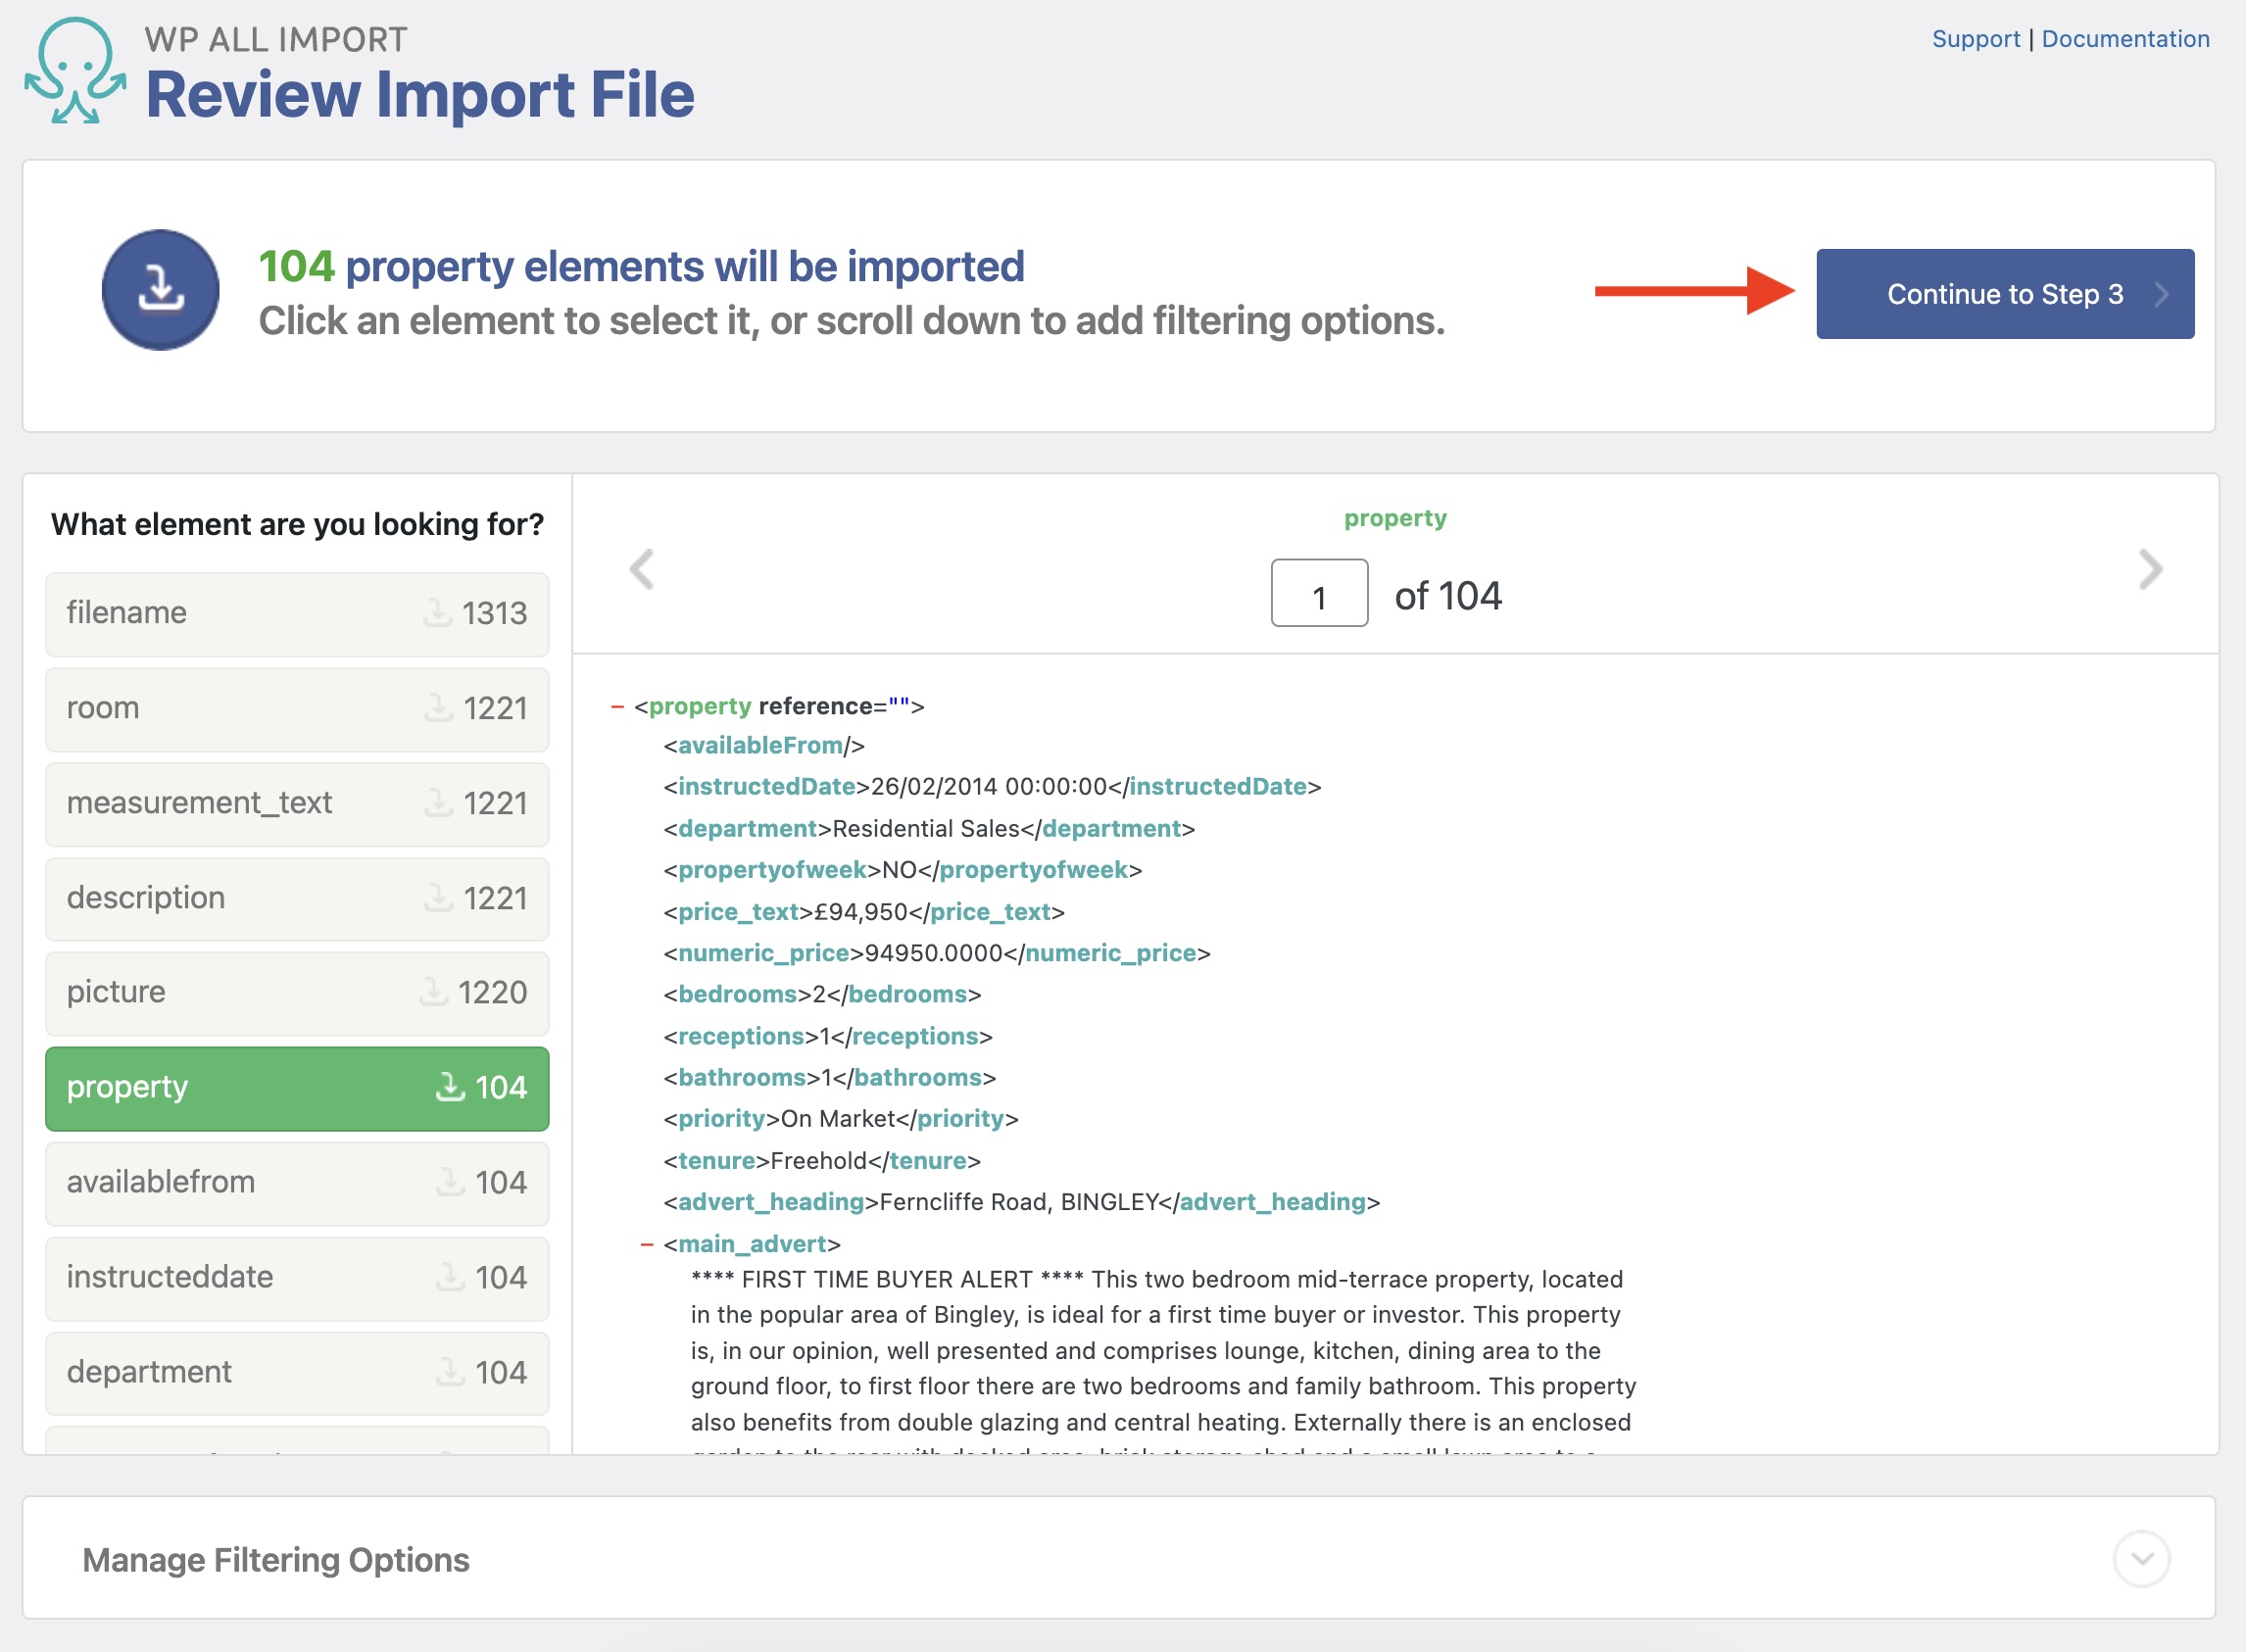
Besides reviewing the records to import, you can also apply filters by expanding the Manage Filtering Options section.
Click on Continue to Step 3.
Step 3: Map Incoming Data to Meta Box Custom Fields
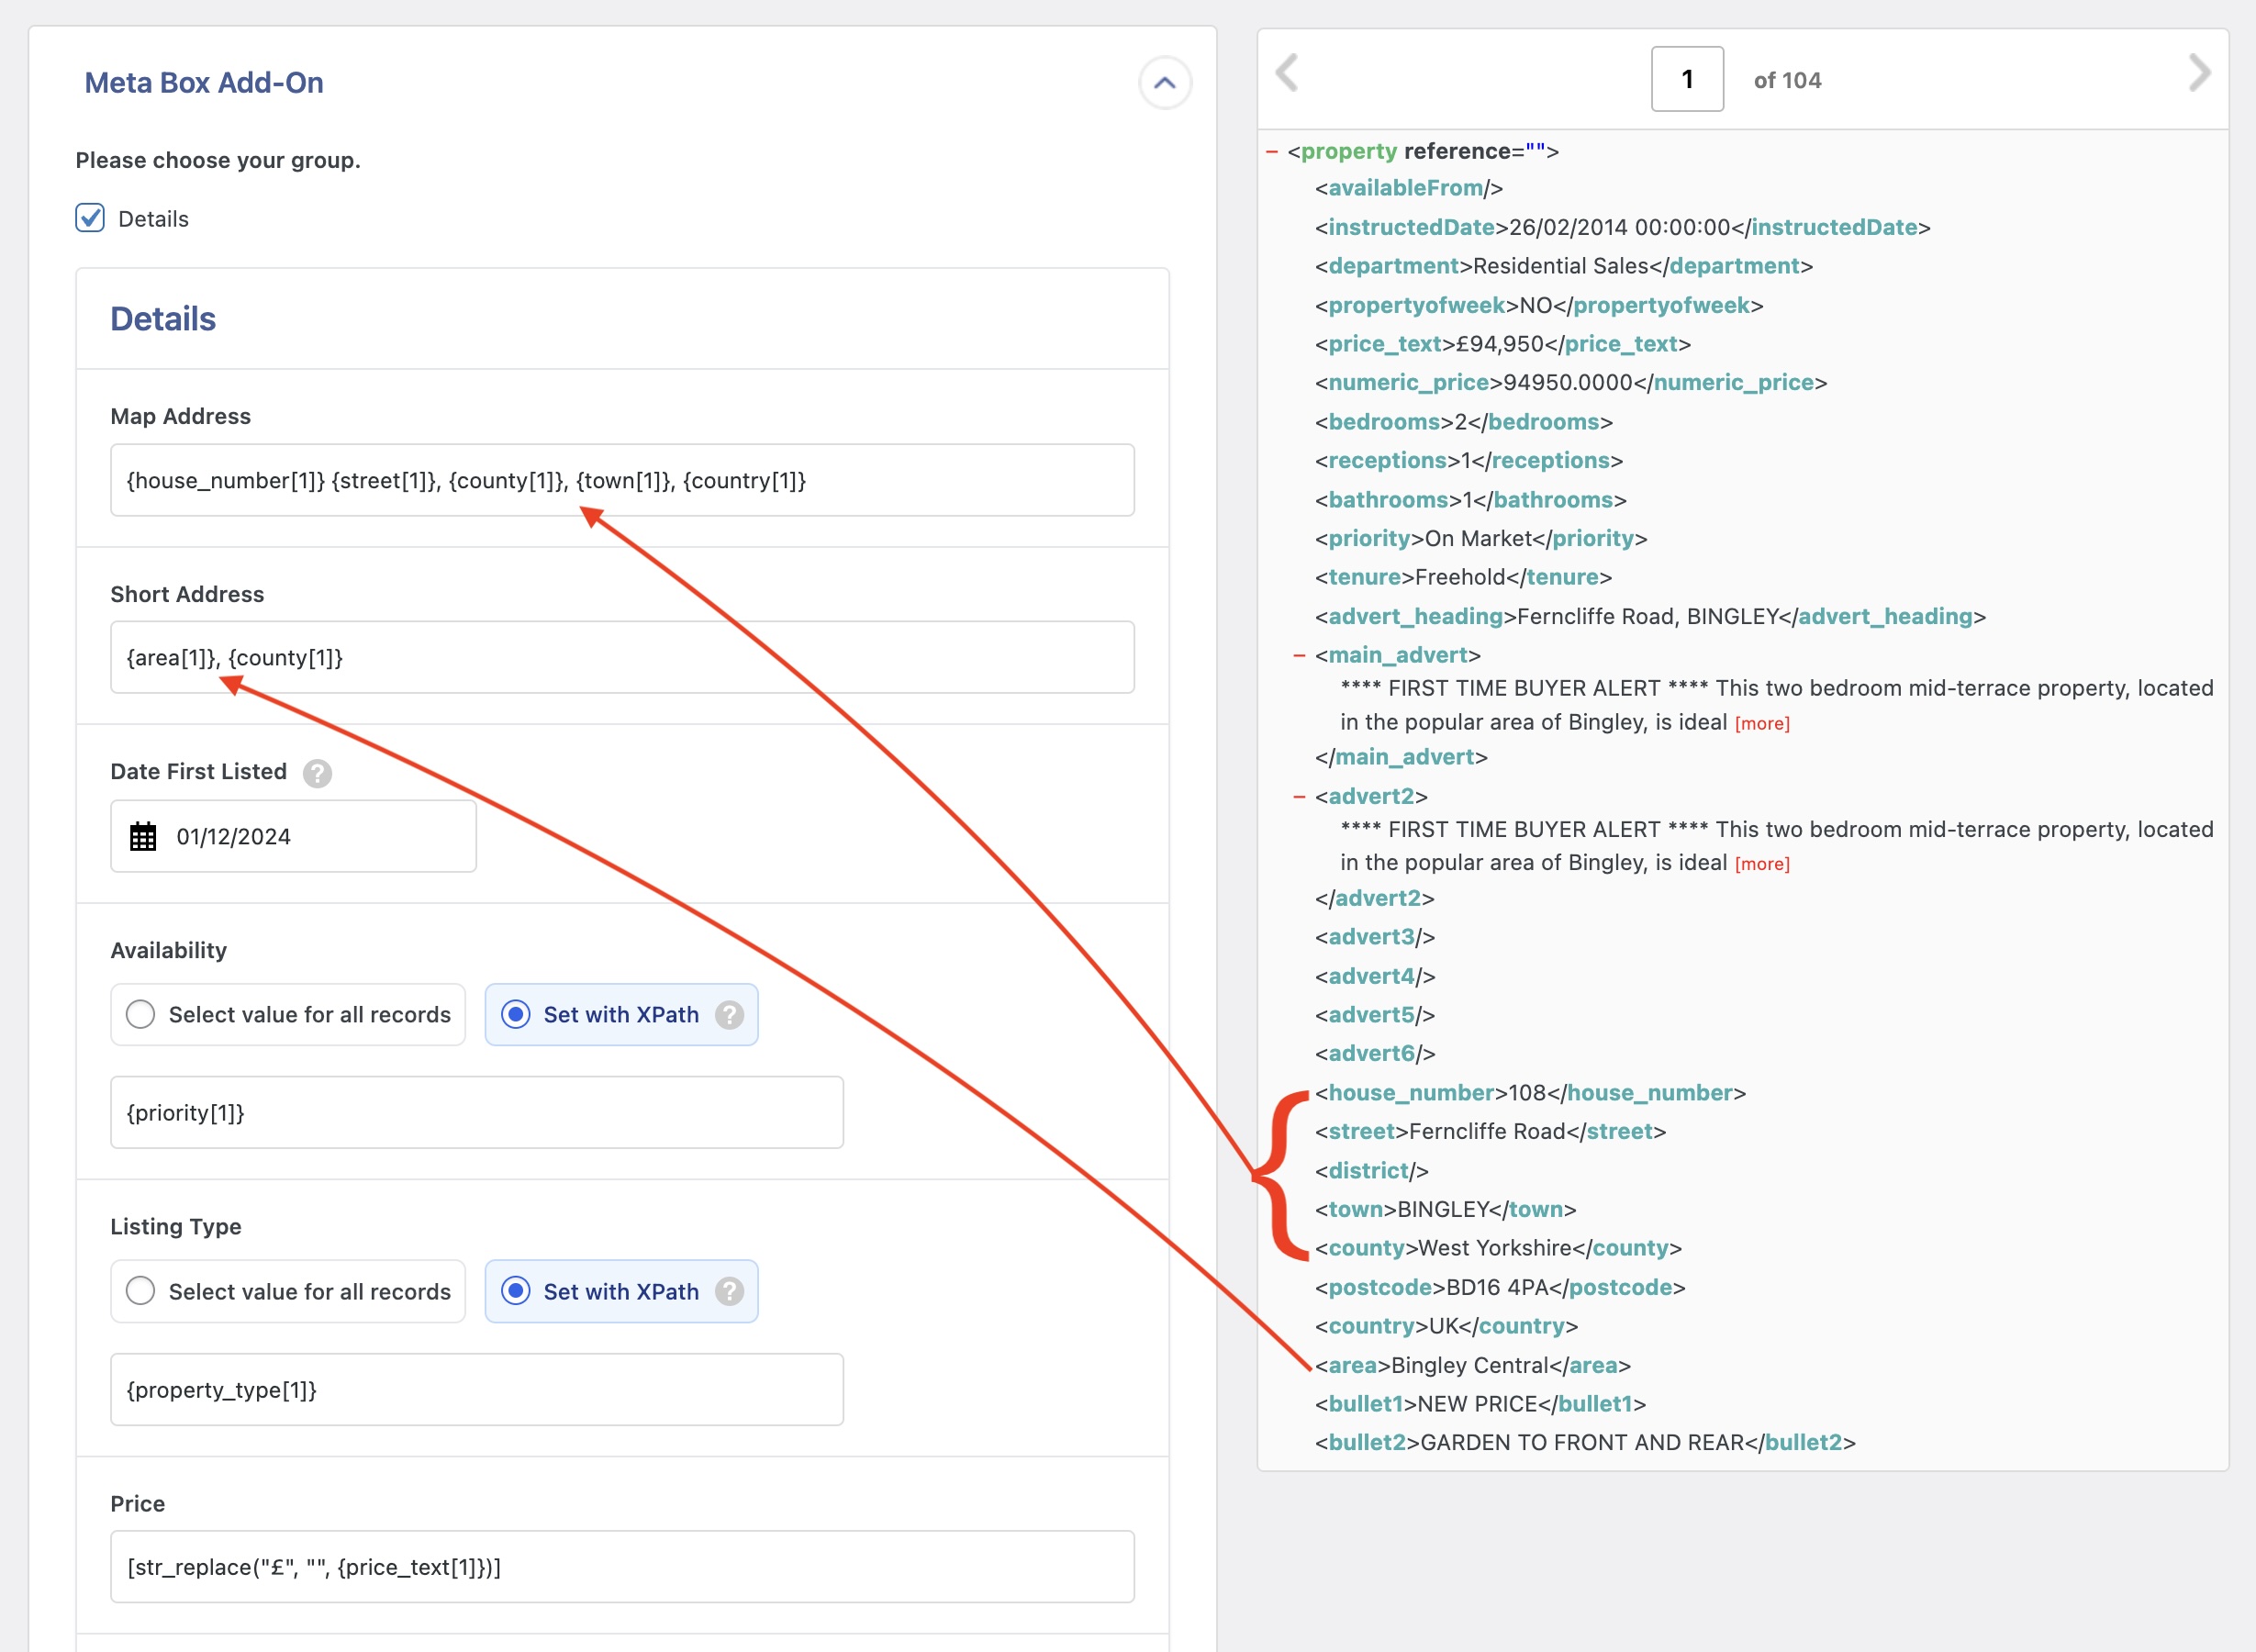
You now see the Drag & Drop screen, which lets you map the import data elements into the respective target fields.
To map a data element, drag it from the right panel and drop it on the matching field on the left:
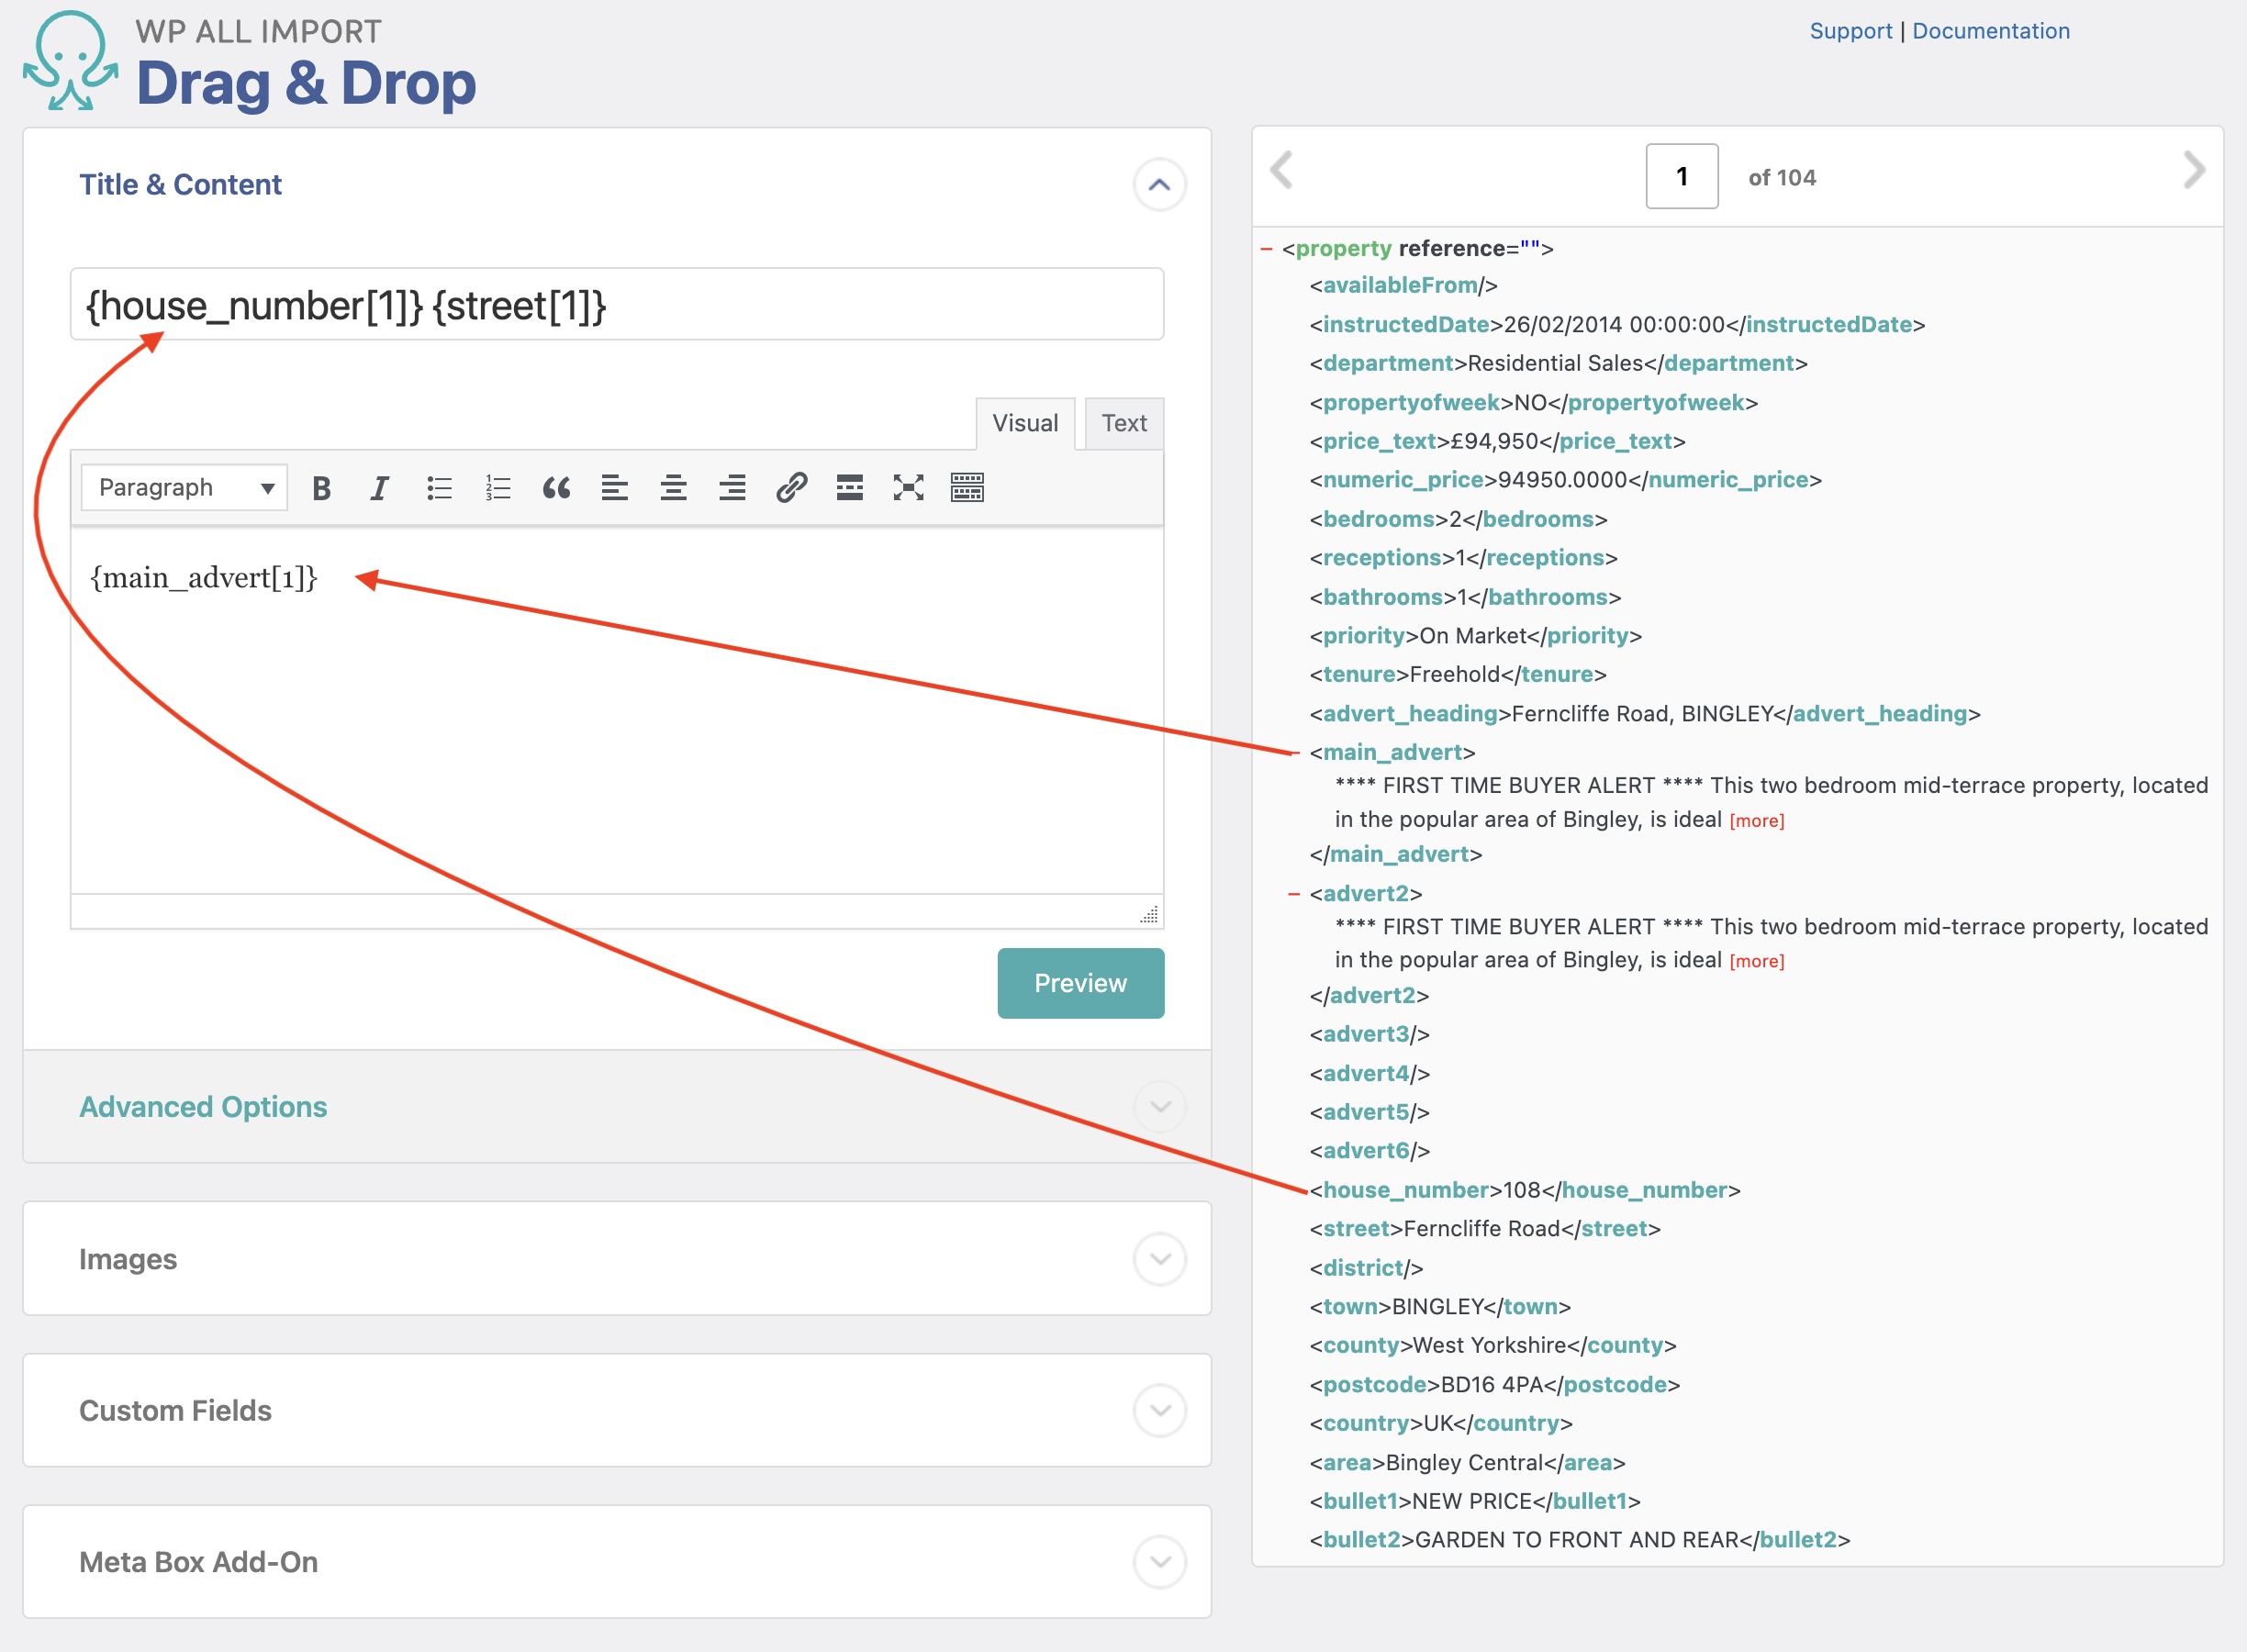
The Meta Box Add-On section is the place to define your Meta Box custom fields. Search for that section:
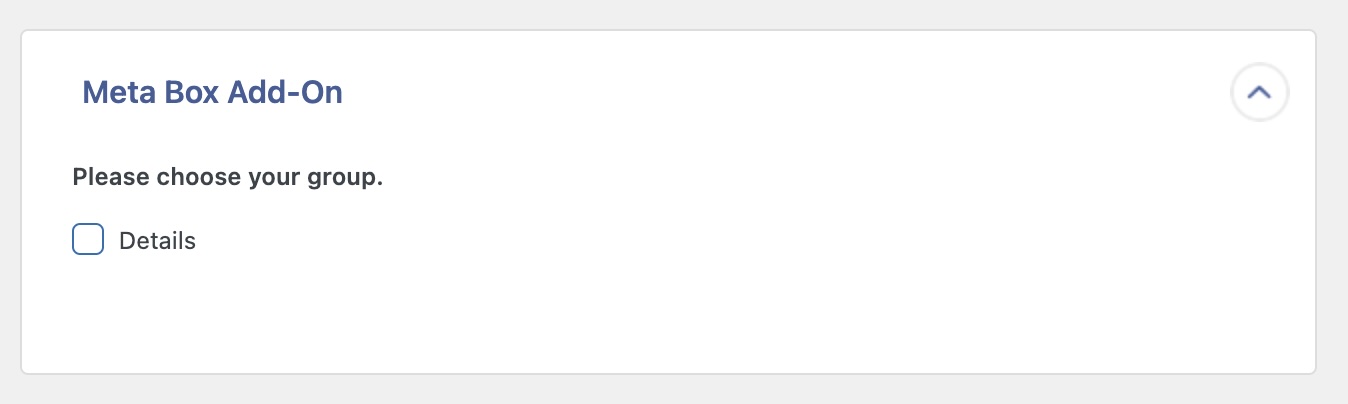
Enable the field groups where you want to import Meta Box custom fields and map each field as needed. Here are some examples:
Once you've finished mapping all the Meta Box custom fields, click Continue to Step 4 (not shown) at the bottom.
Step 4: Define Import Settings
Next up is the Import Settings screen, where most import settings can be defined:
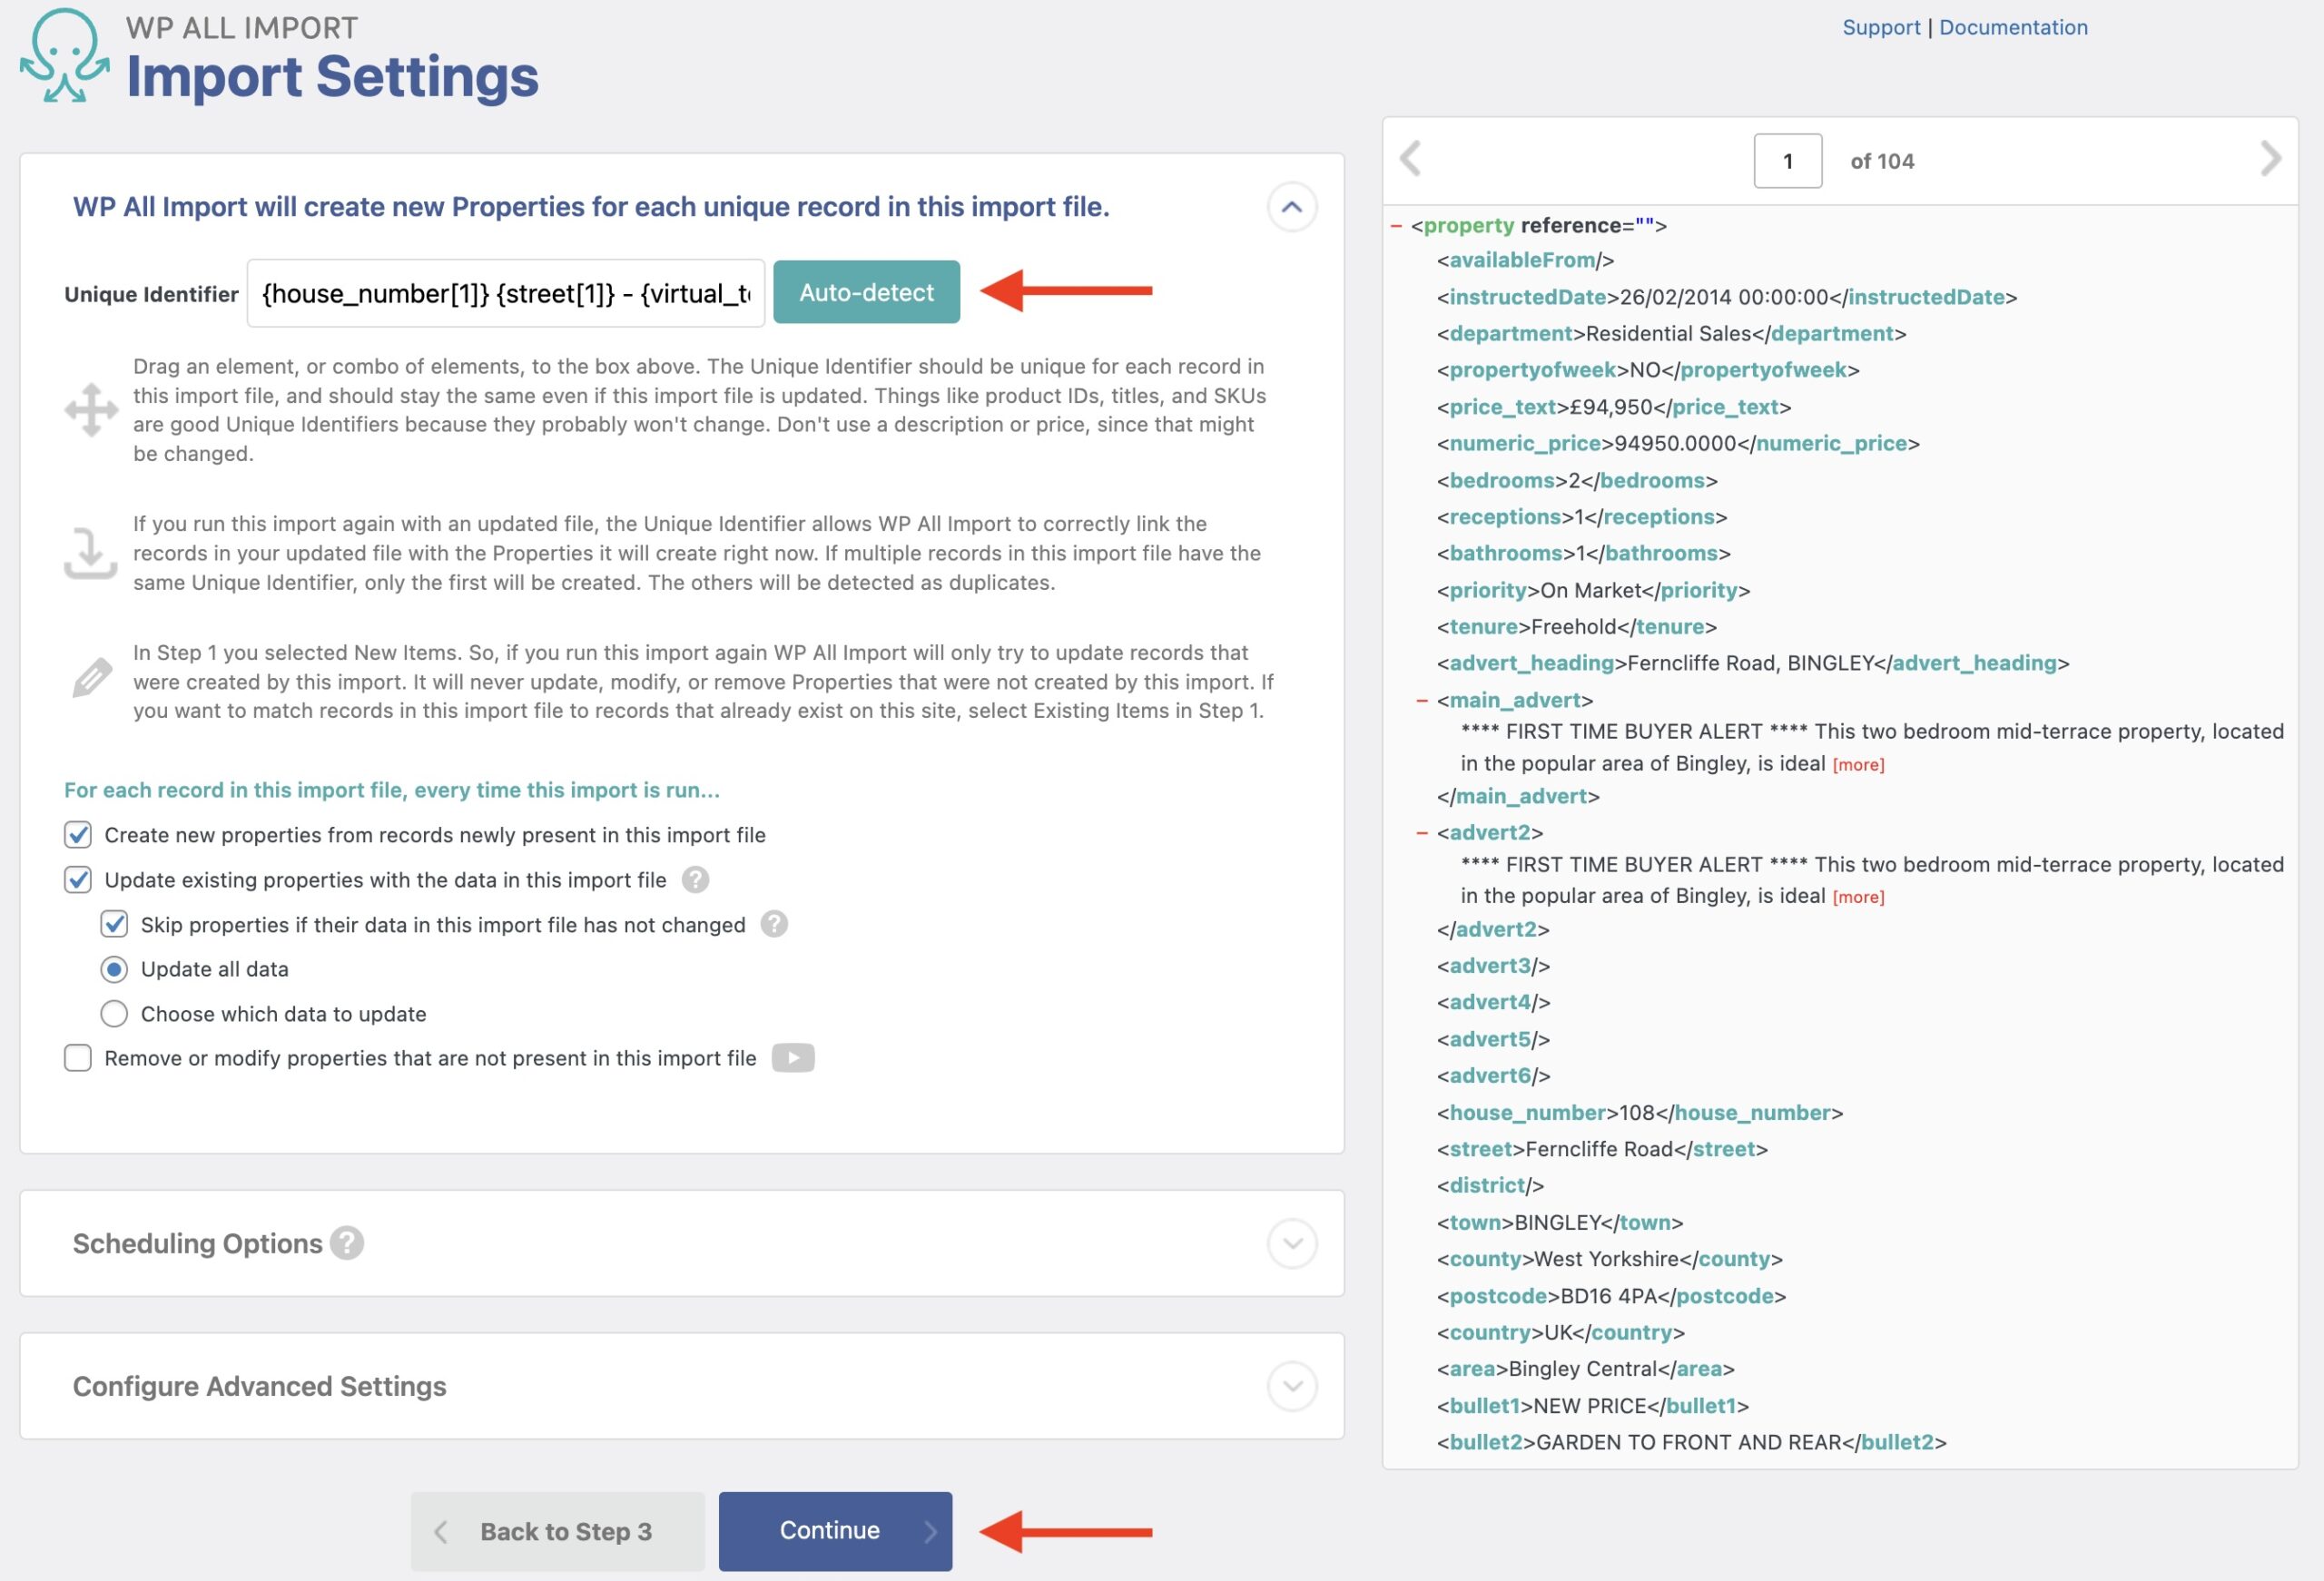
This interface lets you assign or generate a Unique Identifier to be used in the import. To generate one automatically, click on Auto-detect. To create the identifier manually, use drag and drop.
Midway down the screen, you can control other import options, such as how the import will behave if it runs again and whether it creates, updates, or removes records.
There are also sections for Scheduling Options and other Configure Advanced Settings. We'll leave those alone for now and click Continue.
Step 5: Run the Import and Check Your Meta Box Fields
The Confirm & Run screen appears, which includes an Import Summary section to review everything that will happen when you run the import.
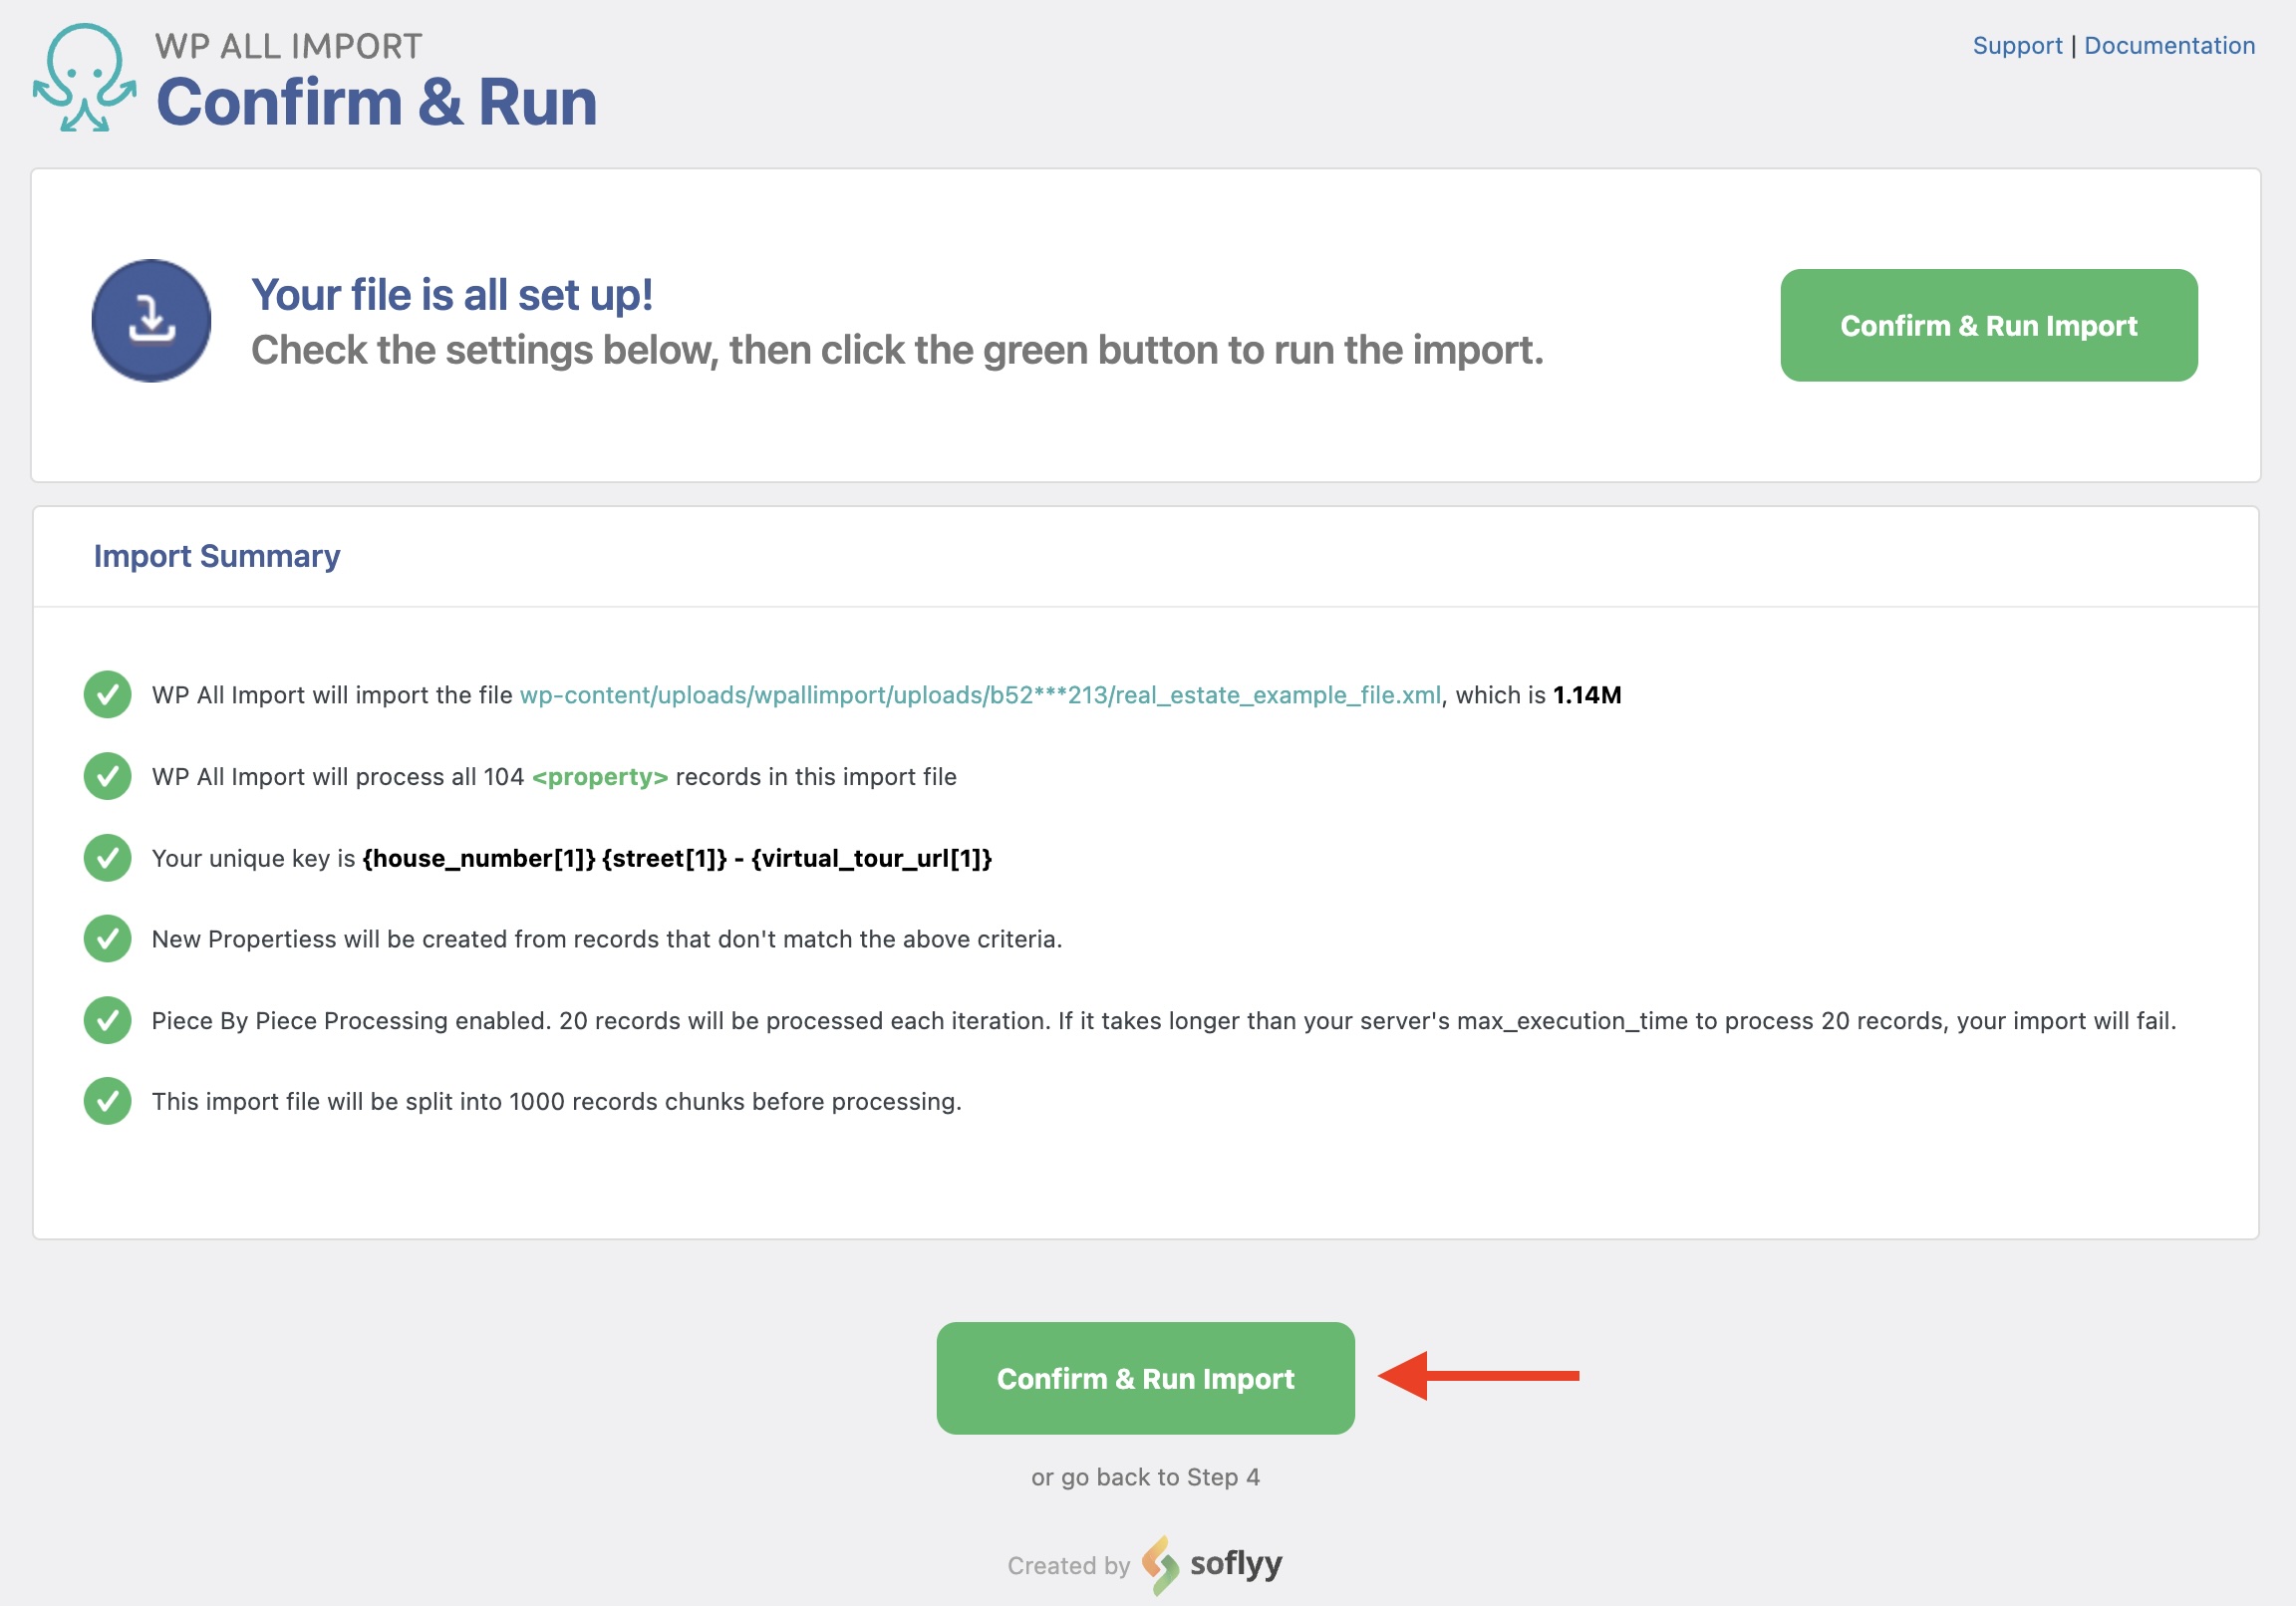
To execute and run the import, click on Confirm & Run Import.
Once the import completes, you will see an Import Complete message:
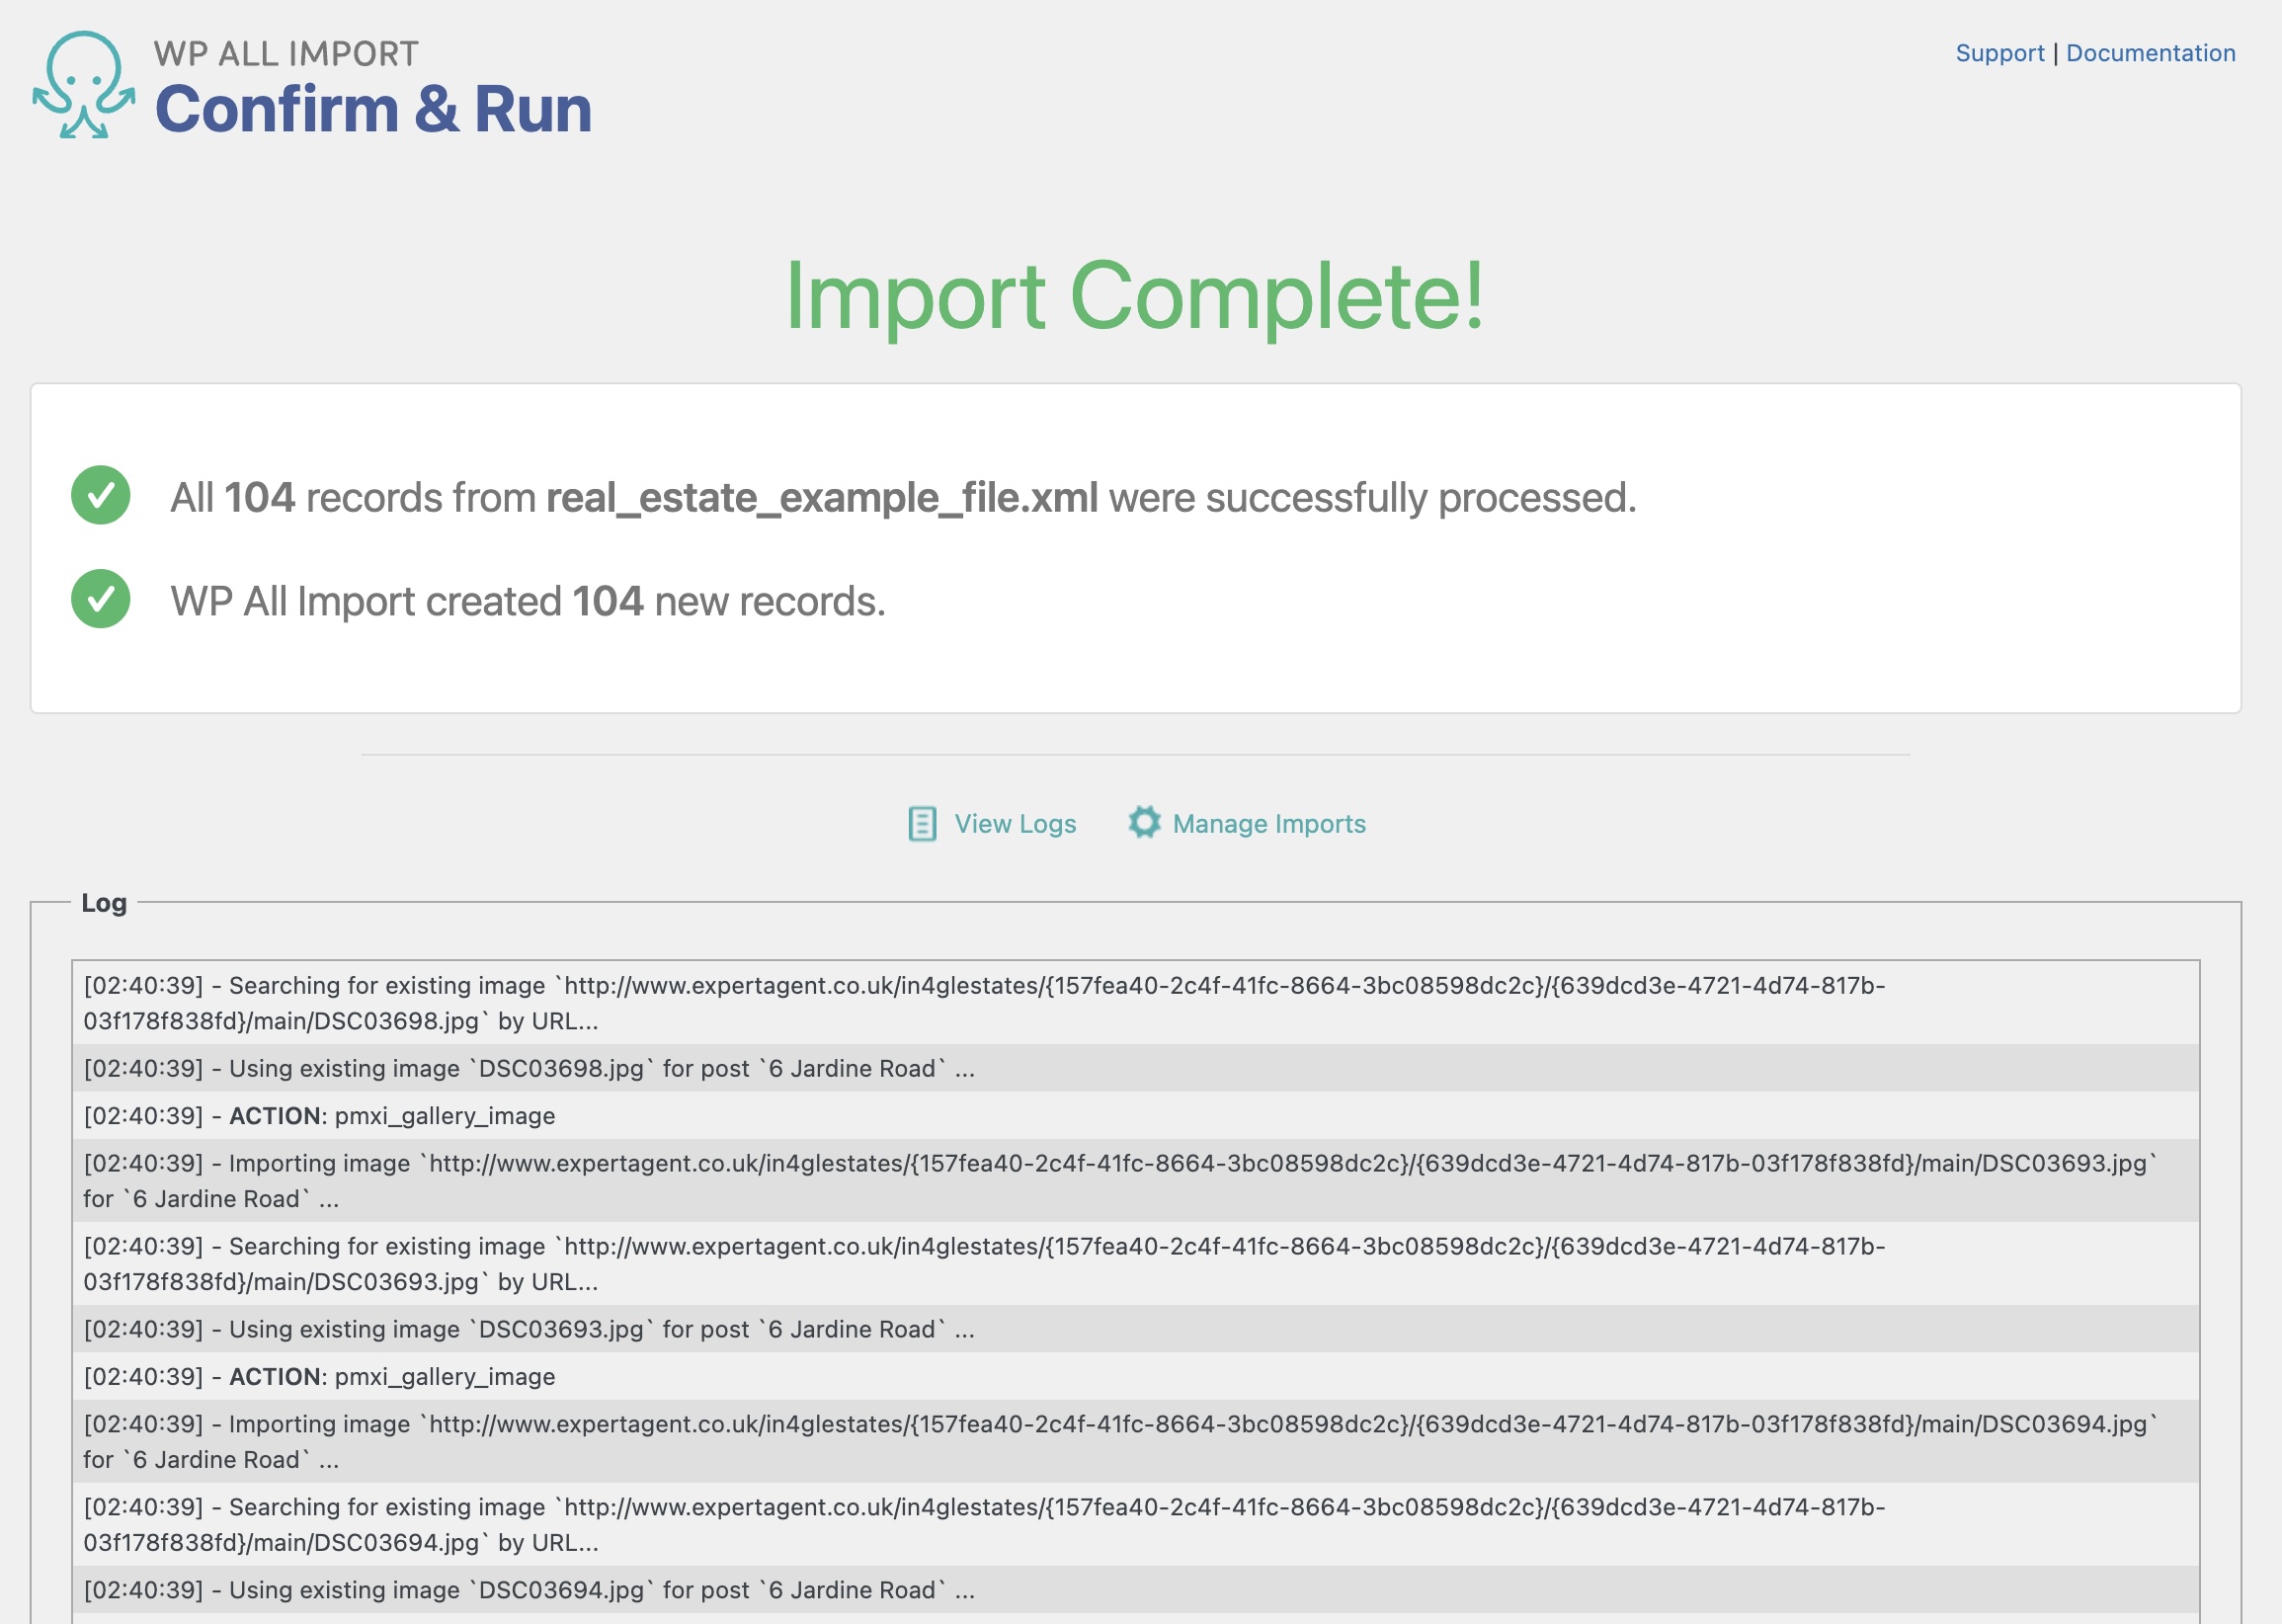
You can then proceed to review the newly imported properties.
That's how you import Meta Box custom fields into WordPress using WP All Import!
Import to Meta Box from any CSV, Excel, and XML
- Every Meta Box field
- Any file format / data structure
- Inline PHP
- Images, galleries, repeaters, and more
- Woo, ACF, JetEngine
- Any theme or plugin
Import Meta Box Custom Fields — Advanced Topics
Field Labels and Values
Meta Box lets you define both a value and a label for the choices inside the field definitions.
You can define those choices in a format such as value : Label.
For example, red : Red. This is how that looks in the Meta Box field setup:
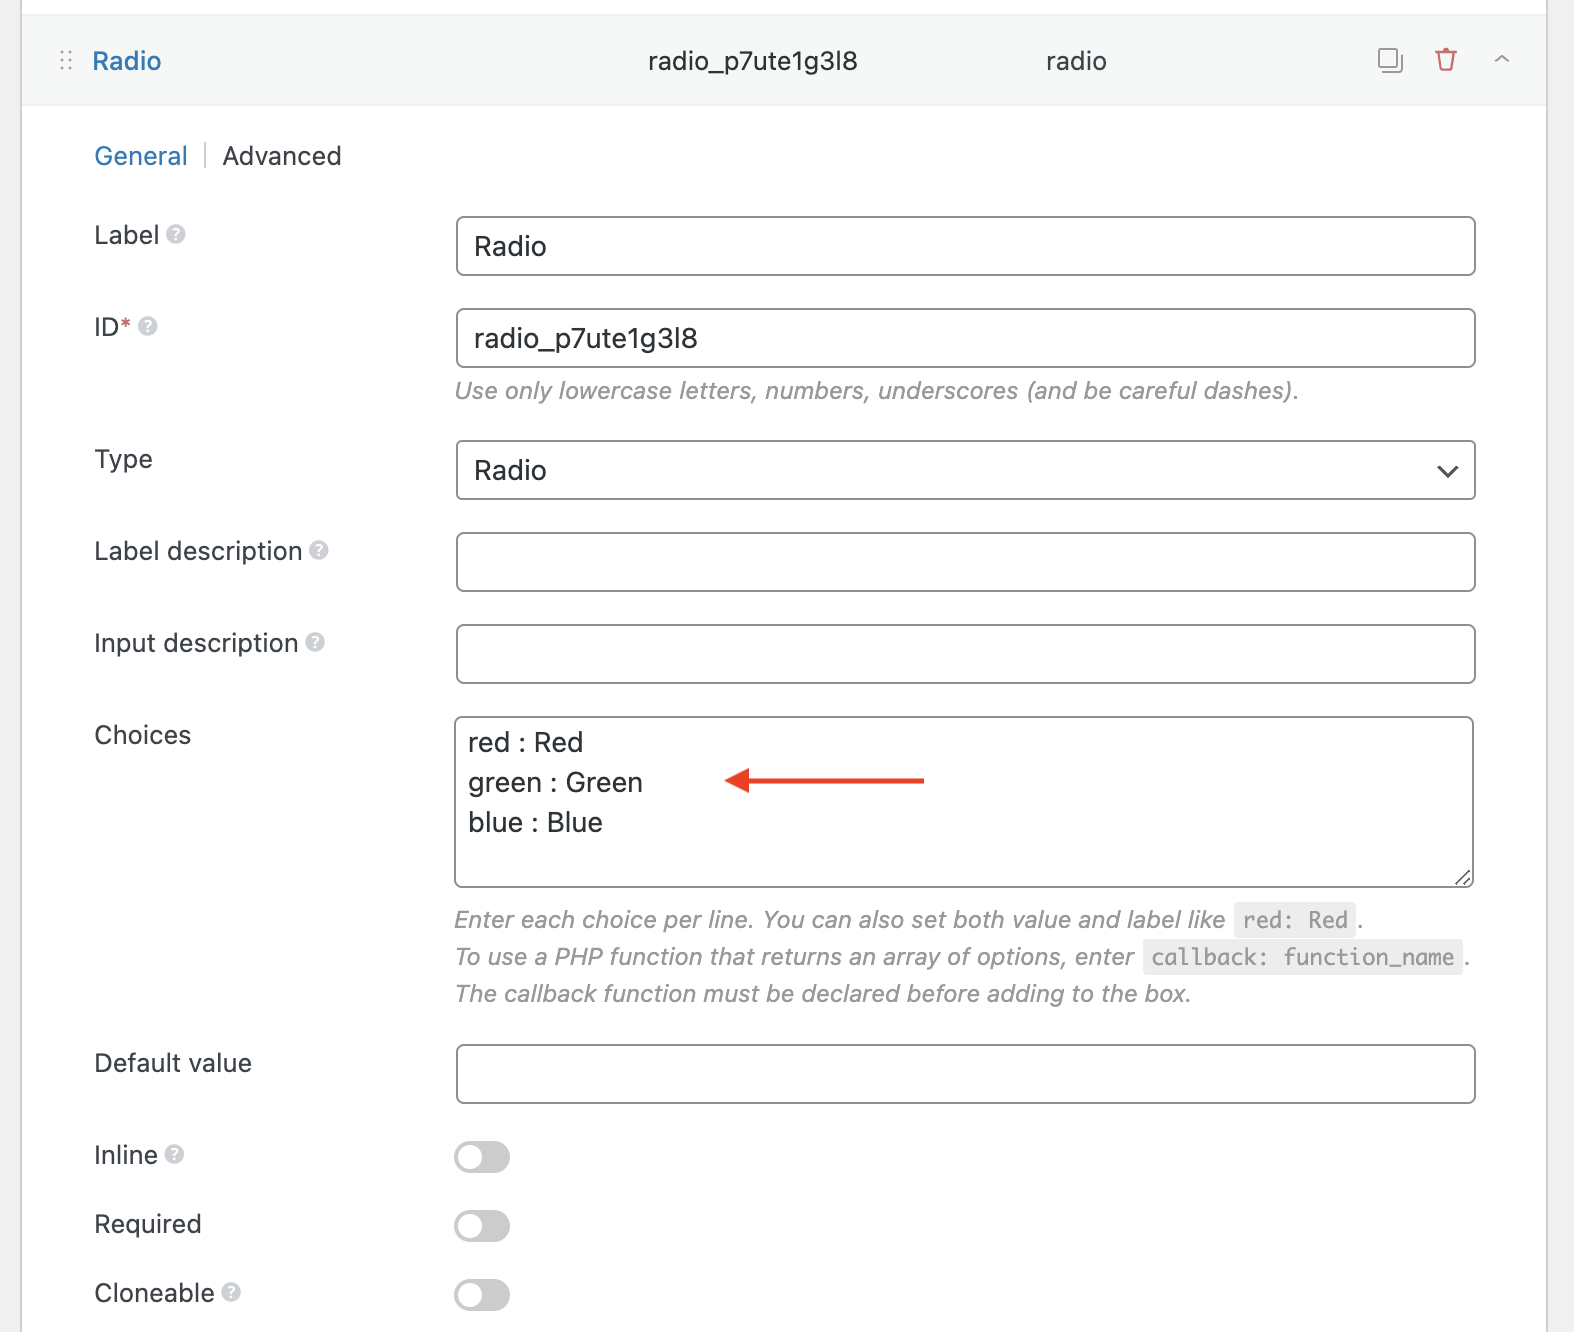
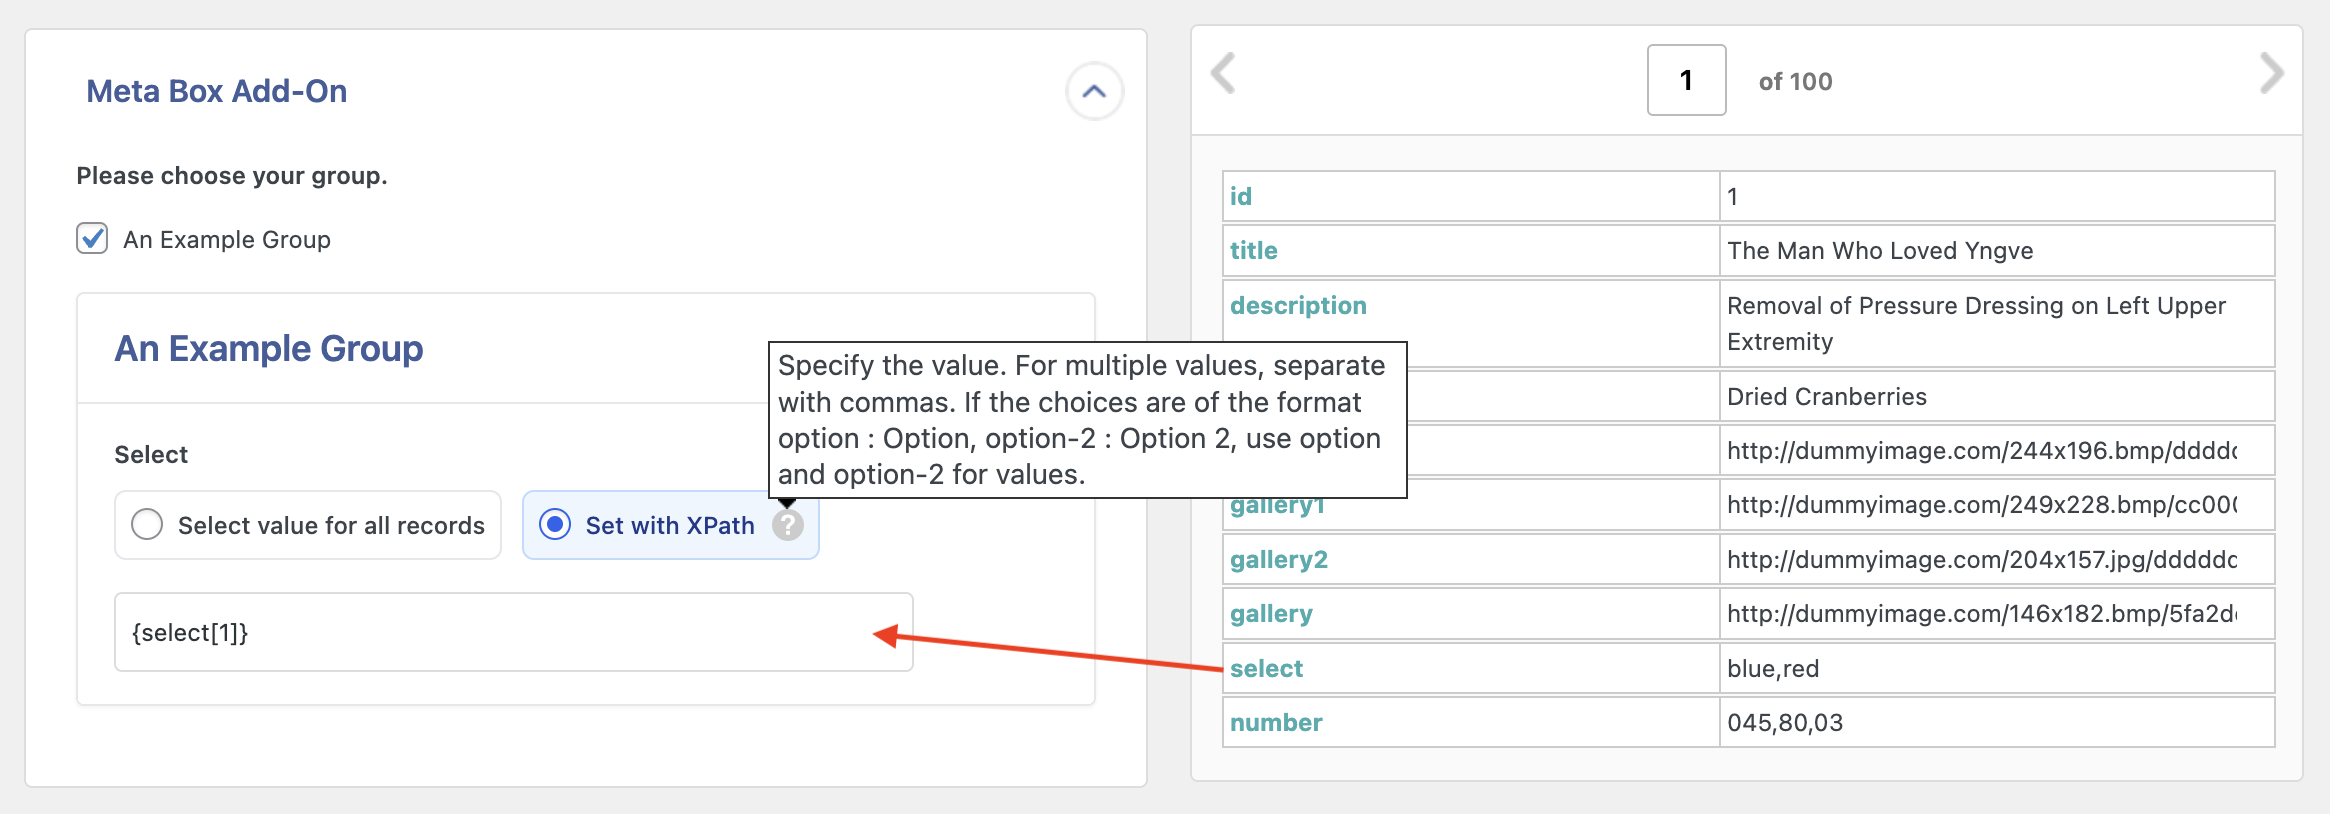
Then, to import into those fields, you can use the values in the Set with XPath option. If you only have labels, then use those.
Create Custom Fields Groups in Meta Box
To create a new custom field group in Meta Box, do the following:
- Go to Meta Box › Custom Fields and click Add New.
- Input a title for the field group.
- Under Settings, define where the fields are going to appear.
- Under Fields, add your new fields, which you can do by clicking + Add Field and choosing the field to add.
- Publish the new field group, and you're done!
You will see the new Meta Box custom fields when editing the chosen post type or when importing into it. Meta Box has more documentation about this here: How to Create Custom Fields?.
Migrate Custom Field Definitions
- On the export site, locate the field group to migrate in Meta Box › Custom Fields and click on Export.
- Download the exported file with the custom fields.
- Go to Meta Box › Custom Fields in the target site and click on Import, then upload the previously obtained file.
- That's it! You've migrated Meta Box custom field definitions from one site to another.
There's more documentation about this in the Meta Box site: Export/Import Custom fields.
Import Meta Box Custom Fields — Frequently Asked Questions
Are All Meta Box Custom Fields Supported?
Yes, the Meta Box Import Add-On supports all custom fields available in Meta Box. To import these fields correctly, you must have installed both WP All Import Pro and the Meta Box Import Add-On.
How Do I Modify Imported Data via PHP?
During import, you can use PHP functions to modify the import data and adjust it however you need. Other than native PHP functions, you can also create your own custom PHP functions.
You can learn more about using PHP functions here: Calling PHP Functions In Your Import Configuration.
How Do I Export Meta Box Custom Field Data?
- Go to All Export › New Export.
- Choose the post type with the attached Meta Box fields.
- Configure the export and include your Meta Box fields.
- Run the import process and download the exported data.
To do this, you'll need both WP All Export and the Meta Box Export Add-On. For more information, see How to Export Meta Box Custom Fields.
Import Meta Box Custom Fields — Related Docs
Quickstart guide showing you how to import any file into WordPress using WP All Import.
Execute PHP or custom code to modify ACF data during import.


