The best import export plugin for WordPress & WooCommerce.

How to Import Listings to WP Rentals
To import listings in WP Rentals, create a brand new import via All Import › New Import, choose Listings, then proceed to map your import template and run the import process.
To import listings into WP Rentals, you need to install the Import WP Rentals Listings Add-On along with the WP Rentals theme.
Step 1: Create a New WP Rentals Listings Import
Go to All Import › New Import and upload the file with your listings to import into WP Rentals.
Choose Listings from the drop-down list as the post type to import.

Proceed to click Continue to Step 2 and move on to the next step.
Step 2: Review Listings Import File
Next, you will see the Review Import File screen, where the import data is validated to ensure it's all correct:
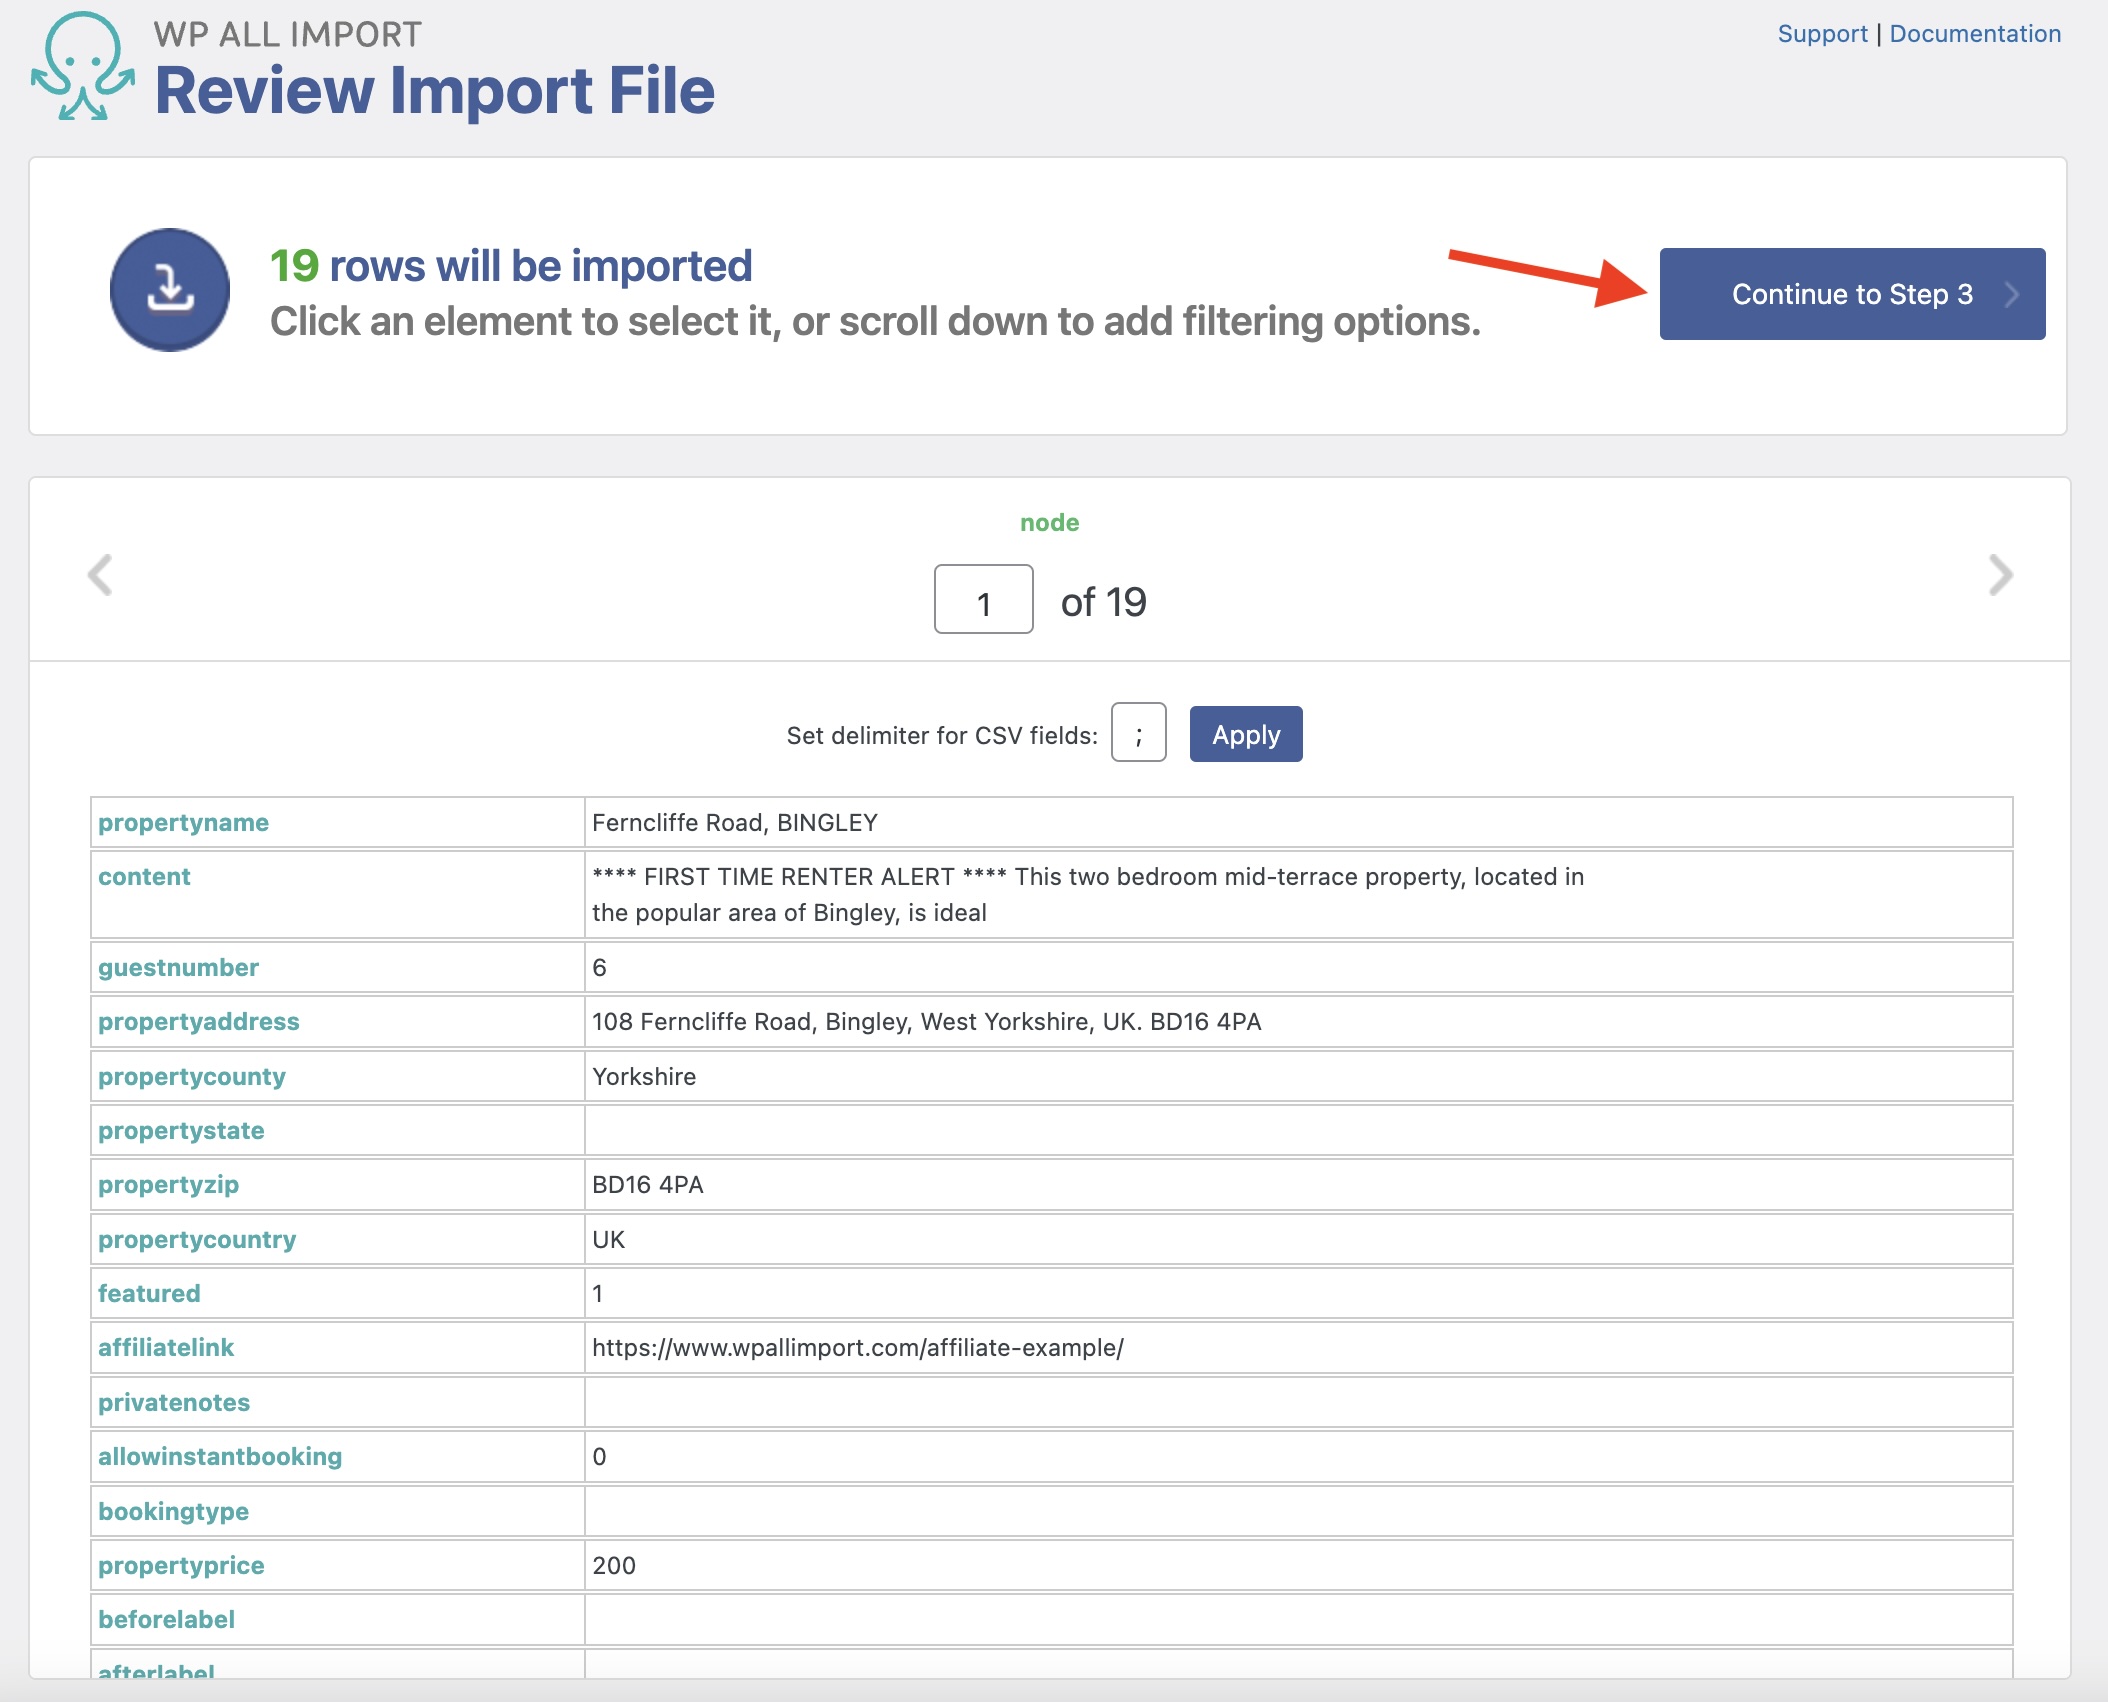
The gray arrows at the top can be used to review the data. If necessary, you can add filters to decide what to import using the Manage Filtering Options section.
After you validate that the import data is correct and add any required filters, click on Continue to Step 3.
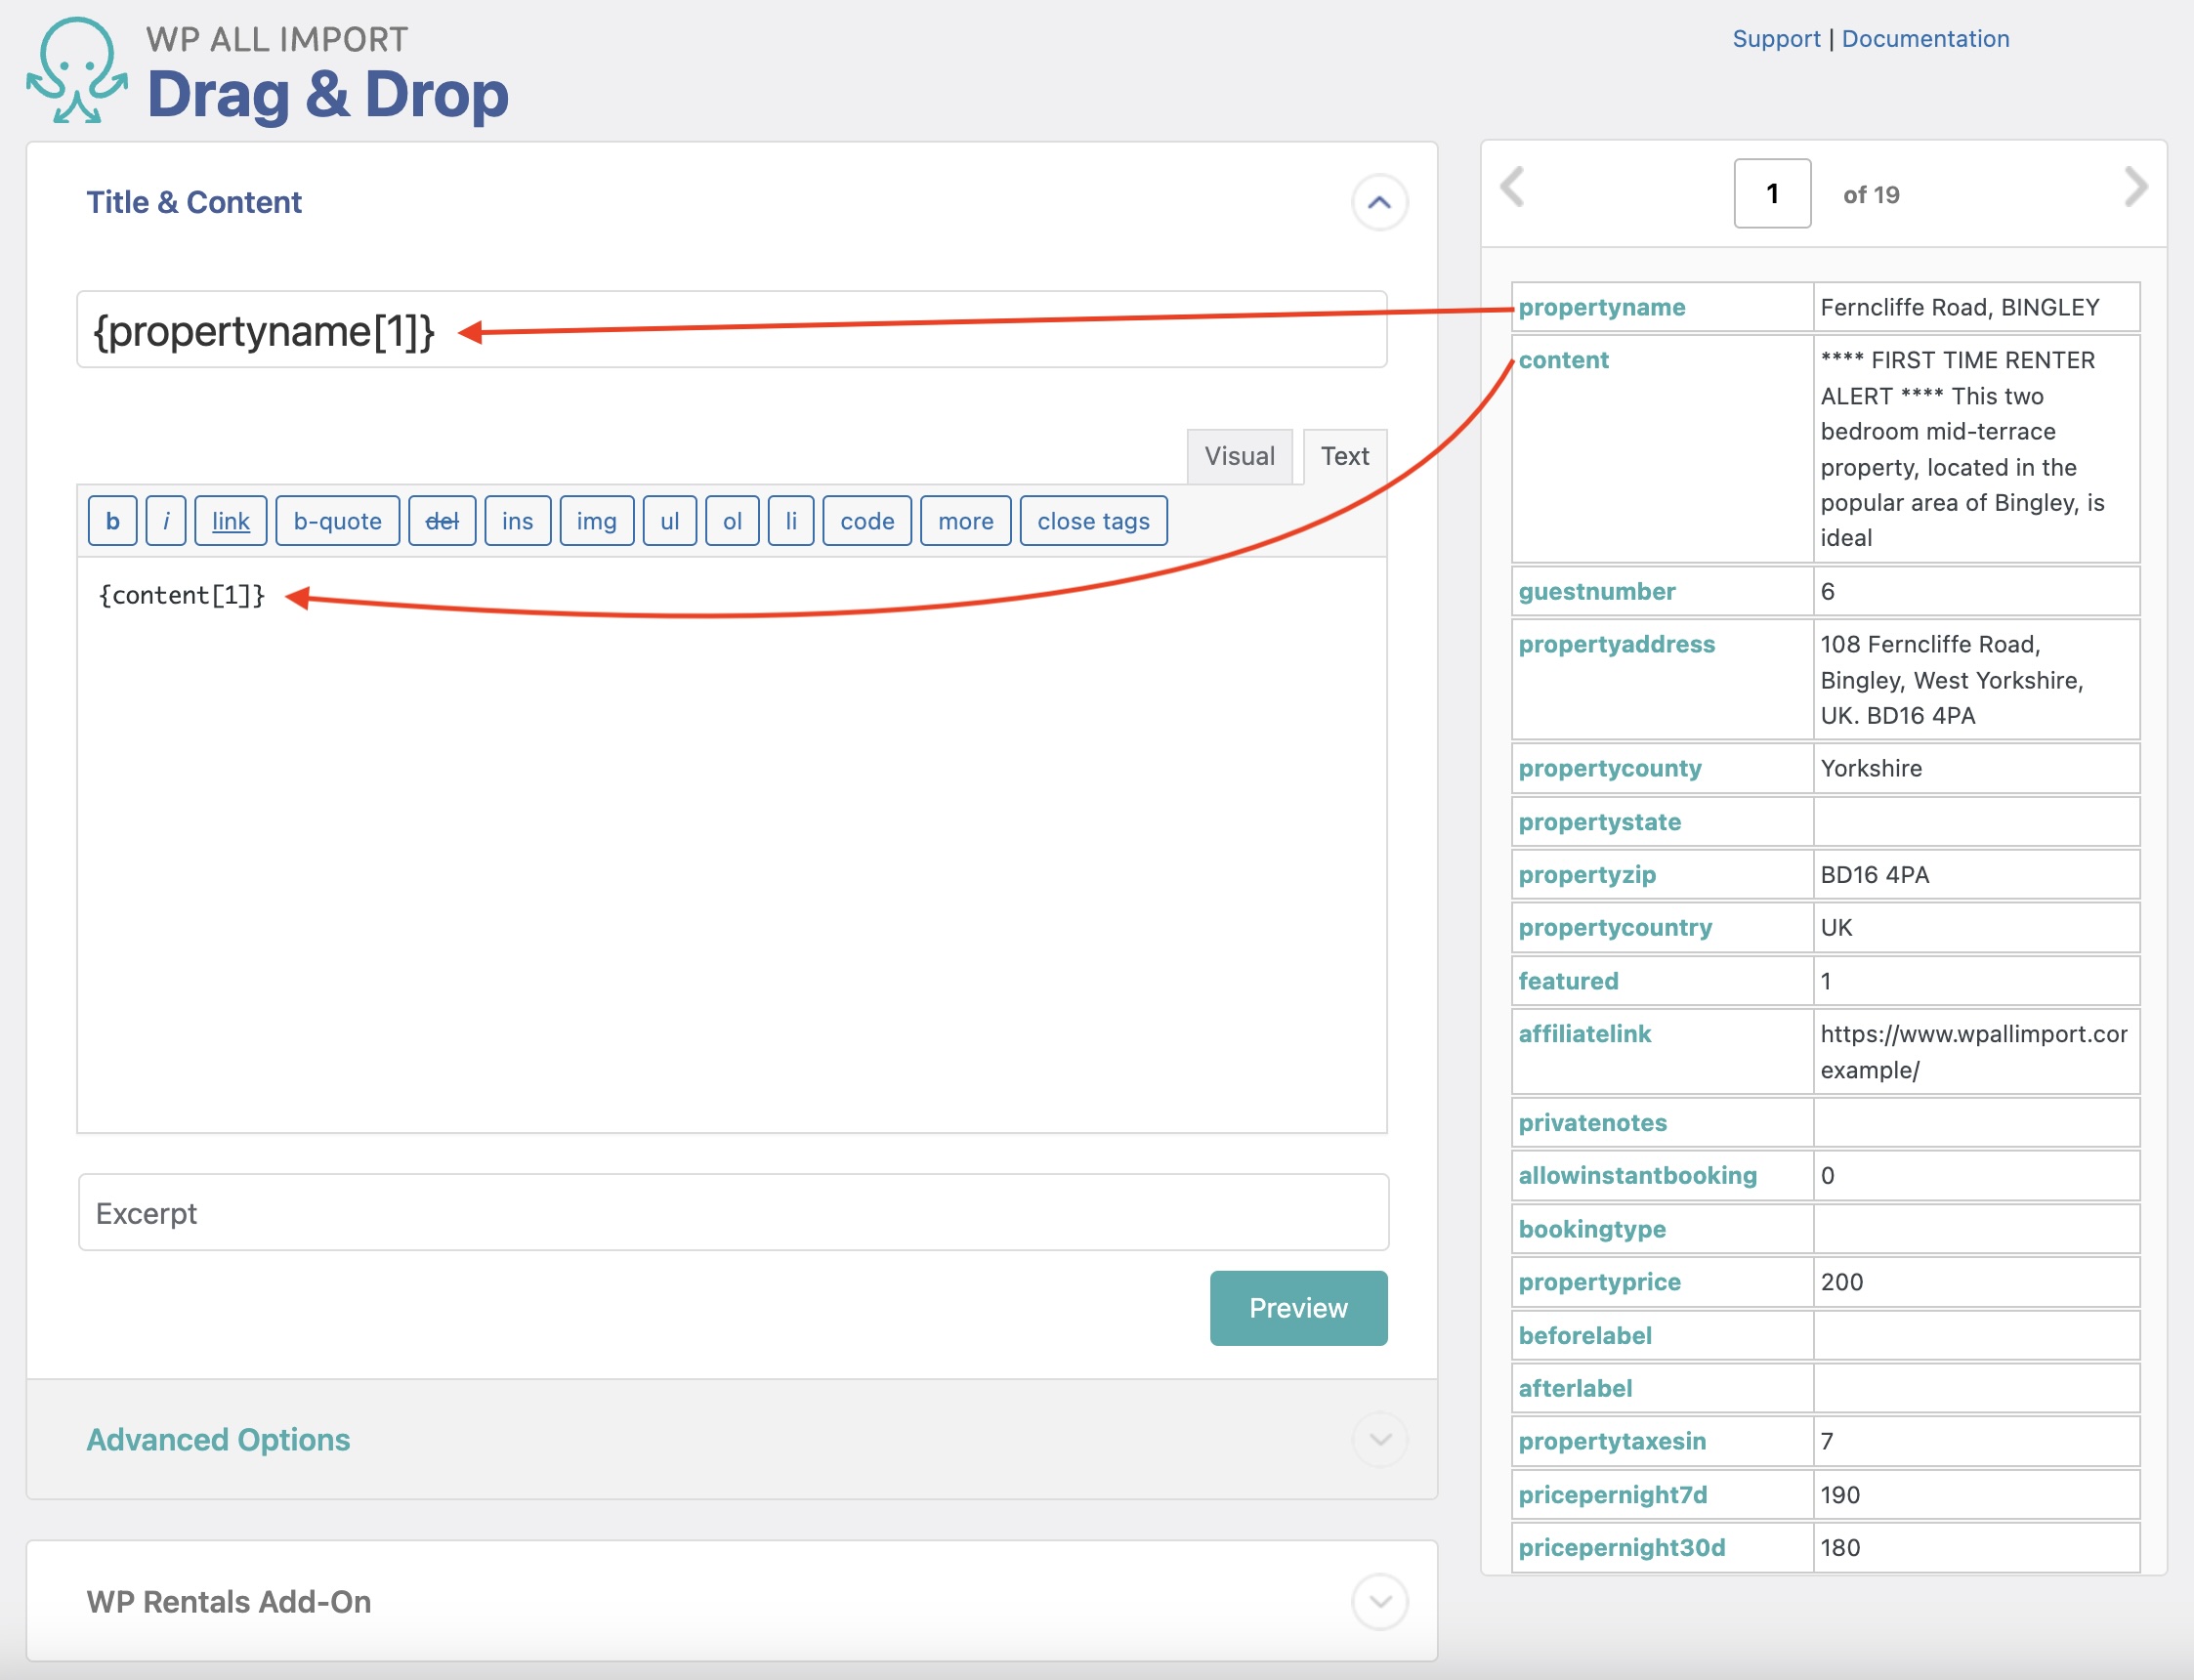
Step 3: Map Incoming Data into WP Rentals Fields
Now, the Drag & Drop interface appears, where you can map the data elements into their corresponding target fields.
Drag the desired data element from the panel on the right to the corresponding field on the left.
The WP Rentals Add-On section is where you map and import all WP Rentals fields. Below are more details on what's imported inside of this section:
Property General Details
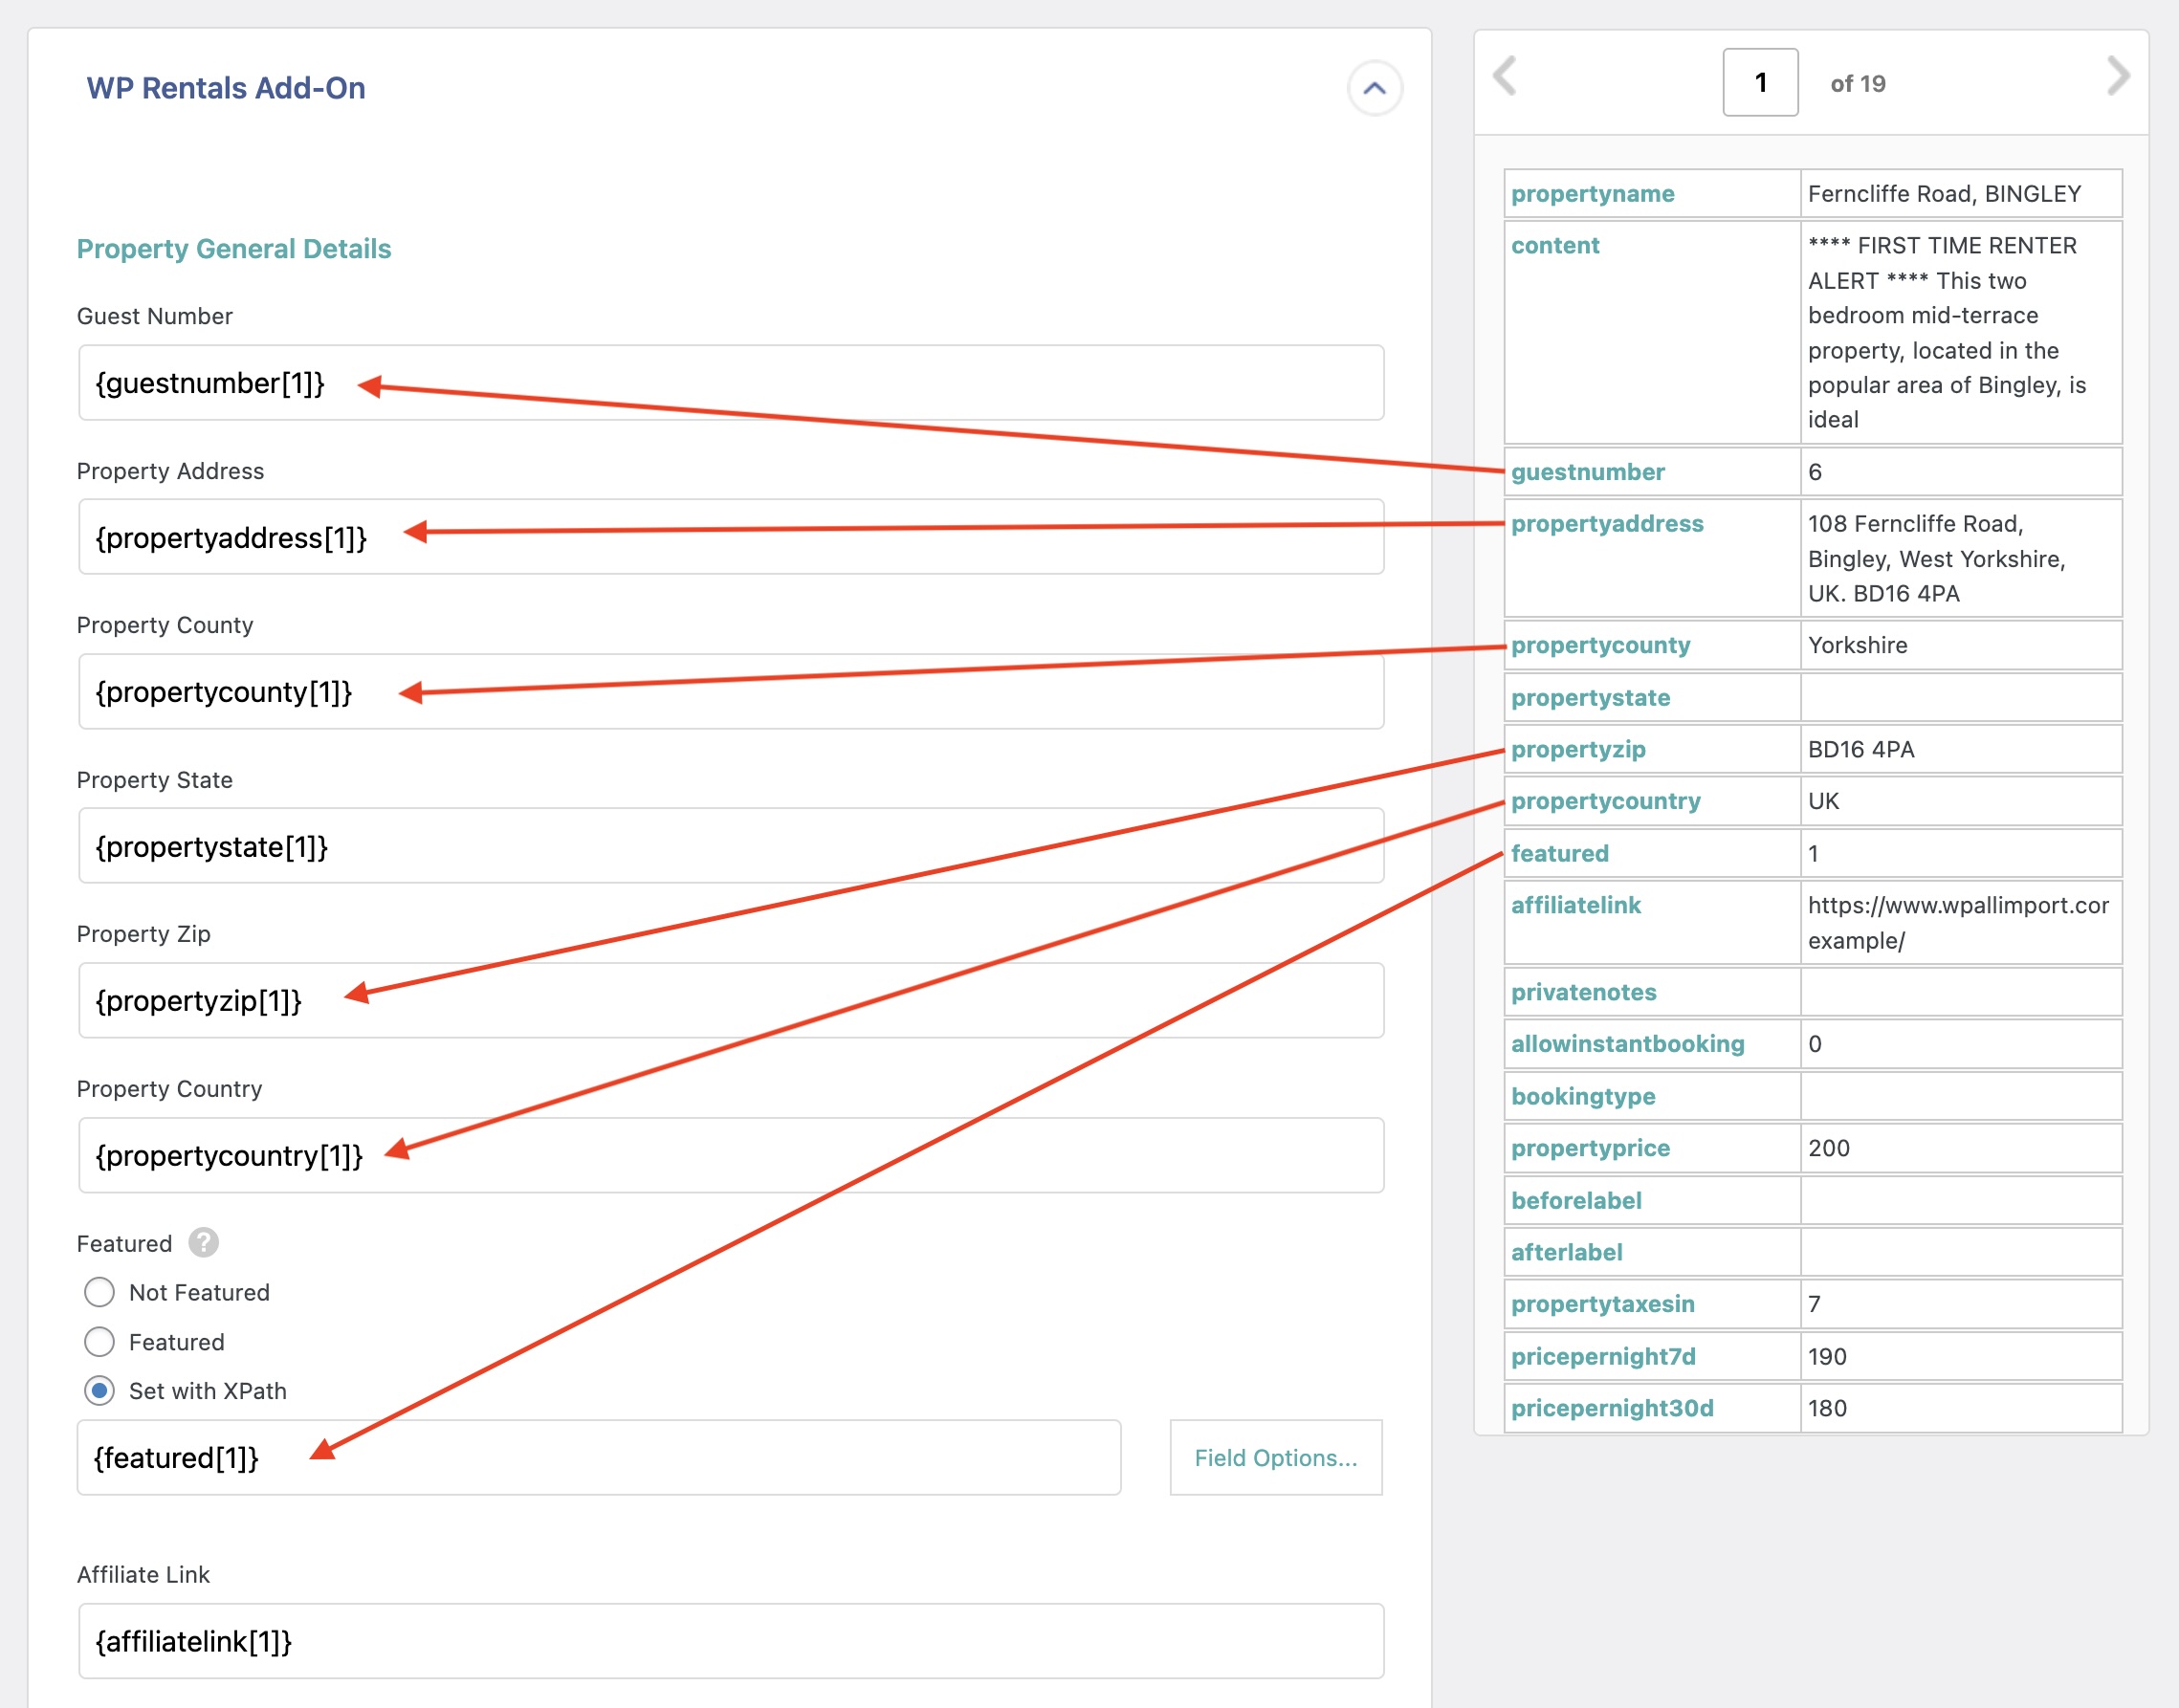
Below are the main fields you can import for any WP Rentals Listing, along with more details on what data is expected:
- Guest Number: The number of guests allowed.
- Property Address: The property address.
- Property County: The property county.
- Property State: The property state.
- Property Zip: The property Zip.
- Property Country: The property country.
- Featured: Whether the listing is featured or not. You can choose between Not Featured, Featured, or Set with XPath. The Set with XPath options accepts
1for Featured and0for Not Featured. - Affiliate Link: The affiliate link URL.
- Private Notes: Enter any private notes here.
- Allow Instant Booking?: Whether to allow instant listing booking or not. You can choose between Do not allow, Allow, or Set with XPath. The Set with XPath options accepts
1for Allow and0for Do not allow.
Property Price
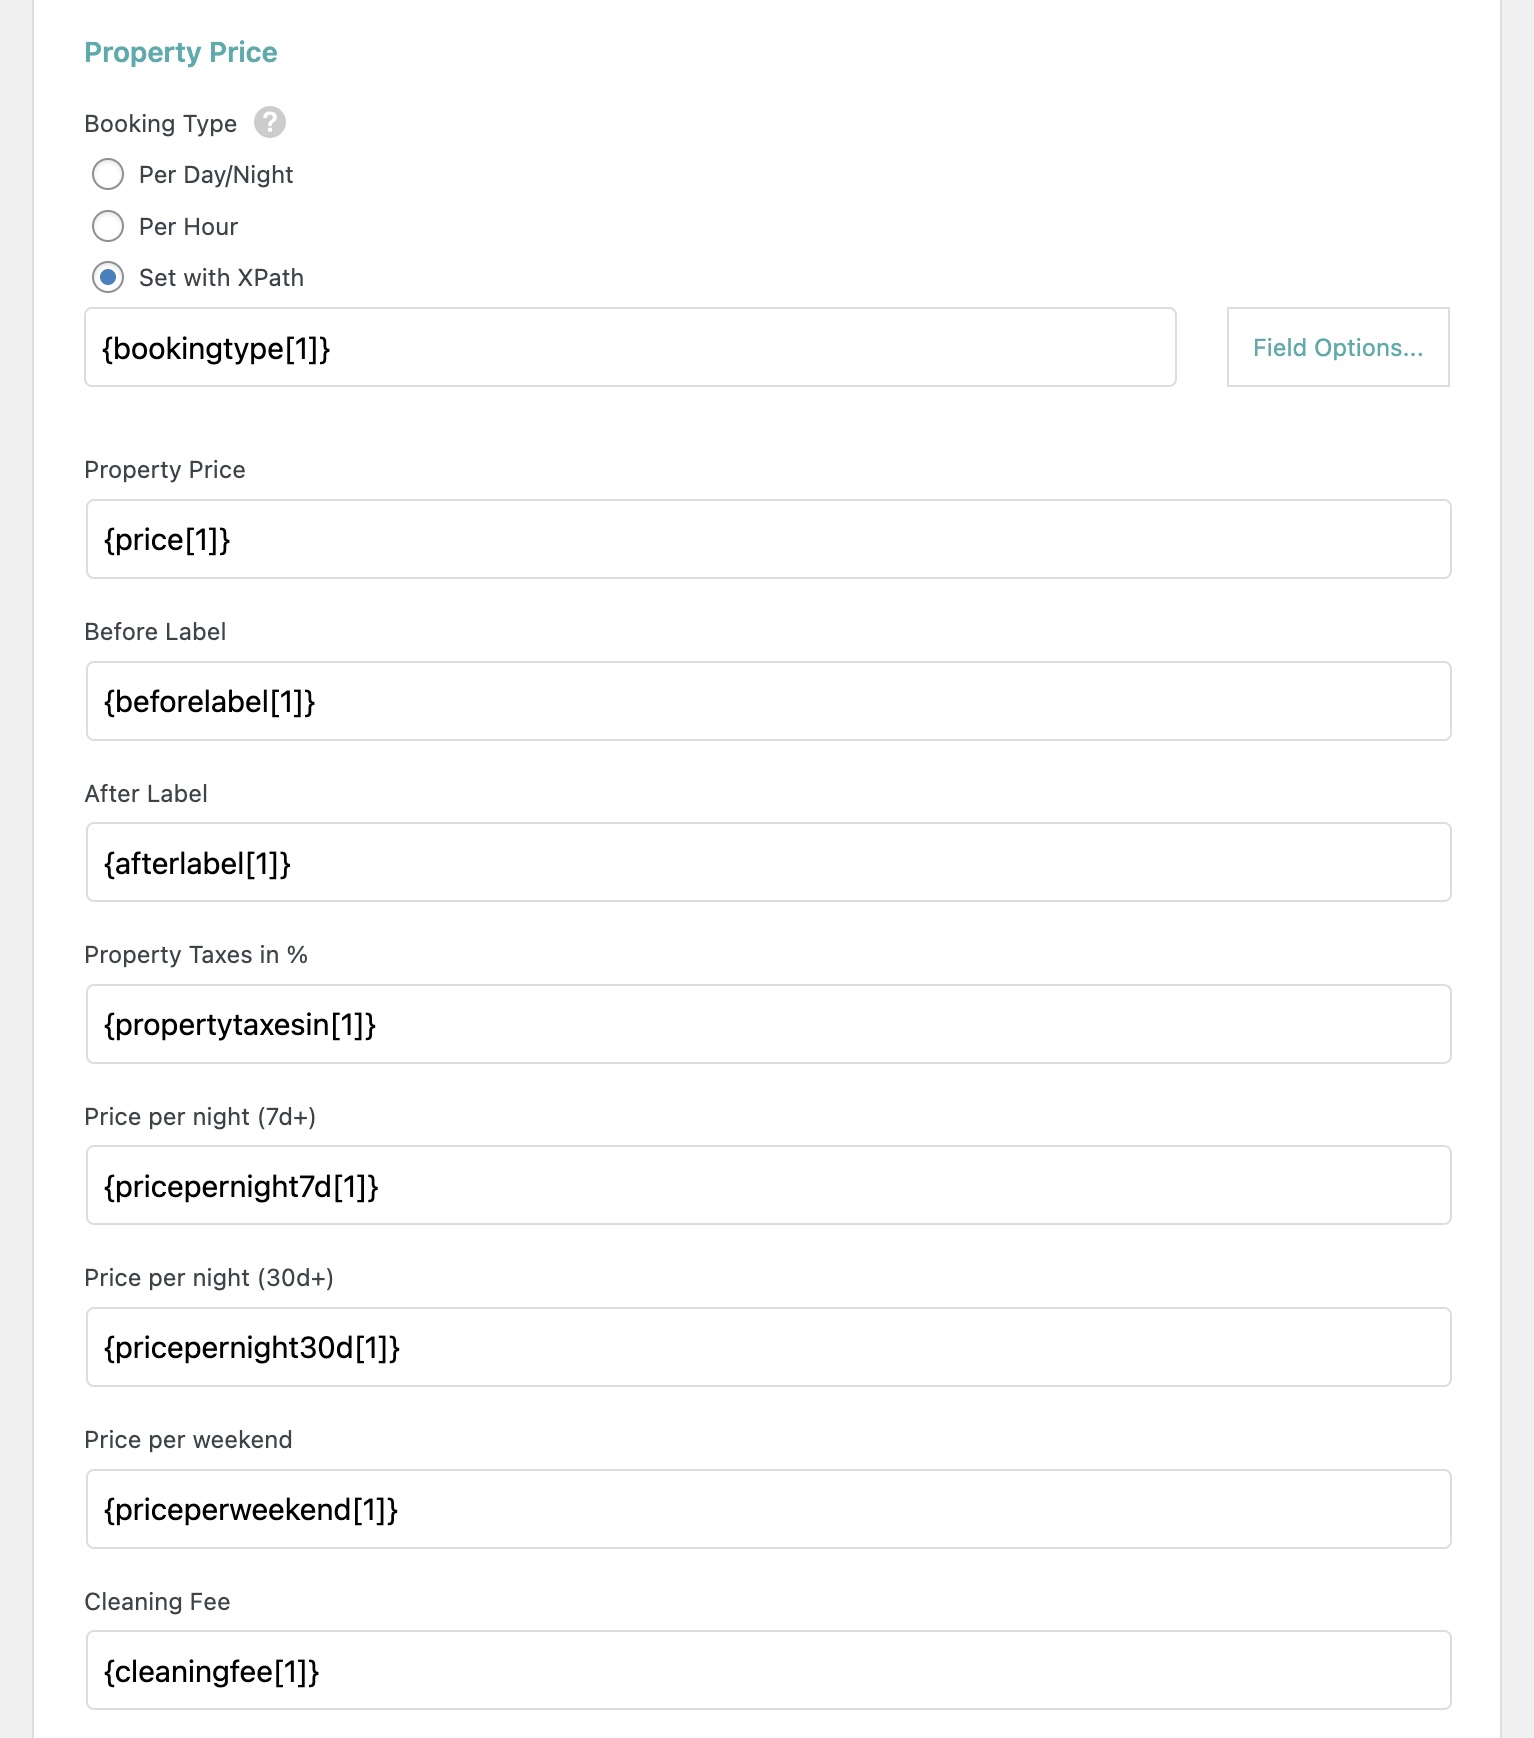
- Booking Type: You can choose between Per Day/Night, Per Hour, or Set with XPath. The Set with XPath options accepts
1for Per Day/Night and2for Per Hour. - Property Price: The property price.
- Before Label: The before label for the property price.
- After Label: The after label for the property price.
- Property Taxes in %: The property taxes in percentage.
- Price per night (7d+): The price per night for stays of 7 days or more.
- Price per night (30d+): The price per night for stays of 30 days or more.
- Price per weekend: The price per weekend.
- Cleaning Fee: The cleaning fee.
- Cleaning Fee Calculation: Decide how the cleaning fee gets calculated. You can choose between Single Fee, Per night, Per Guest, Per night per Guest, or Set with XPath. The Set with XPath options accepts
0for Single Fee,1for Per night,2for Per Guest,3for Per night per Guest. - City Fee: The city fee.
- City Fee calculation: Decide how the city fee gets calculated. You can choose between Single Fee, Per night, Per Guest, Per night per Guest, or Set with XPath. The Set with XPath option accepts
0for Single Fee,1for Per night,2for Per Guest,3for Per night per Guest. - Minimum Days of booking: The minimum days of booking allowed for this listing.
- Security Deposit: The security deposit amount.
- Early bird discount: The early bird discount percentage.
- Early bird days before: The number of days before for early bird discount.
- Extra Price per Guest: The extra price per guest.
- Allow guests above capacity?: Whether to allow guests above capacity or not. You can choose between No, Yes, or Set with XPath. The Set with XPath option accepts
0for No or1for Yes. - Maximum extra guests above capacity: Enter the maximum number of extra guest allowed above capacity. This only applies if extra guests are allowed.
- Pay by the no of guests: This means room prices will NOT be used anymore and billing will be done by guest no only. You can choose between No, Yes, or Set with XPath. The Set with XPath option accepts
0for No or1for Yes. - Allow only bookings with the check-in/check-out on: This allows choosing All days, or a specific day (Monday through Sunday).
- Allow only bookings starting with the check-in on: This allows choosing All days, or a specific day (Monday through Sunday).
Property Media
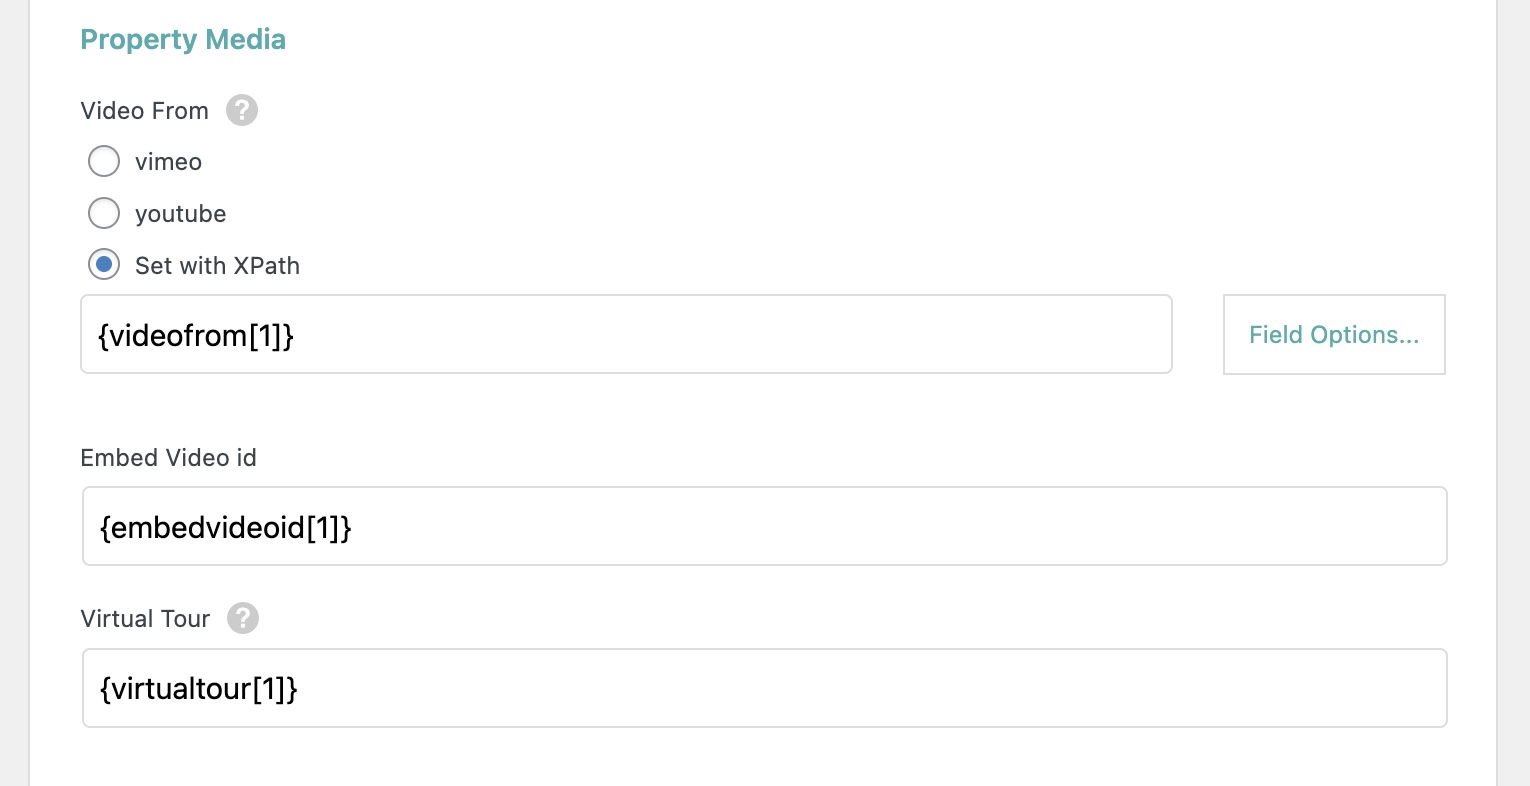
- Video From: You can choose Vimeo or YouTube.
- Embed Video id: The video ID to embed.
- Virtual Tour: The URL to the video.
Property Specific Details
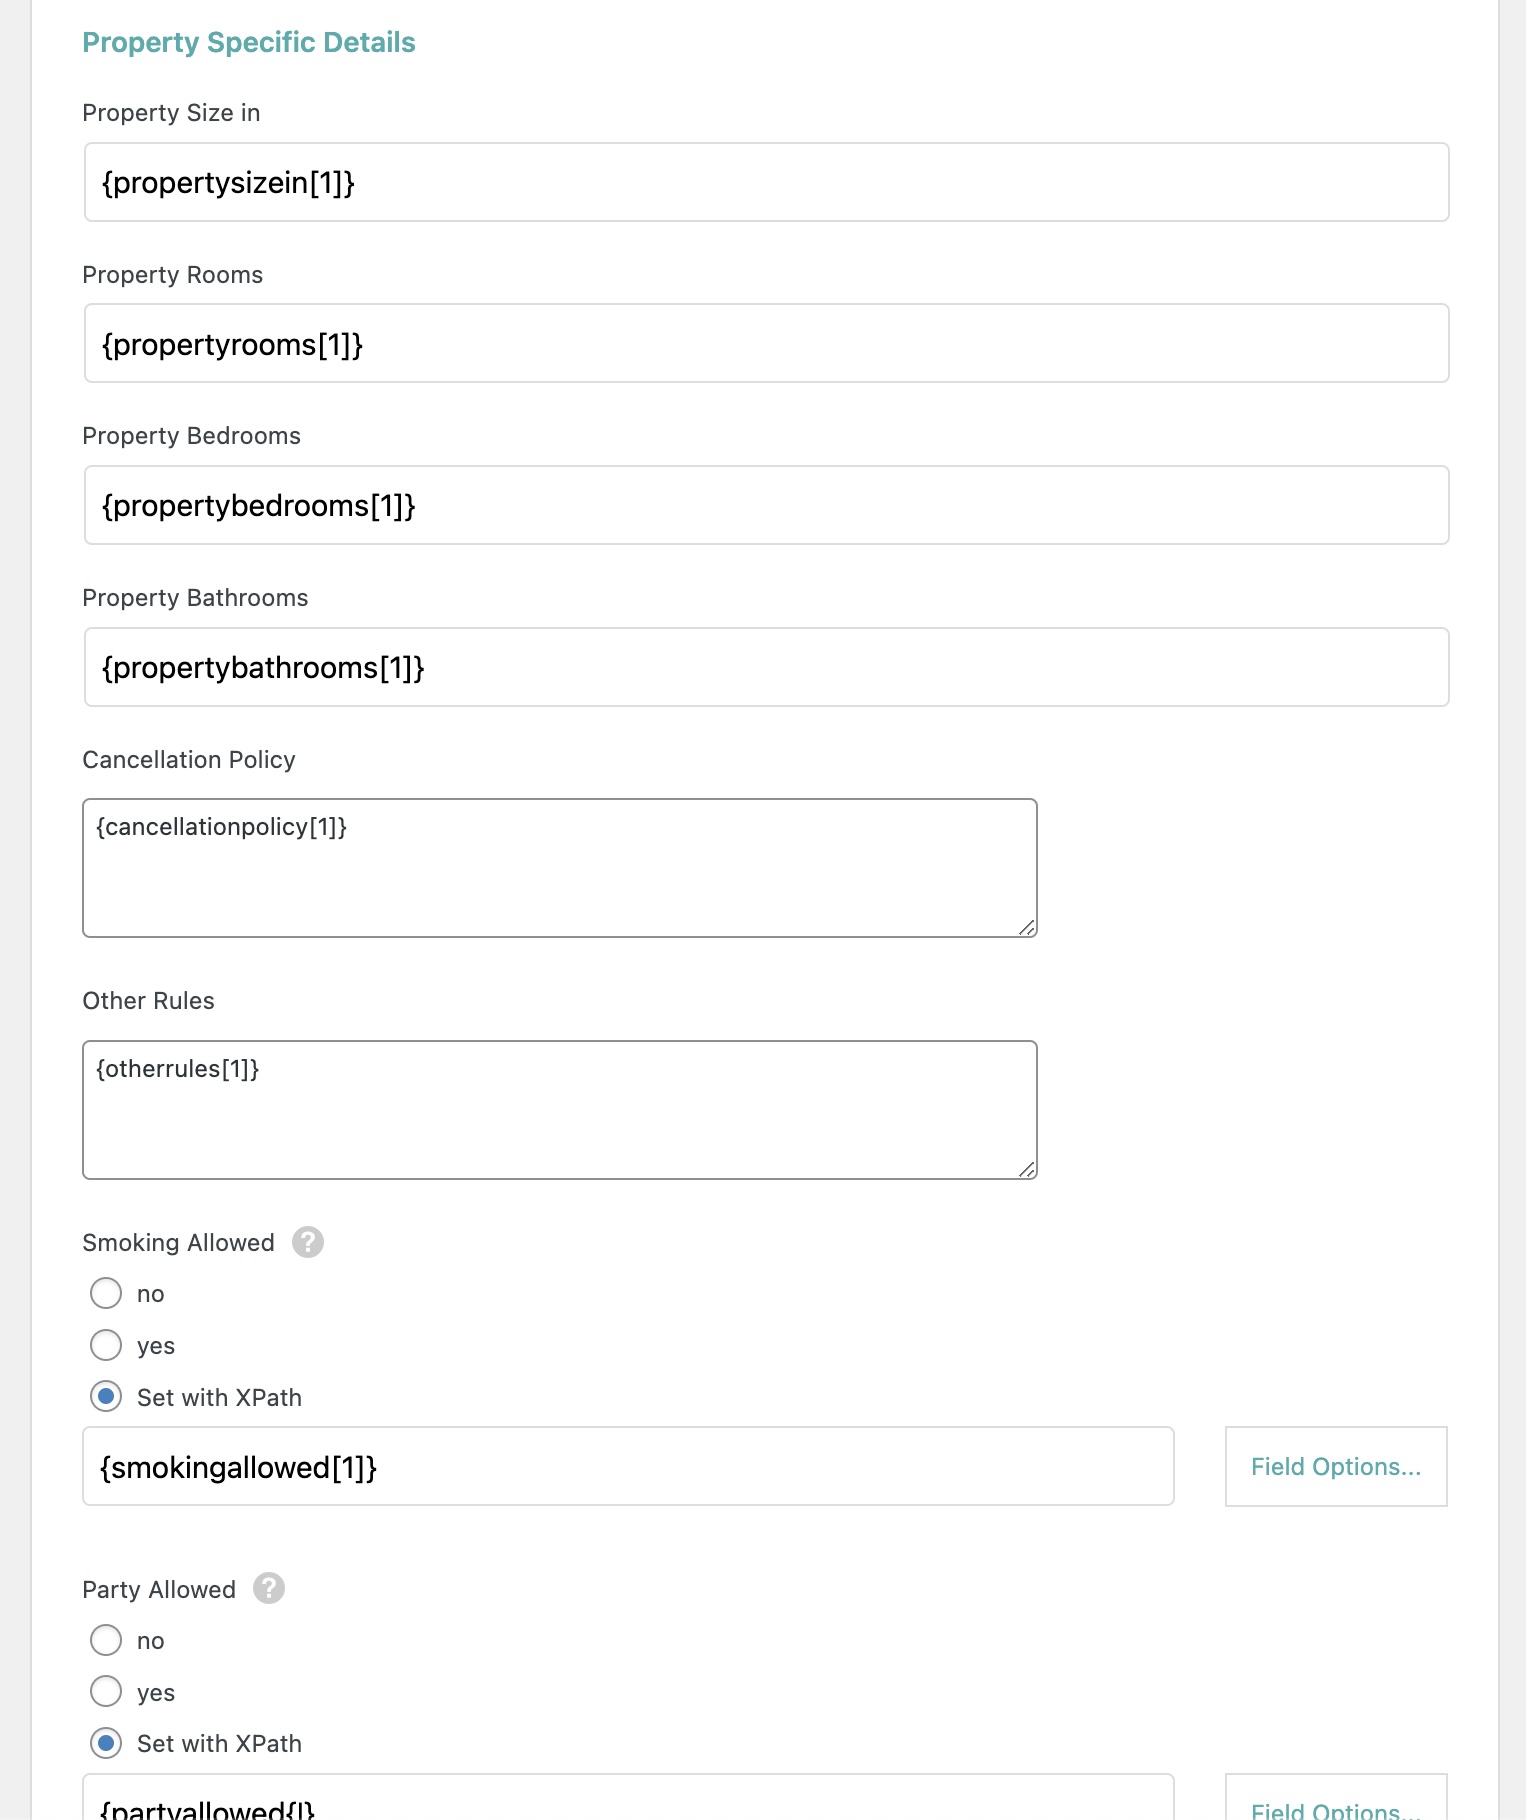
- Property Size in: The property size
- Property Rooms: The number of rooms in the property.
- Property Bedrooms: The number of bedrooms in the property.
- Property Bathrooms: The number of bathrooms in the property.
- Cancellation Policy: The cancellation policy.
- Other Rules: Any other rules.
- Smoking Allowed: Either Yes or No. You can also define it using Set with XPath, which accepts
yesornoas values. - Party Allowed: Either Yes or No. You can also define it using Set with XPath, which accepts
yesornoas values. - Pets Allowed: Either Yes or No. You can also define it using Set with XPath, which accepts
yesornoas values. - Children Allowed: Either Yes or No. You can also define it using Set with XPath, which accepts
yesornoas values. - Check-in hour (*text): The check-in hour.
- Check-Out hour (*text): The check-out hour.
- Late Check-in (*text): The details for late check-in.
- Optional services (*text): Any optional services.
- Outdoor facilities (*text): The outdoor facilities available.
- Extra People (*text): The details for extra people.
- Cancellation (*text): The cancellation details.
Map
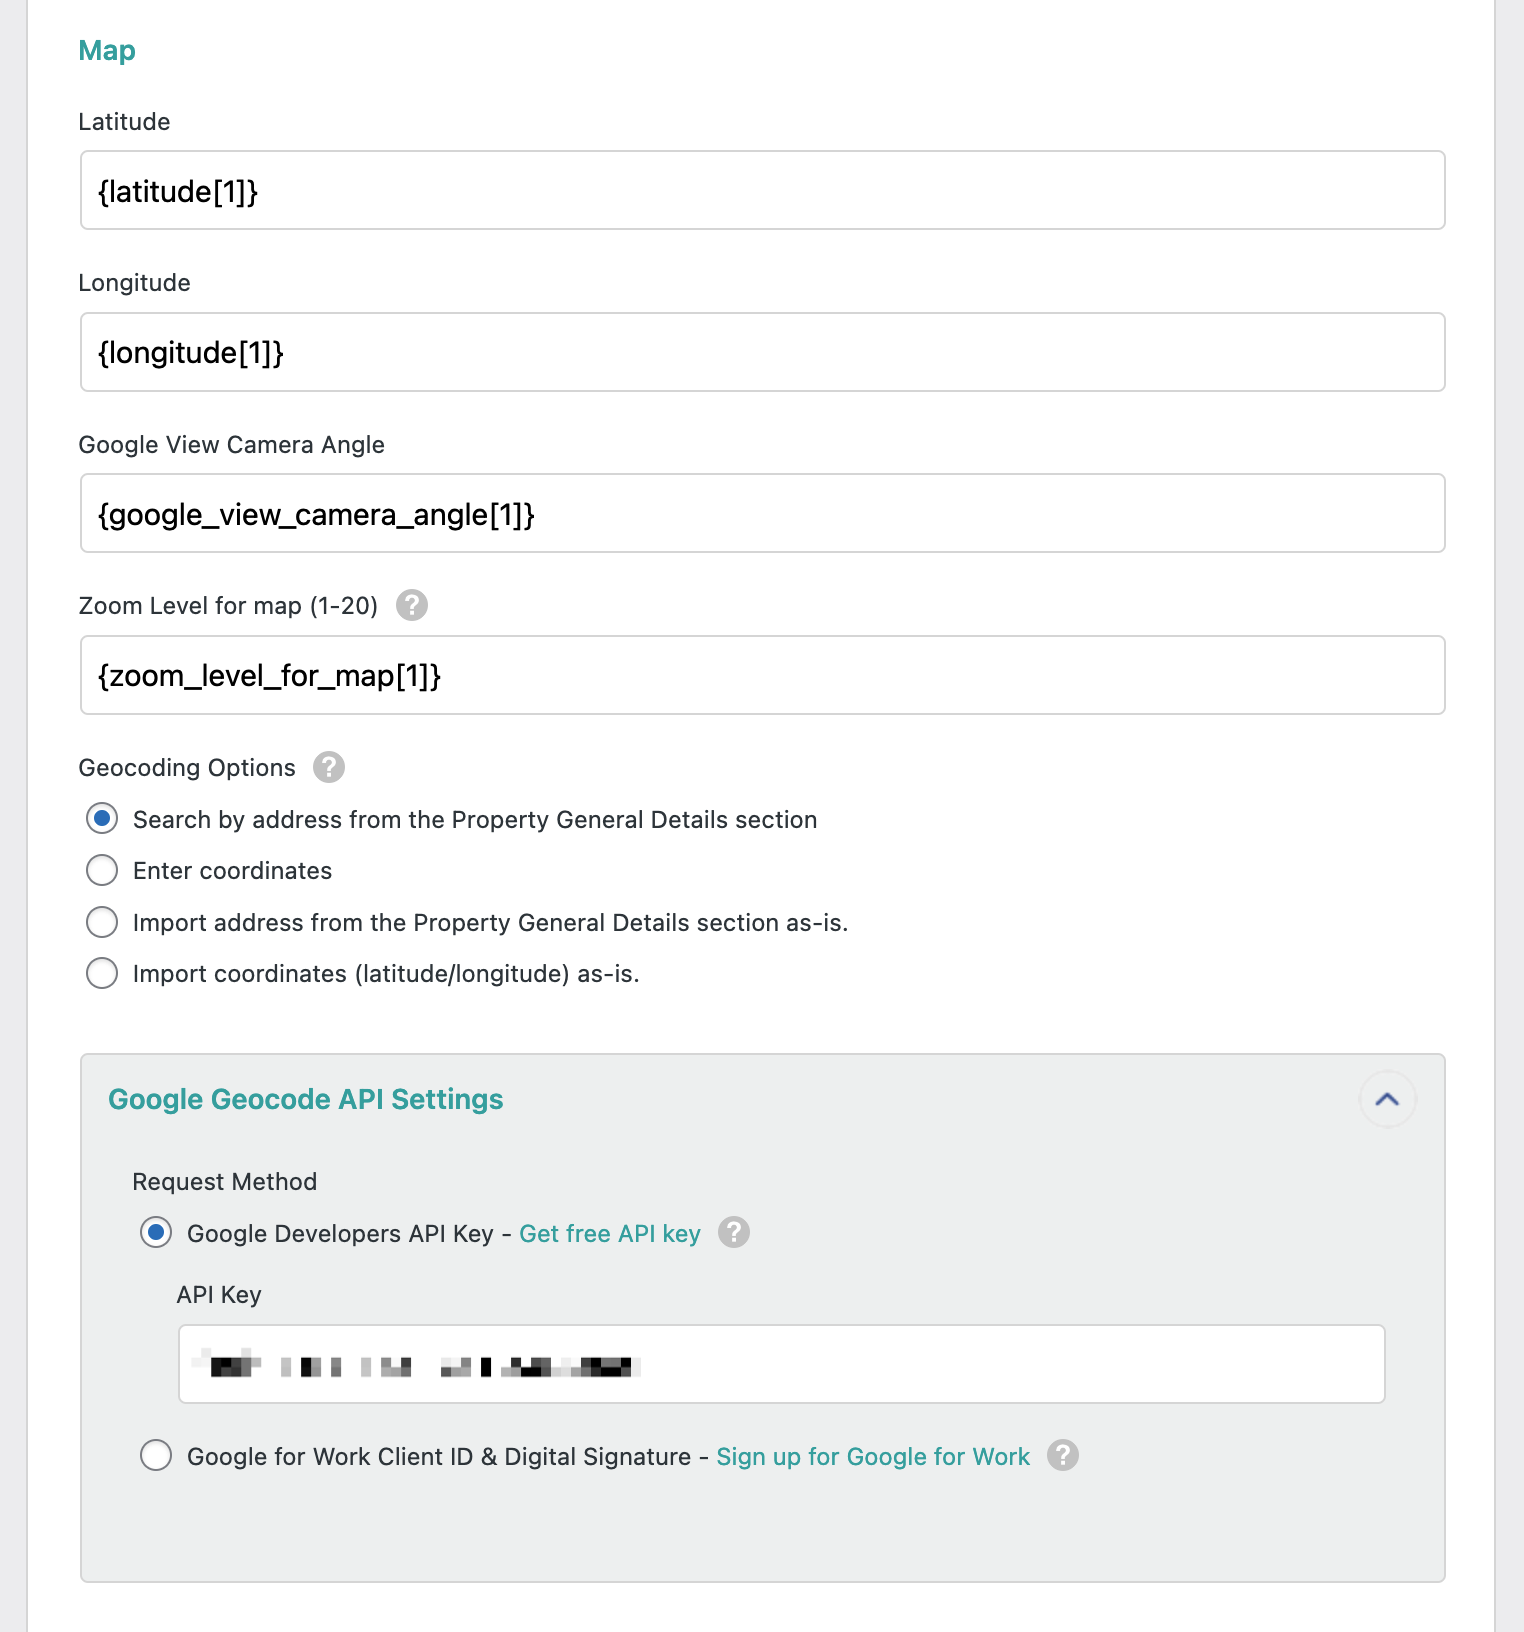
- Latitude: The latitude.
- Longitude: The longitude.
- Google View Camera Angle: The Google view camera angle to use.
- Zoom Level for map: Only accepts a number between 1 and 20.
- Geocoding Options: Allows choosing either of the following options:
- Search by address from the Property General Details section
- Enter coordinates
- Import address from the Property General Details section as-is.
- Import coordinates (latitude/longitude) as-is.
In this section, you can define the Google API Key to use geocoding under Google Geocode API Settings. To learn more about this, please read Google Geocoding Help Sheet.
Owner

Here, you can import the Listing Owner. It accepts the owner's username, user ID, or email.
Advanced Options
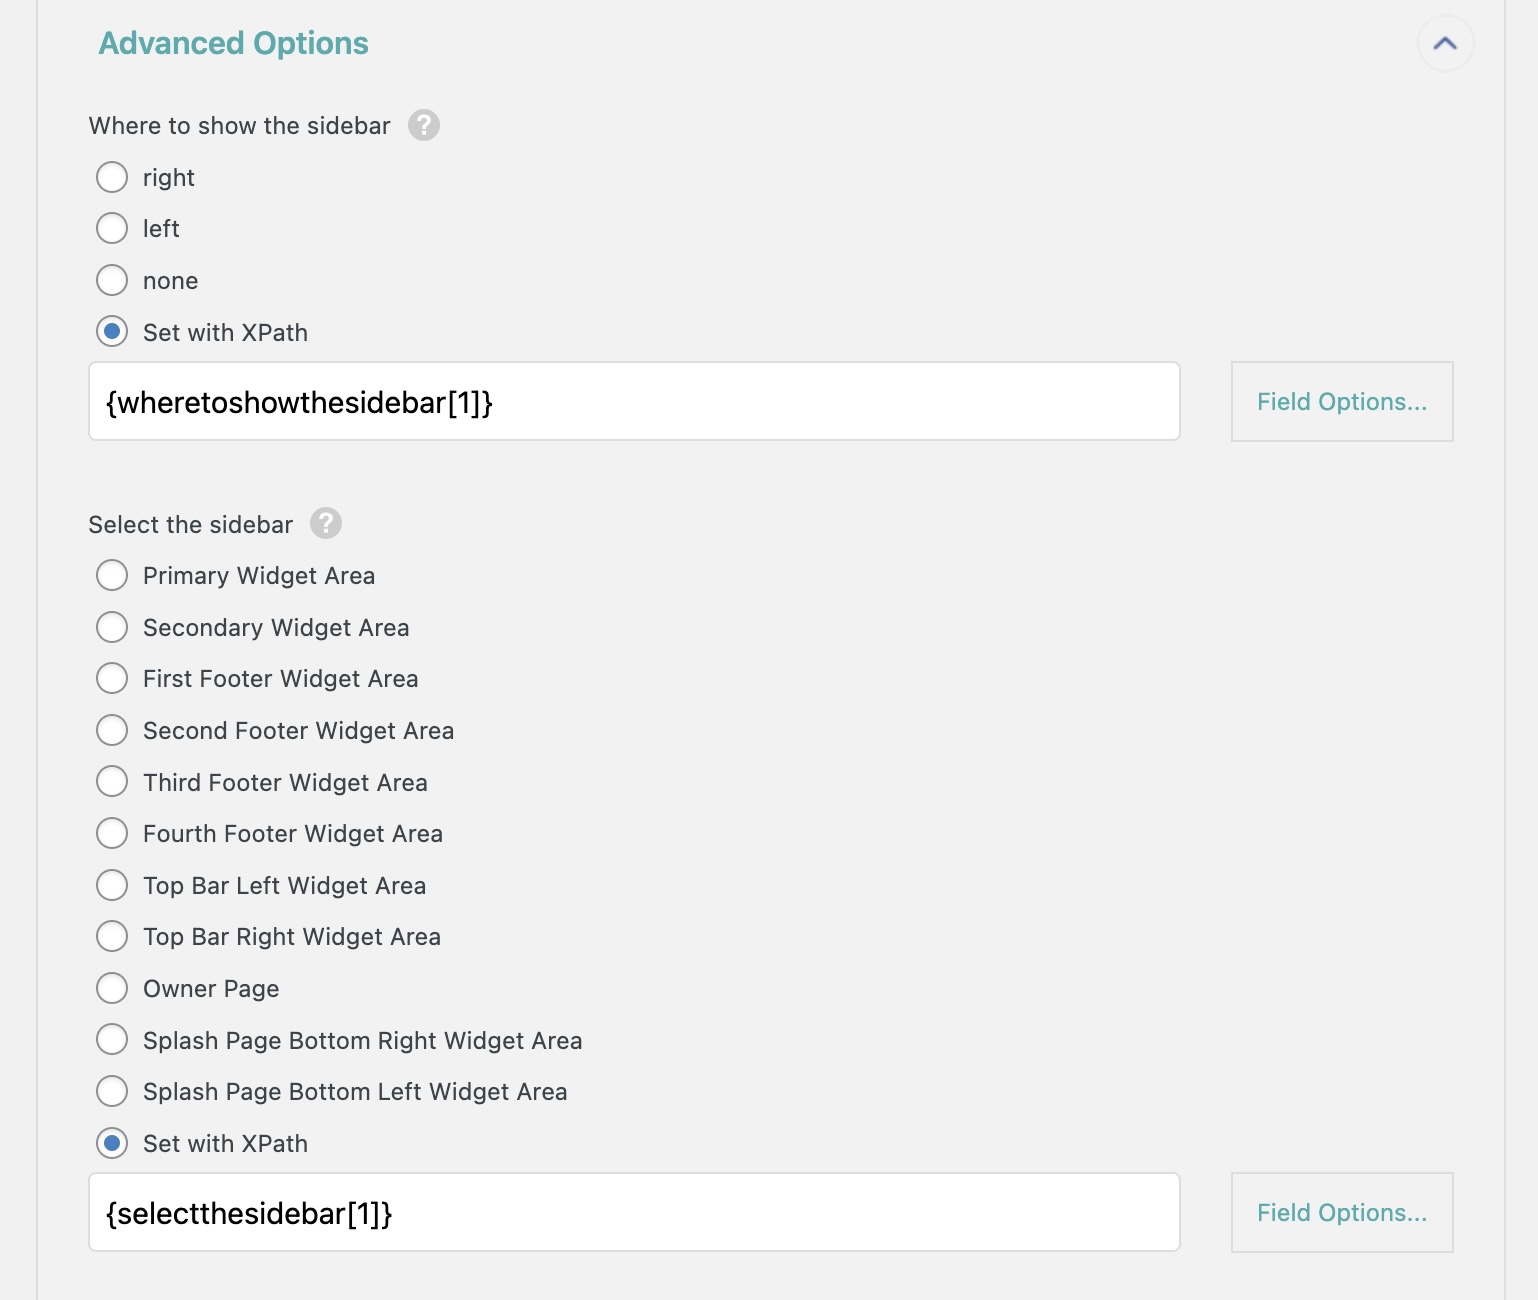
- Where to show the sidebar: Accepted values are
right,left, ornone. The Set with XPath options allows those same values. - Select the sidebar: Choose the type of sidebar you want to use:
- Primary Widget Area
- Secondary Widget Area
- First Footer Widget Area
- Second Footer Widget Area
- Third Footer Widget Area
- Fourth Footer Widget Area
- Top Bar Left Widget Area
- Top Bar Right Widget Area
- Owner Page
- Splash Page Bottom Right Widget Area
- Splash Page Bottom Left Widget Area
These advanced options can also be mapped using Set with XPath, and the tooltip found there explains what values to import.
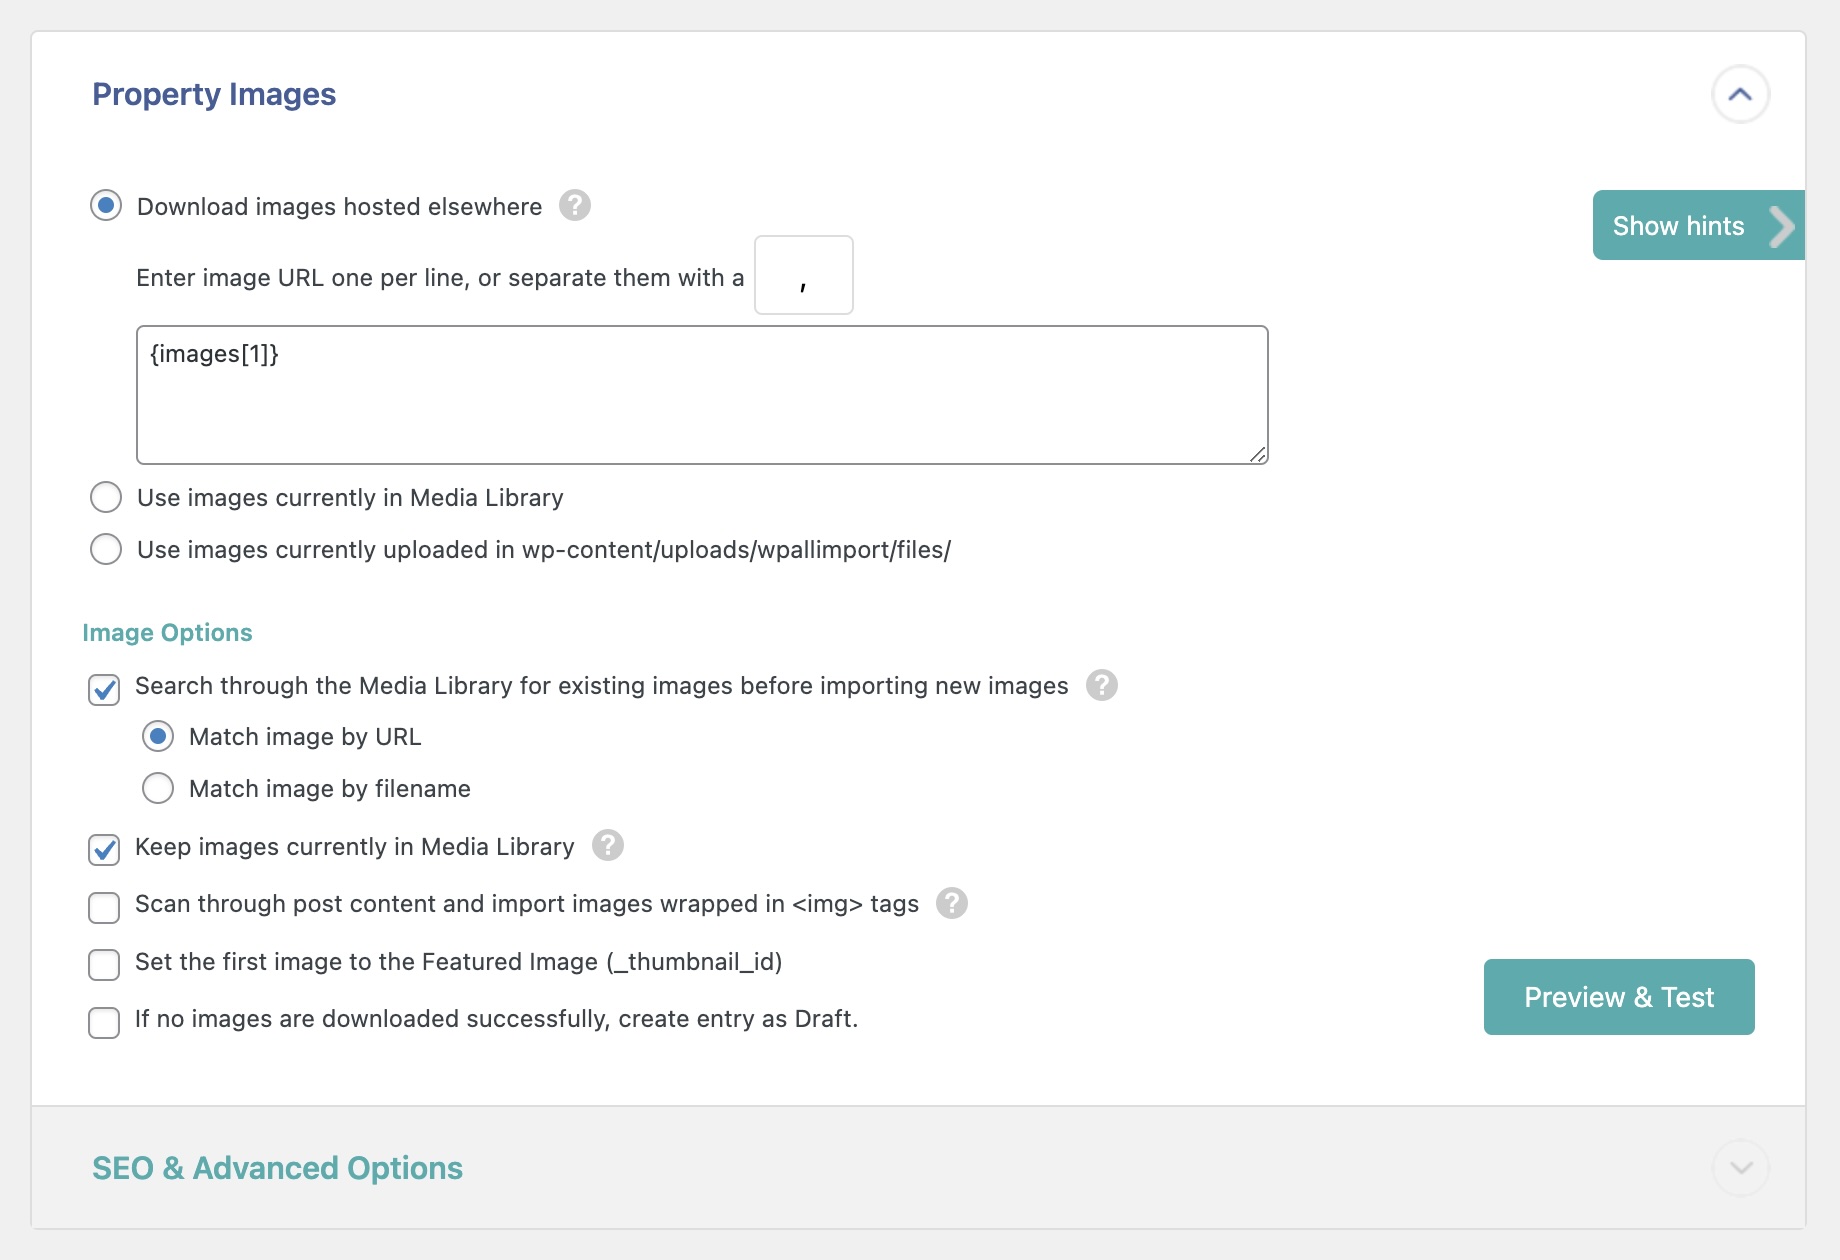
Property Images
Below, you'll find the Property Images section, where you can map images to add to the listings:
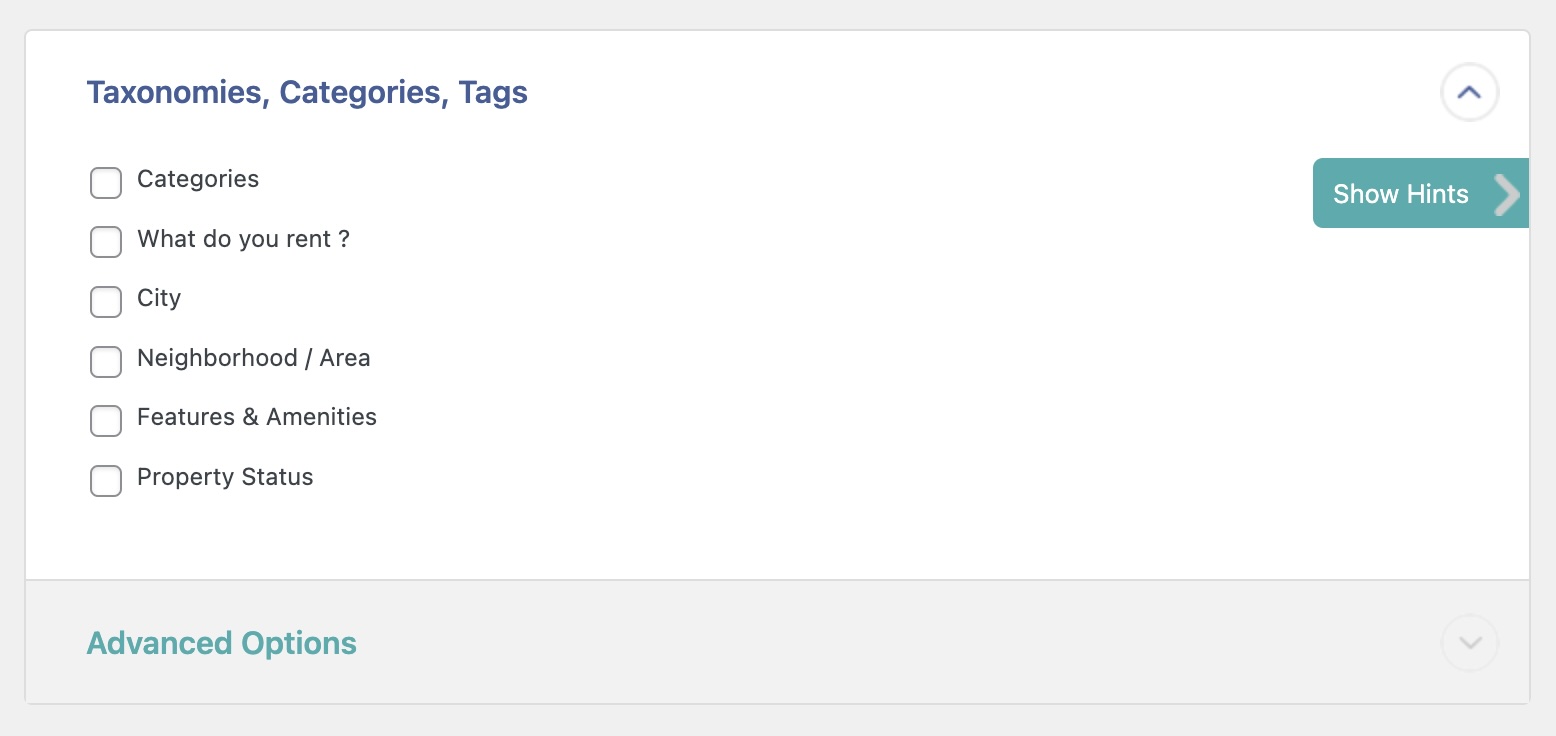
Taxonomies, Categories, Tags
In this section, you'll be able to import some important taxonomies related to the listings that are being imported, such as what's being rented, the city, neighborhood, as well as all features and amenities for the property listing.
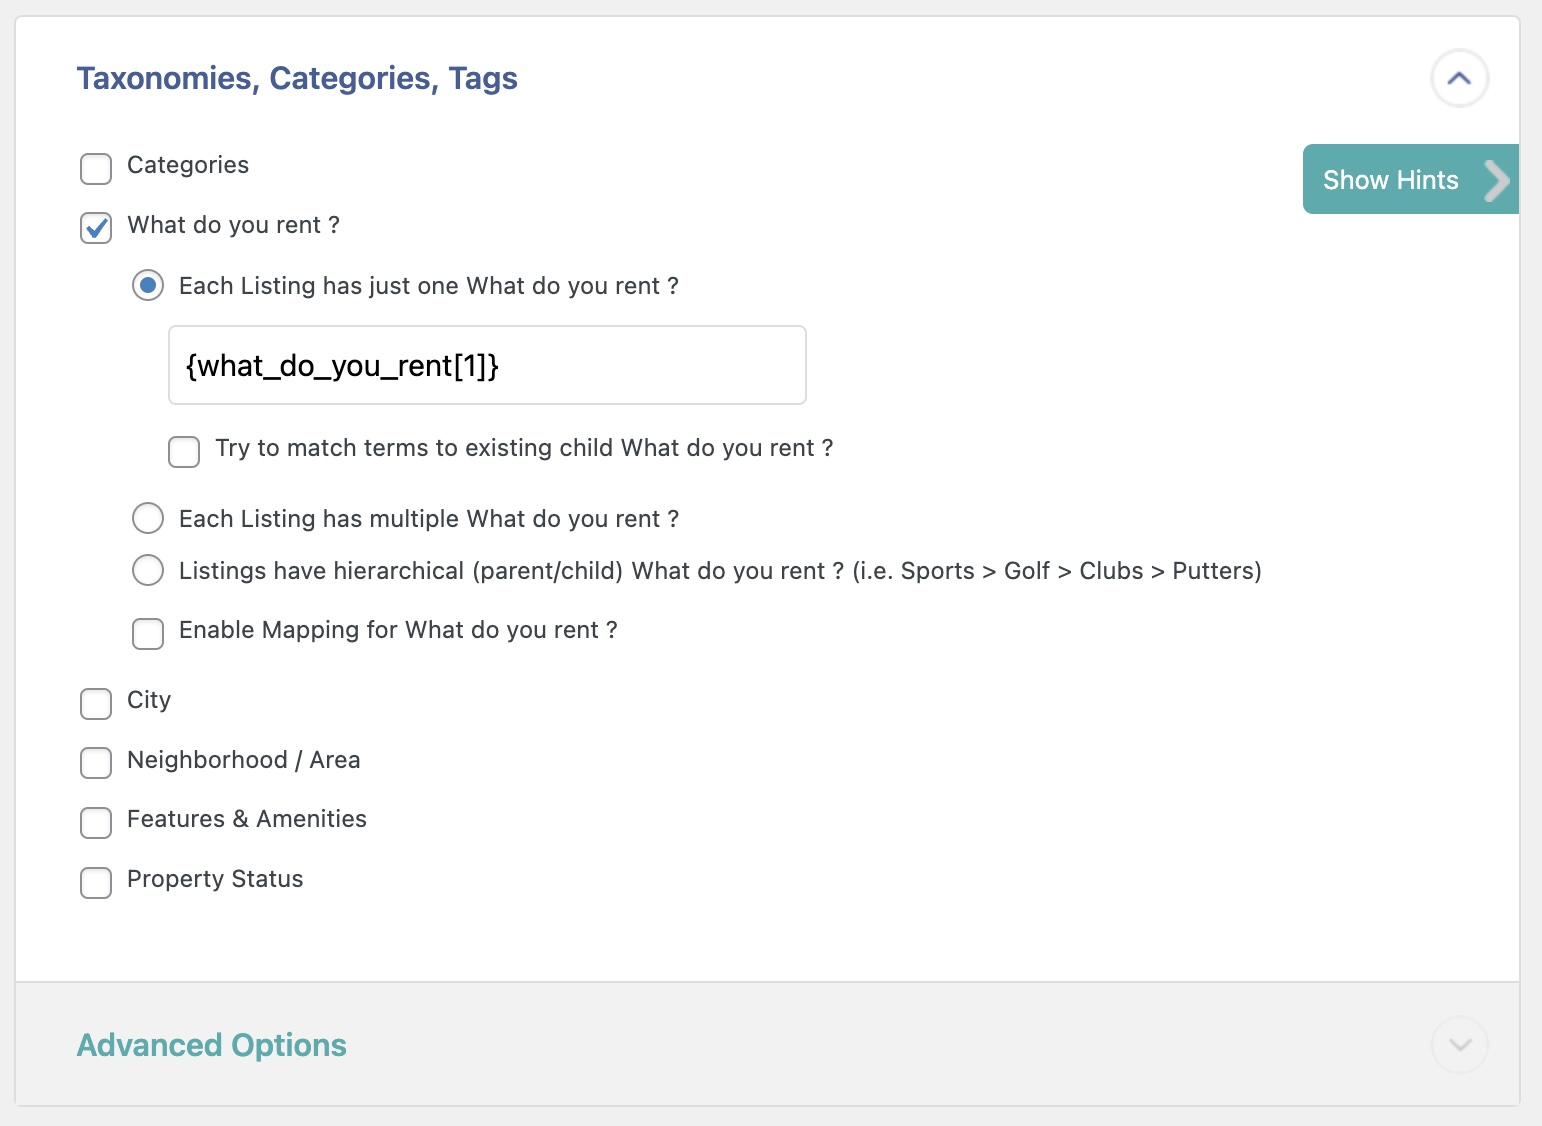
This is how it looks like when you import the type of property that you're renting, let's say, an "Apartment":
Once you've mapped all import elements to their target fields, click on Continue to Step 4 at the bottom to move along.
Step 4: Run WP Rentals Import Process
The Import Settings screen appears, where you can configure the import settings and other options:
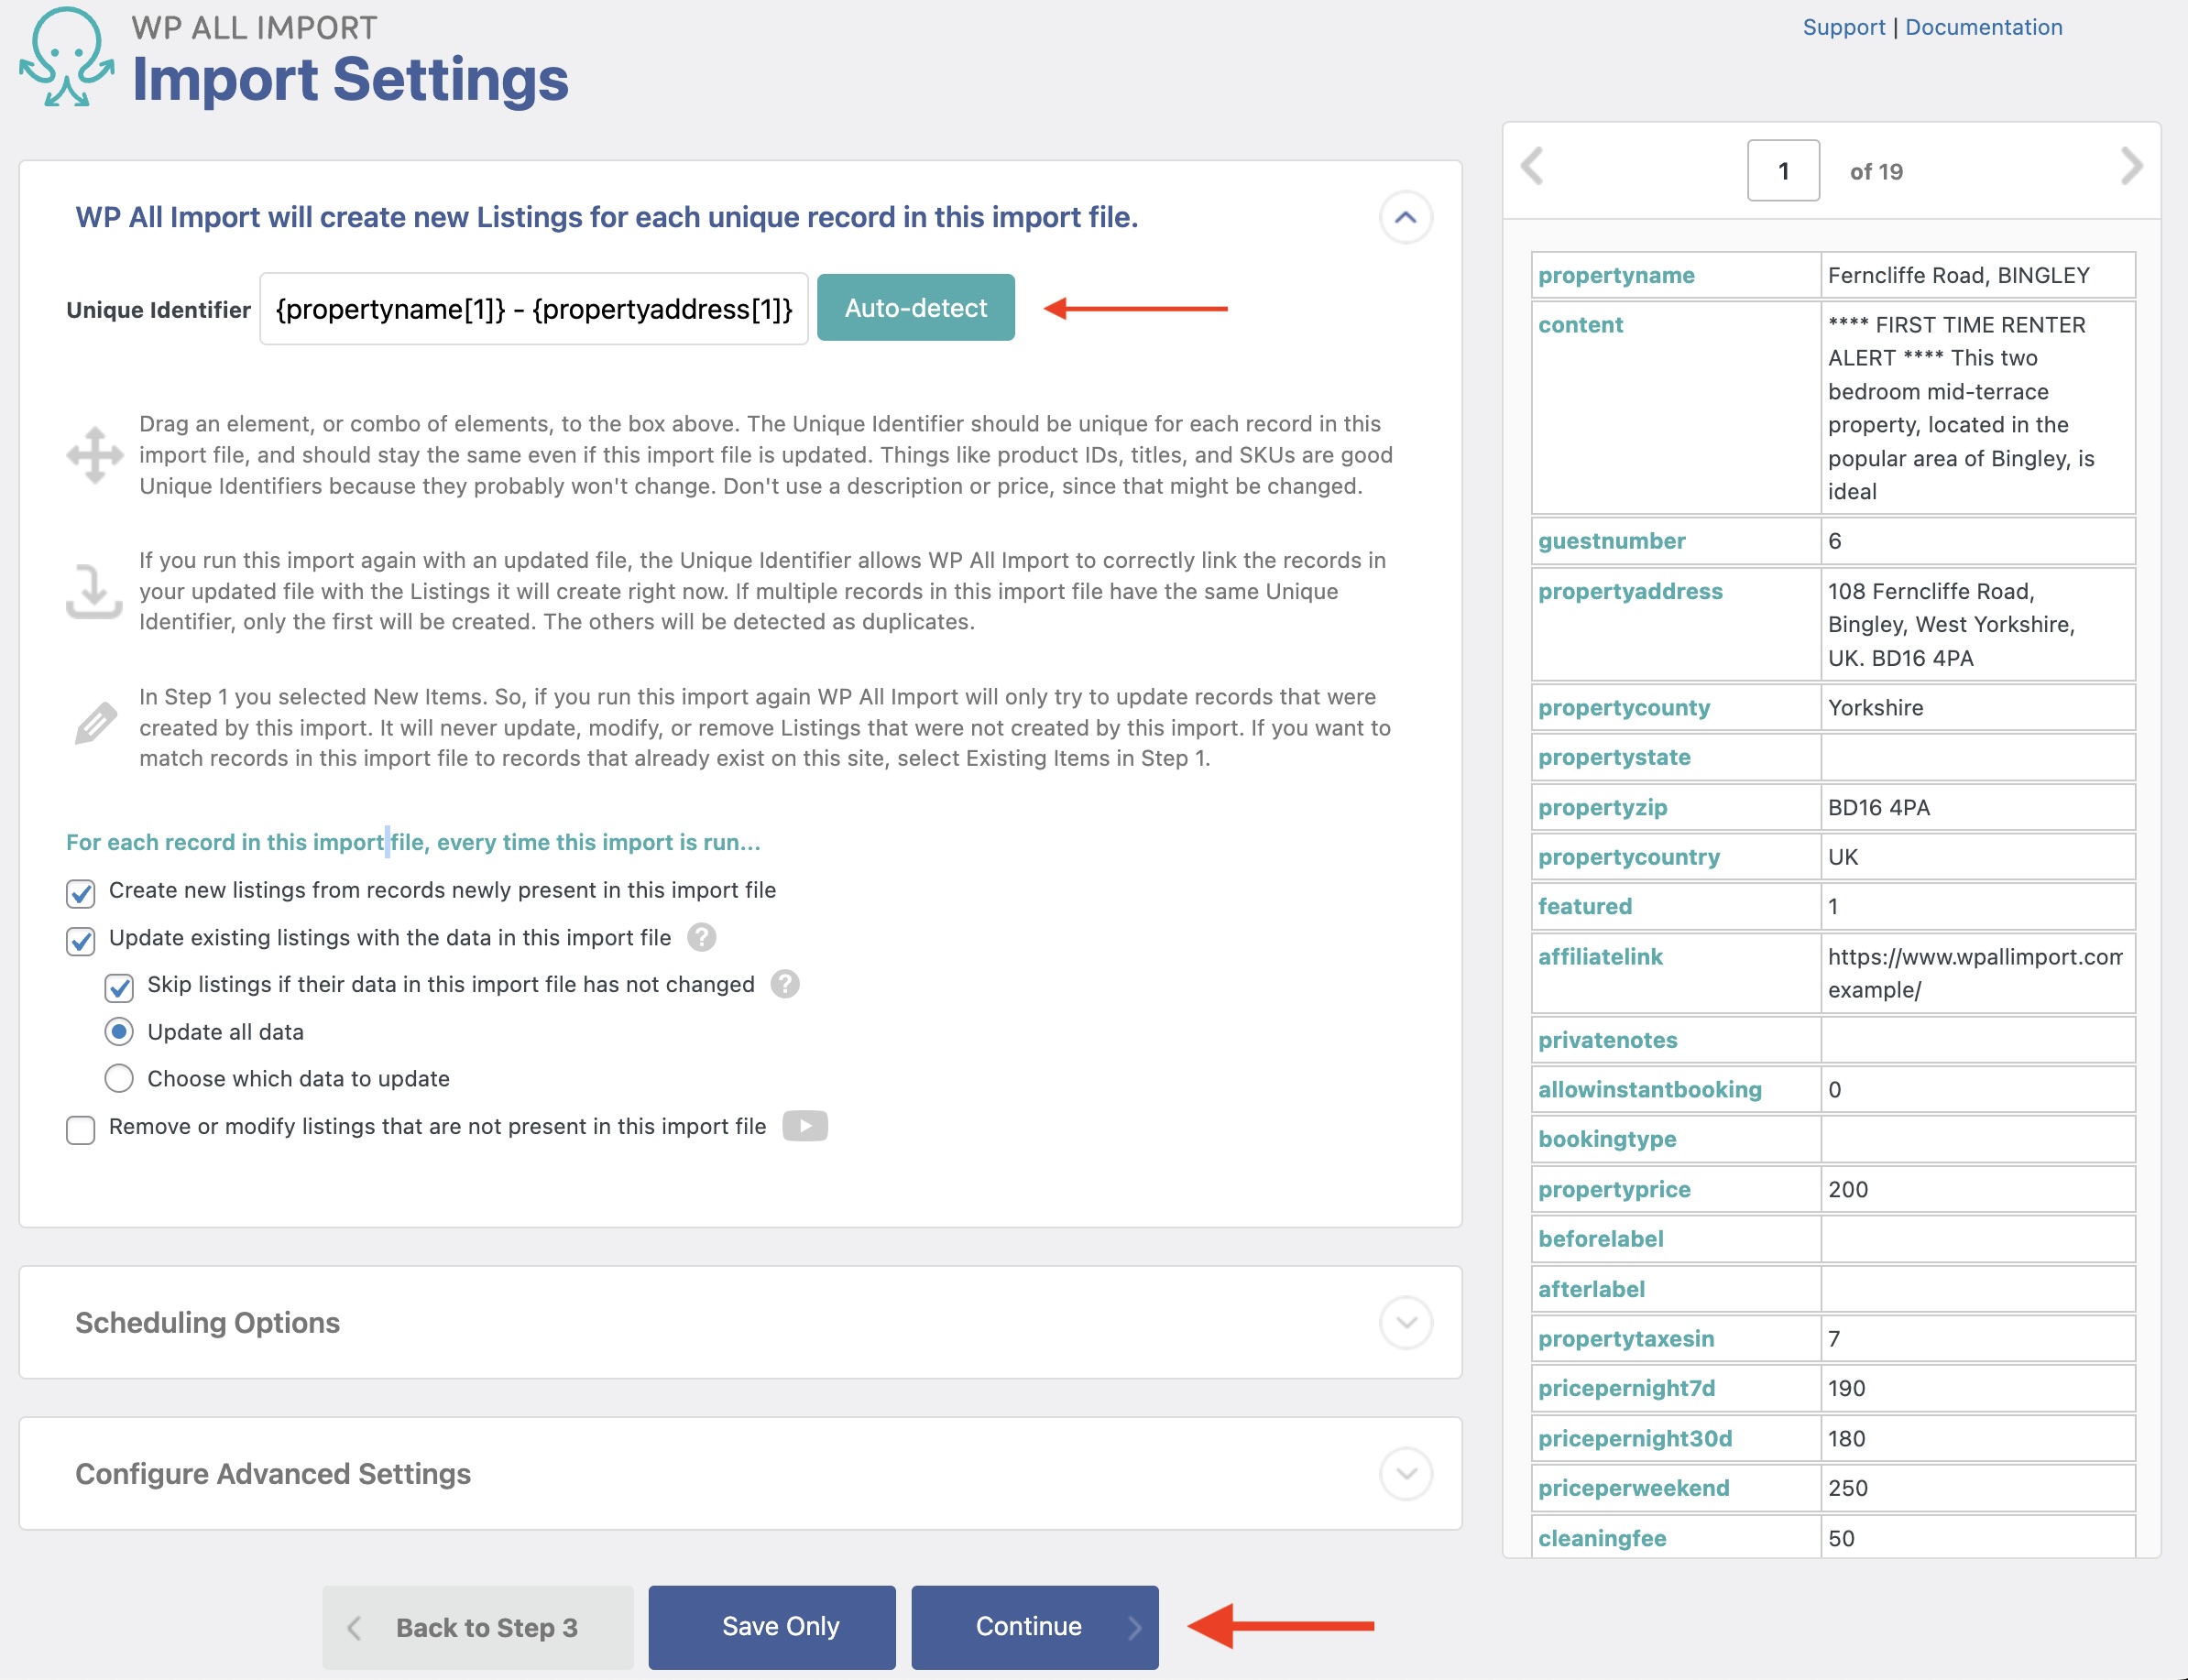
You should first define the Unique Identifier on this screen by clicking the Auto-detect button. WP All Import uses that identifier internally to keep track of the imported records. You can also drag and drop elements to define this unique identifier.
If you use the Auto-detect button, make sure to double-check that a valid identifier has been generated. We explain more about setting this up over here Define Unique Identifier Correctly.
Below that section, you can change the settings that define the import behavior once the import process runs again, i.e., to add, update, or delete existing records. You can also define Scheduling Options and Configure Advanced Settings on this page.
Once done, click Continue to move to the next step.
Step 5: Verify Imported Listings in WP Rentals
Finally, you see the Confirm & Run interface. Here, you have an Import Summary section to review the import, what's in the import file, and the changes that'll take place. To run the import and bring in your listings, click the green Confirm & Run Import button.
Once the import finishes, you see the Import Complete screen:
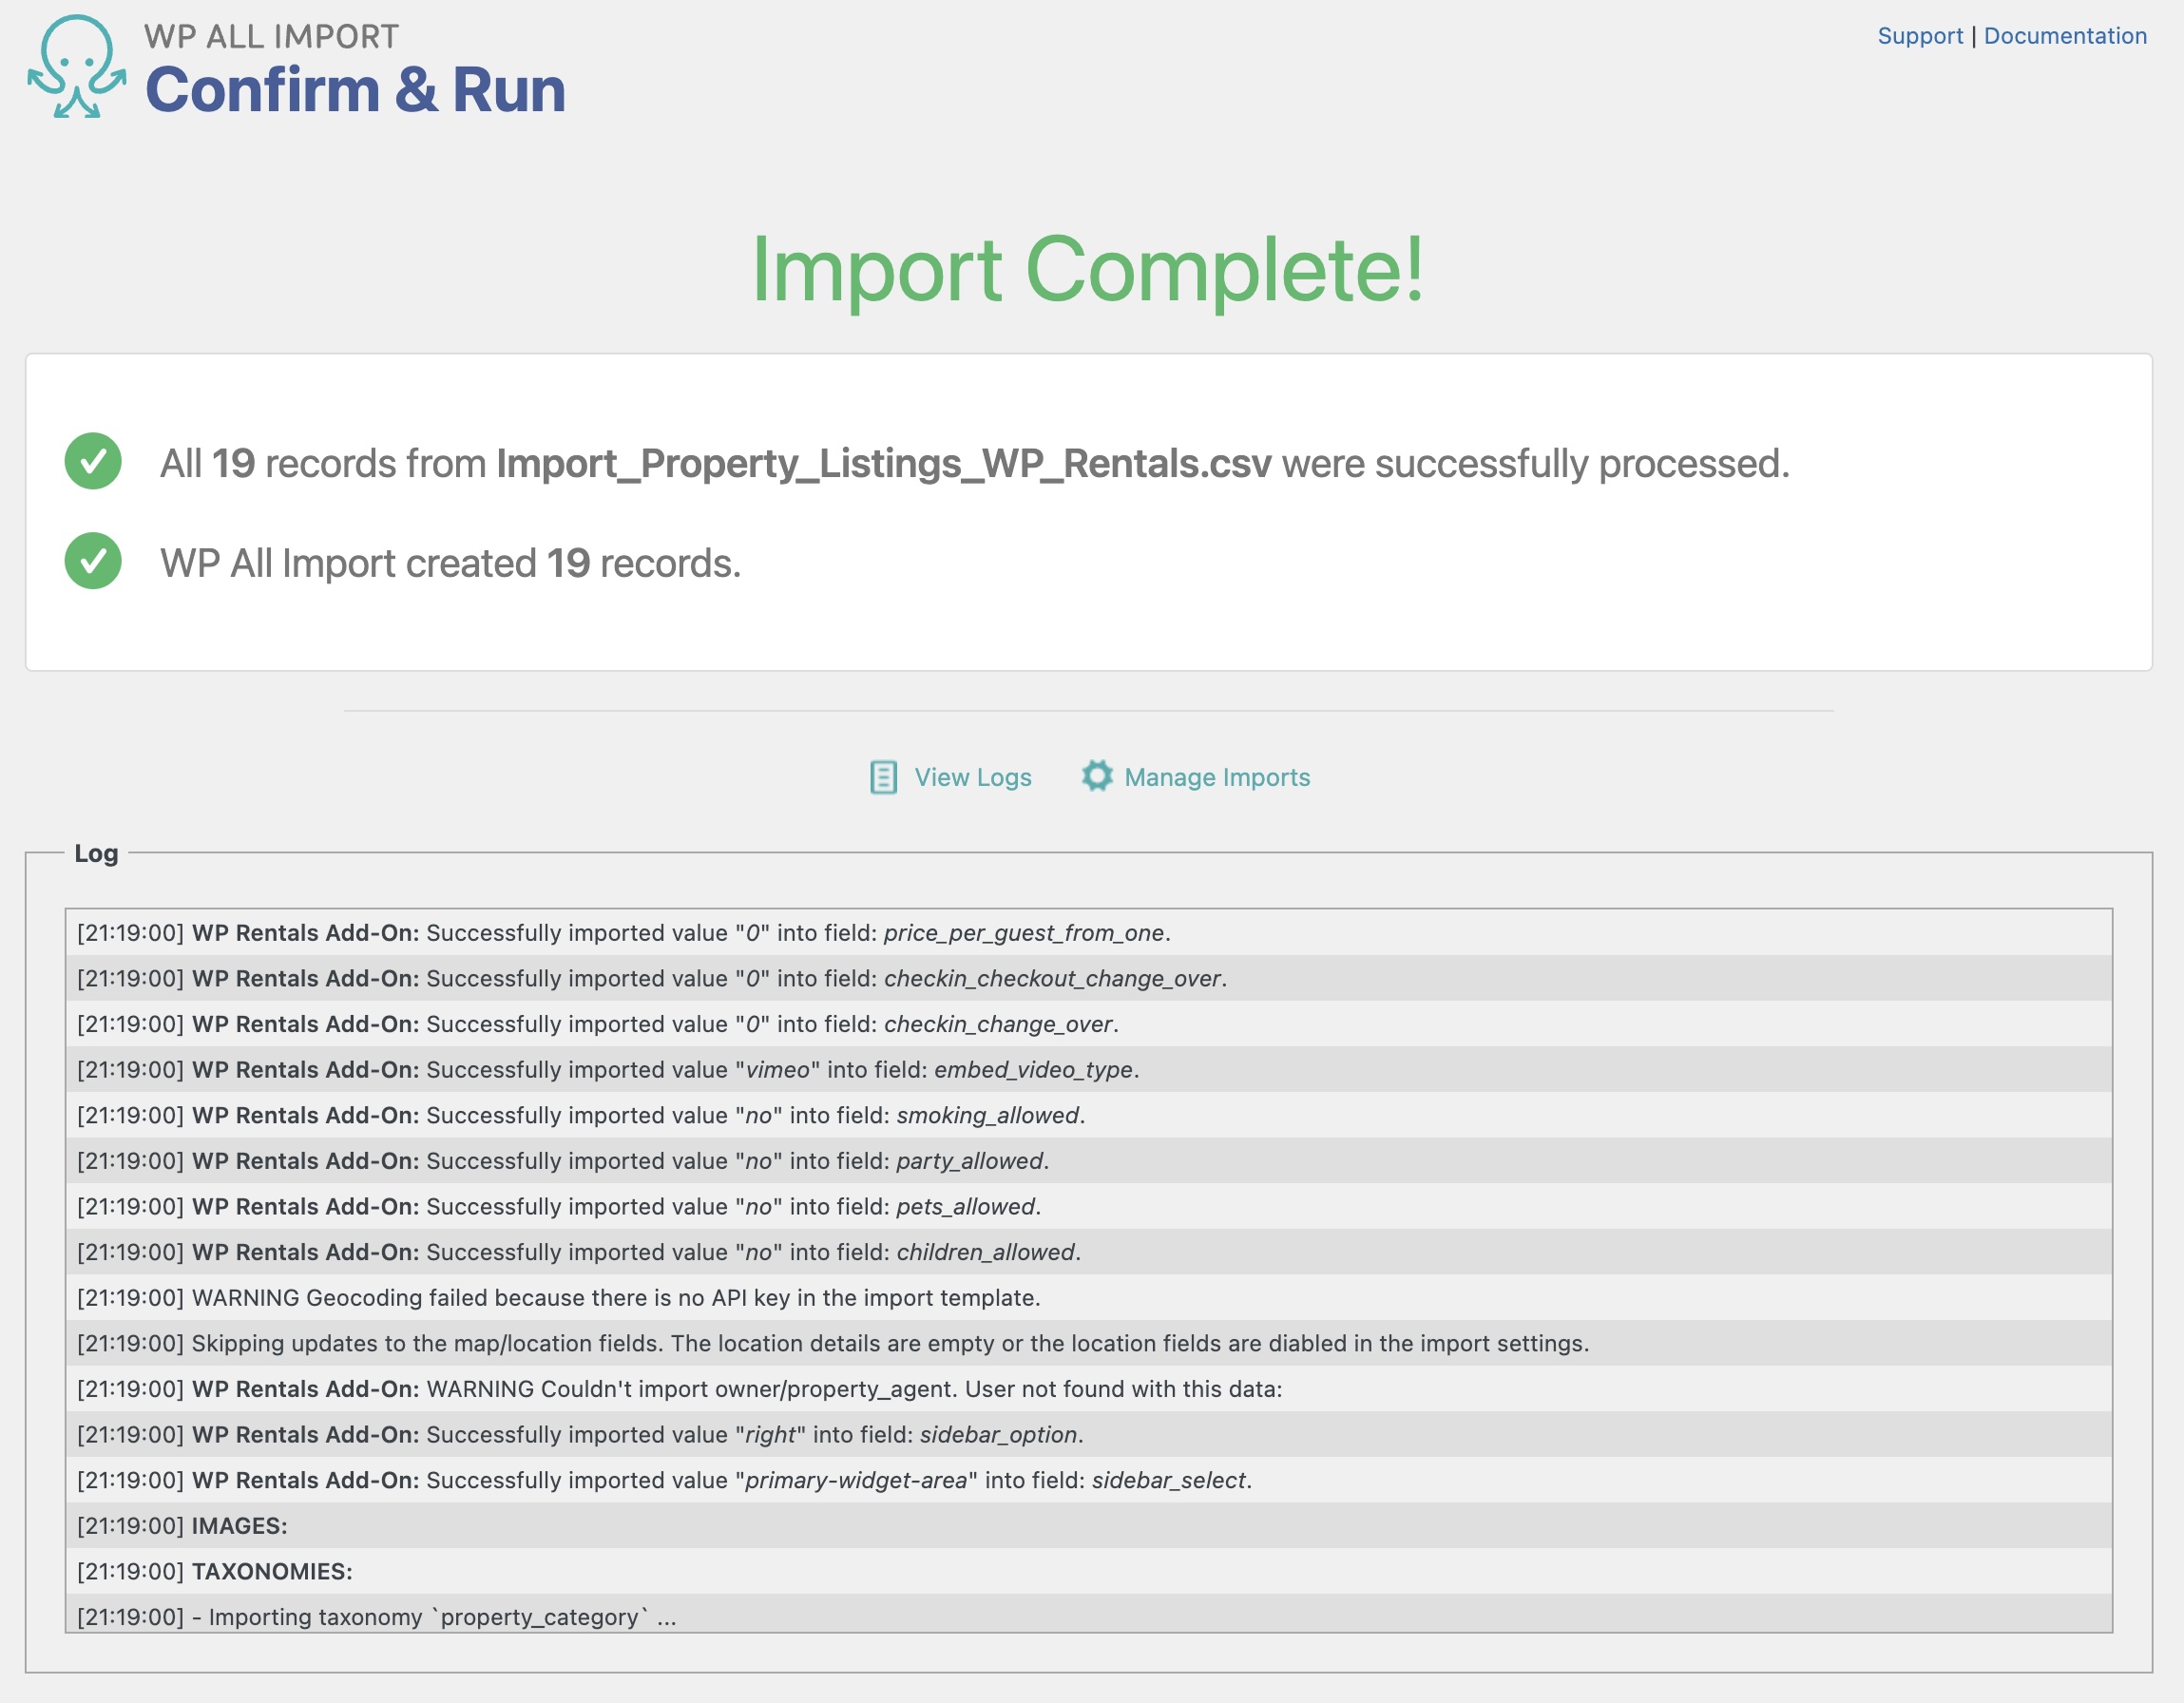
That was it! The import has been completed, and your listings were imported into WP Rentals and WordPress using WP All Import.
You can review the imported listings via Listings › Listings.
Import Listings to WP Rentals — Advanced Topics
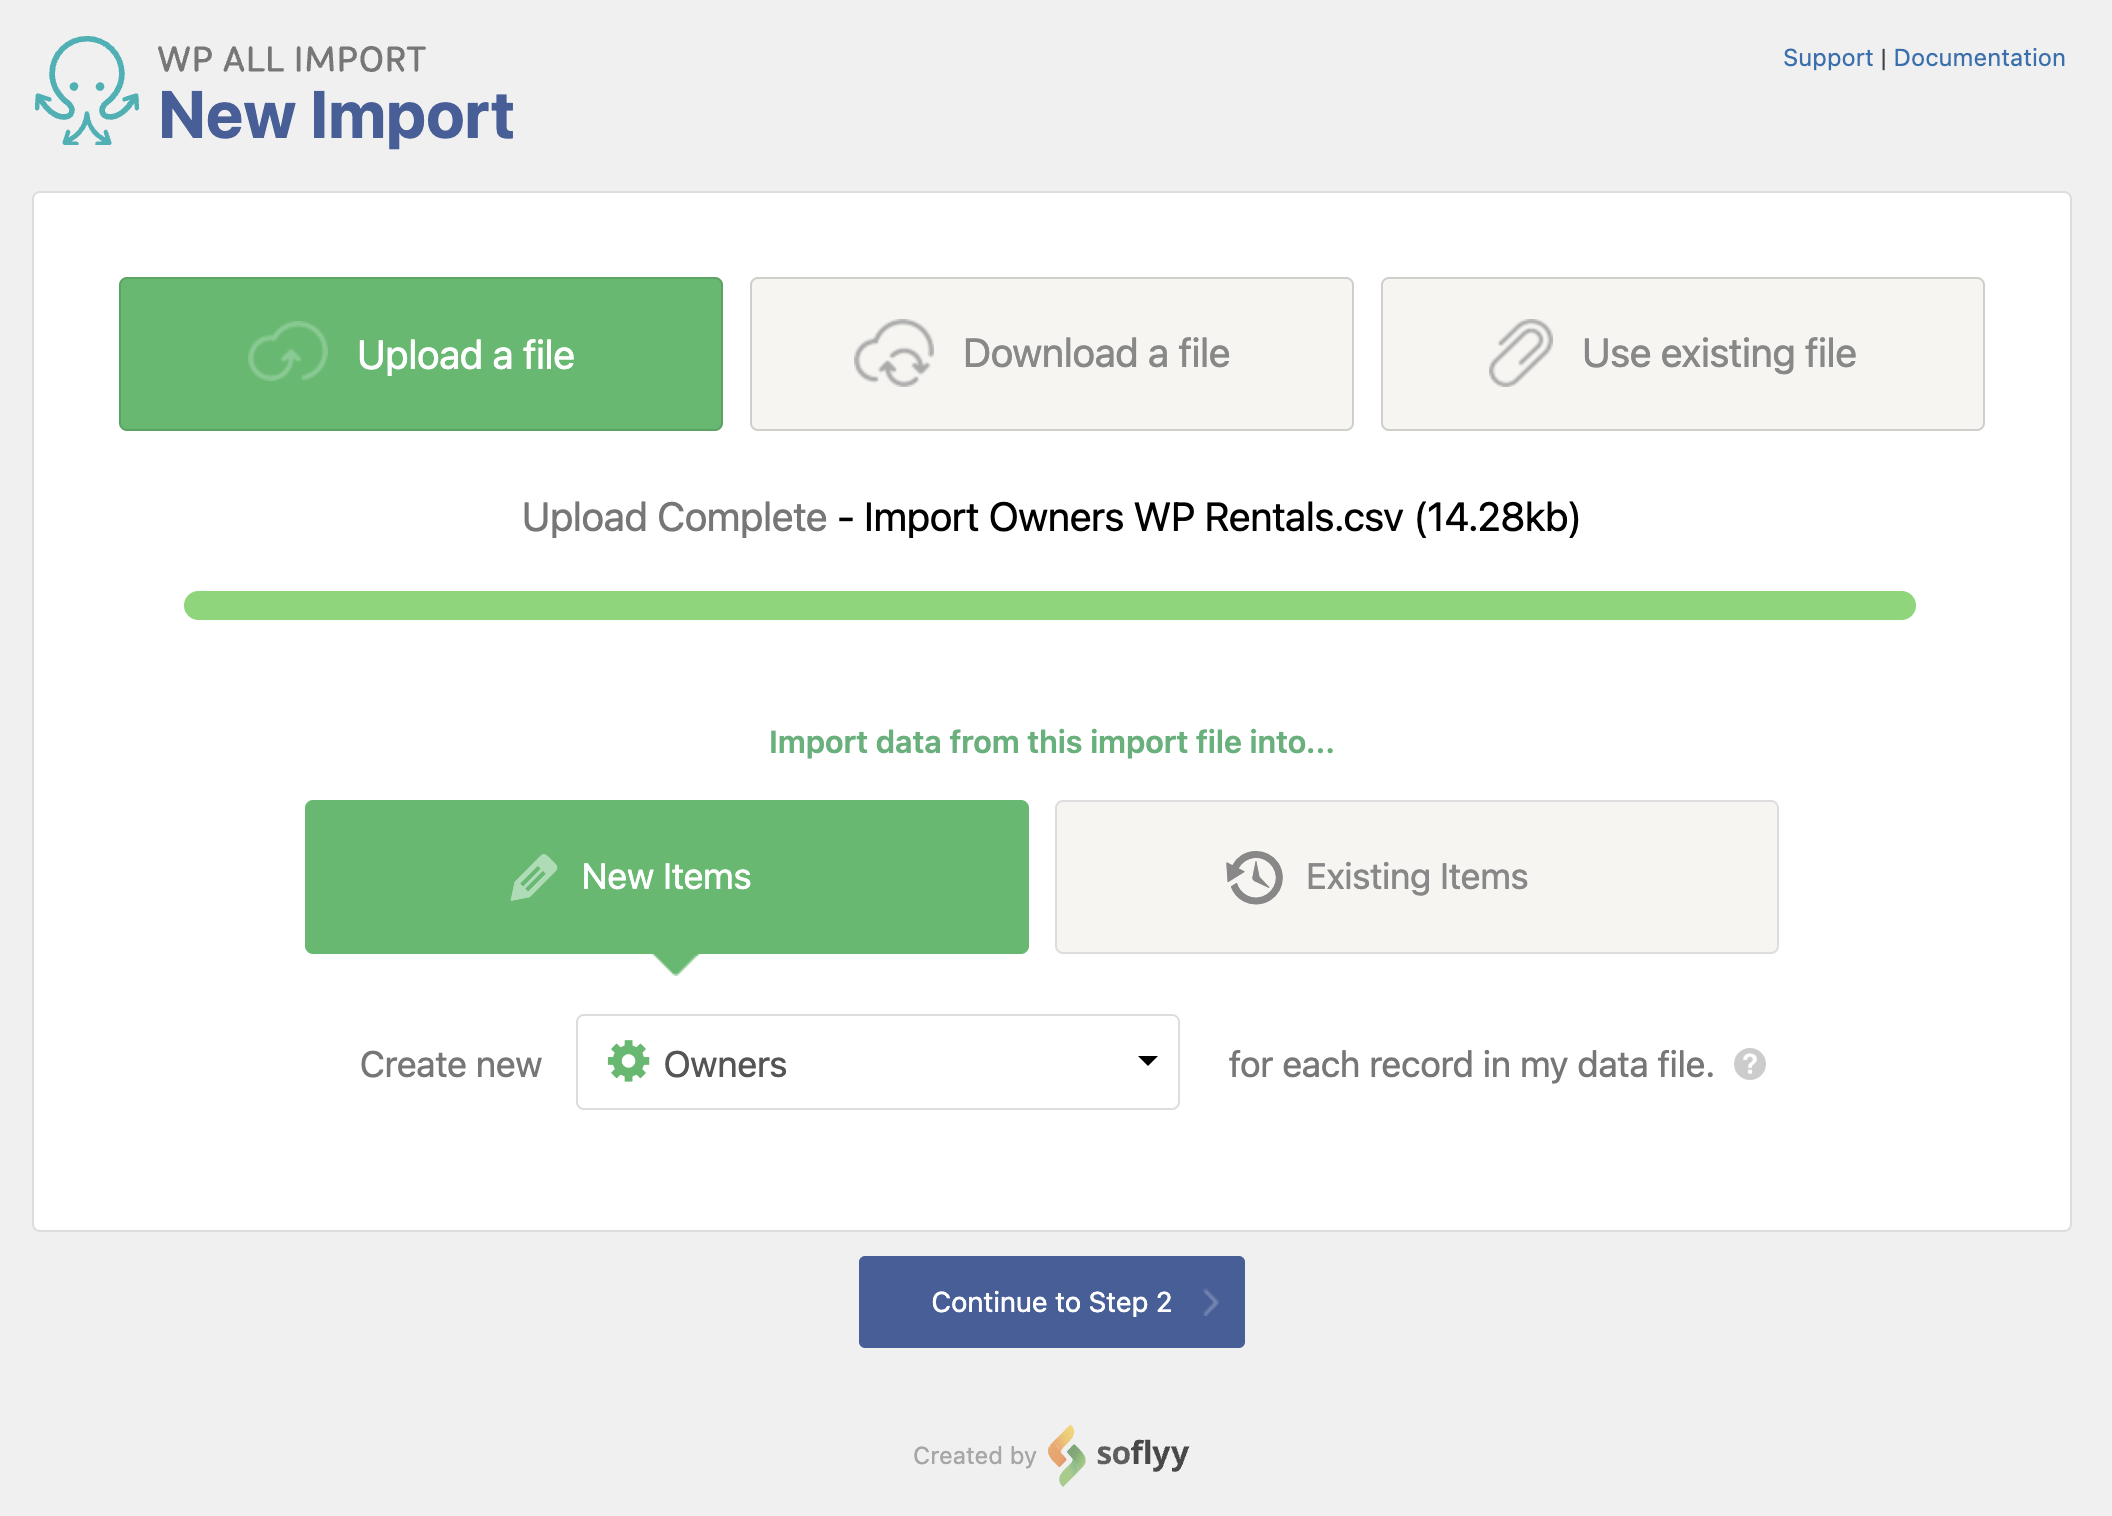
Import Owners into WP Rentals
Besides listings, you can also import the owners into WP Rentals using WP All Import and the WP Rentals Import Add-On.
The steps are the same as explained above. You just have to choose Owners instead when setting up the import process:
When mapping the data, you'll be able to map all of the owners' information under the WP Rentals Add-On section:
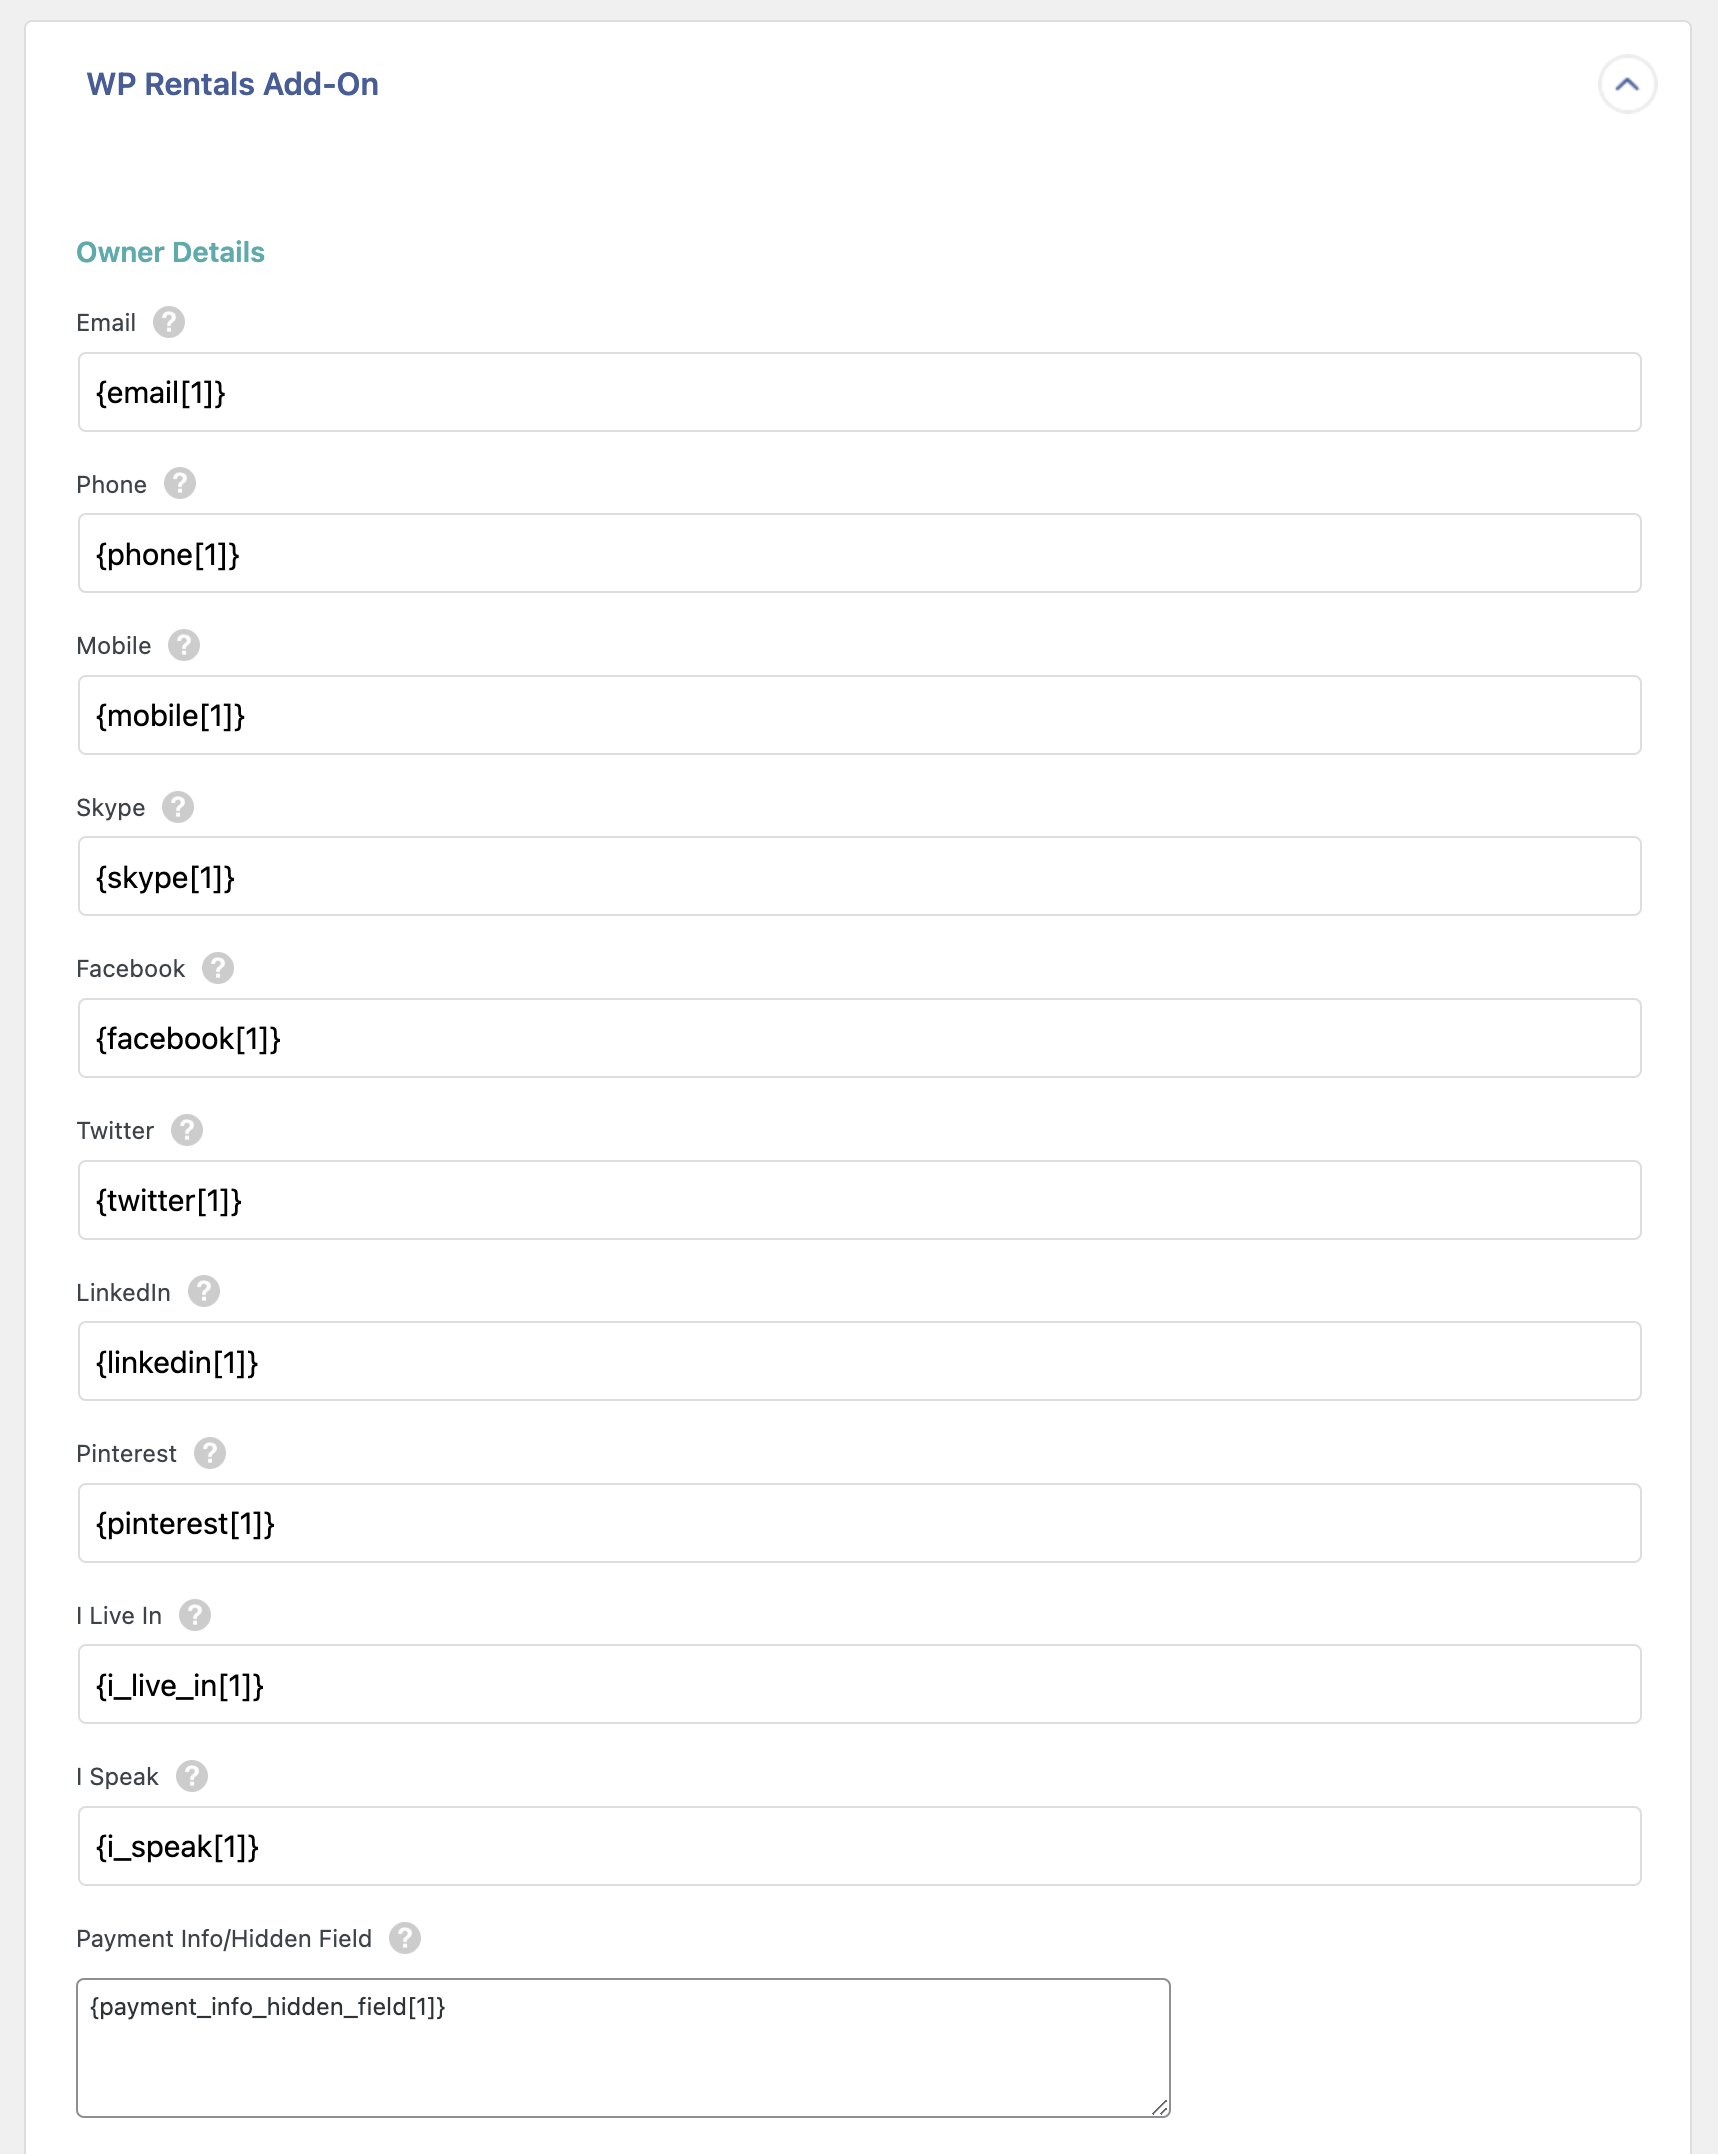
Here are more details on all of the fields for owners that can be added and what data they expect:
- Email: Owner's email address
- Phone: Owner's phone number
- Mobile: Owner's mobile number
- Skype: Owner's Skype ID
- Facebook: Owner's Facebook profile URL
- Twitter: Owner's Twitter handle
- LinkedIn: Owner's LinkedIn profile URL
- Pinterest: Owner's Pinterest profile URL
- I Live In: The location where the owner lives
- I Speak: The languages the owner speaks
- Payment Info/Hidden Field: The owner's payment information
- User Agent ID: The user agent ID for the owner
There are also some Advanced Options that can be defined:
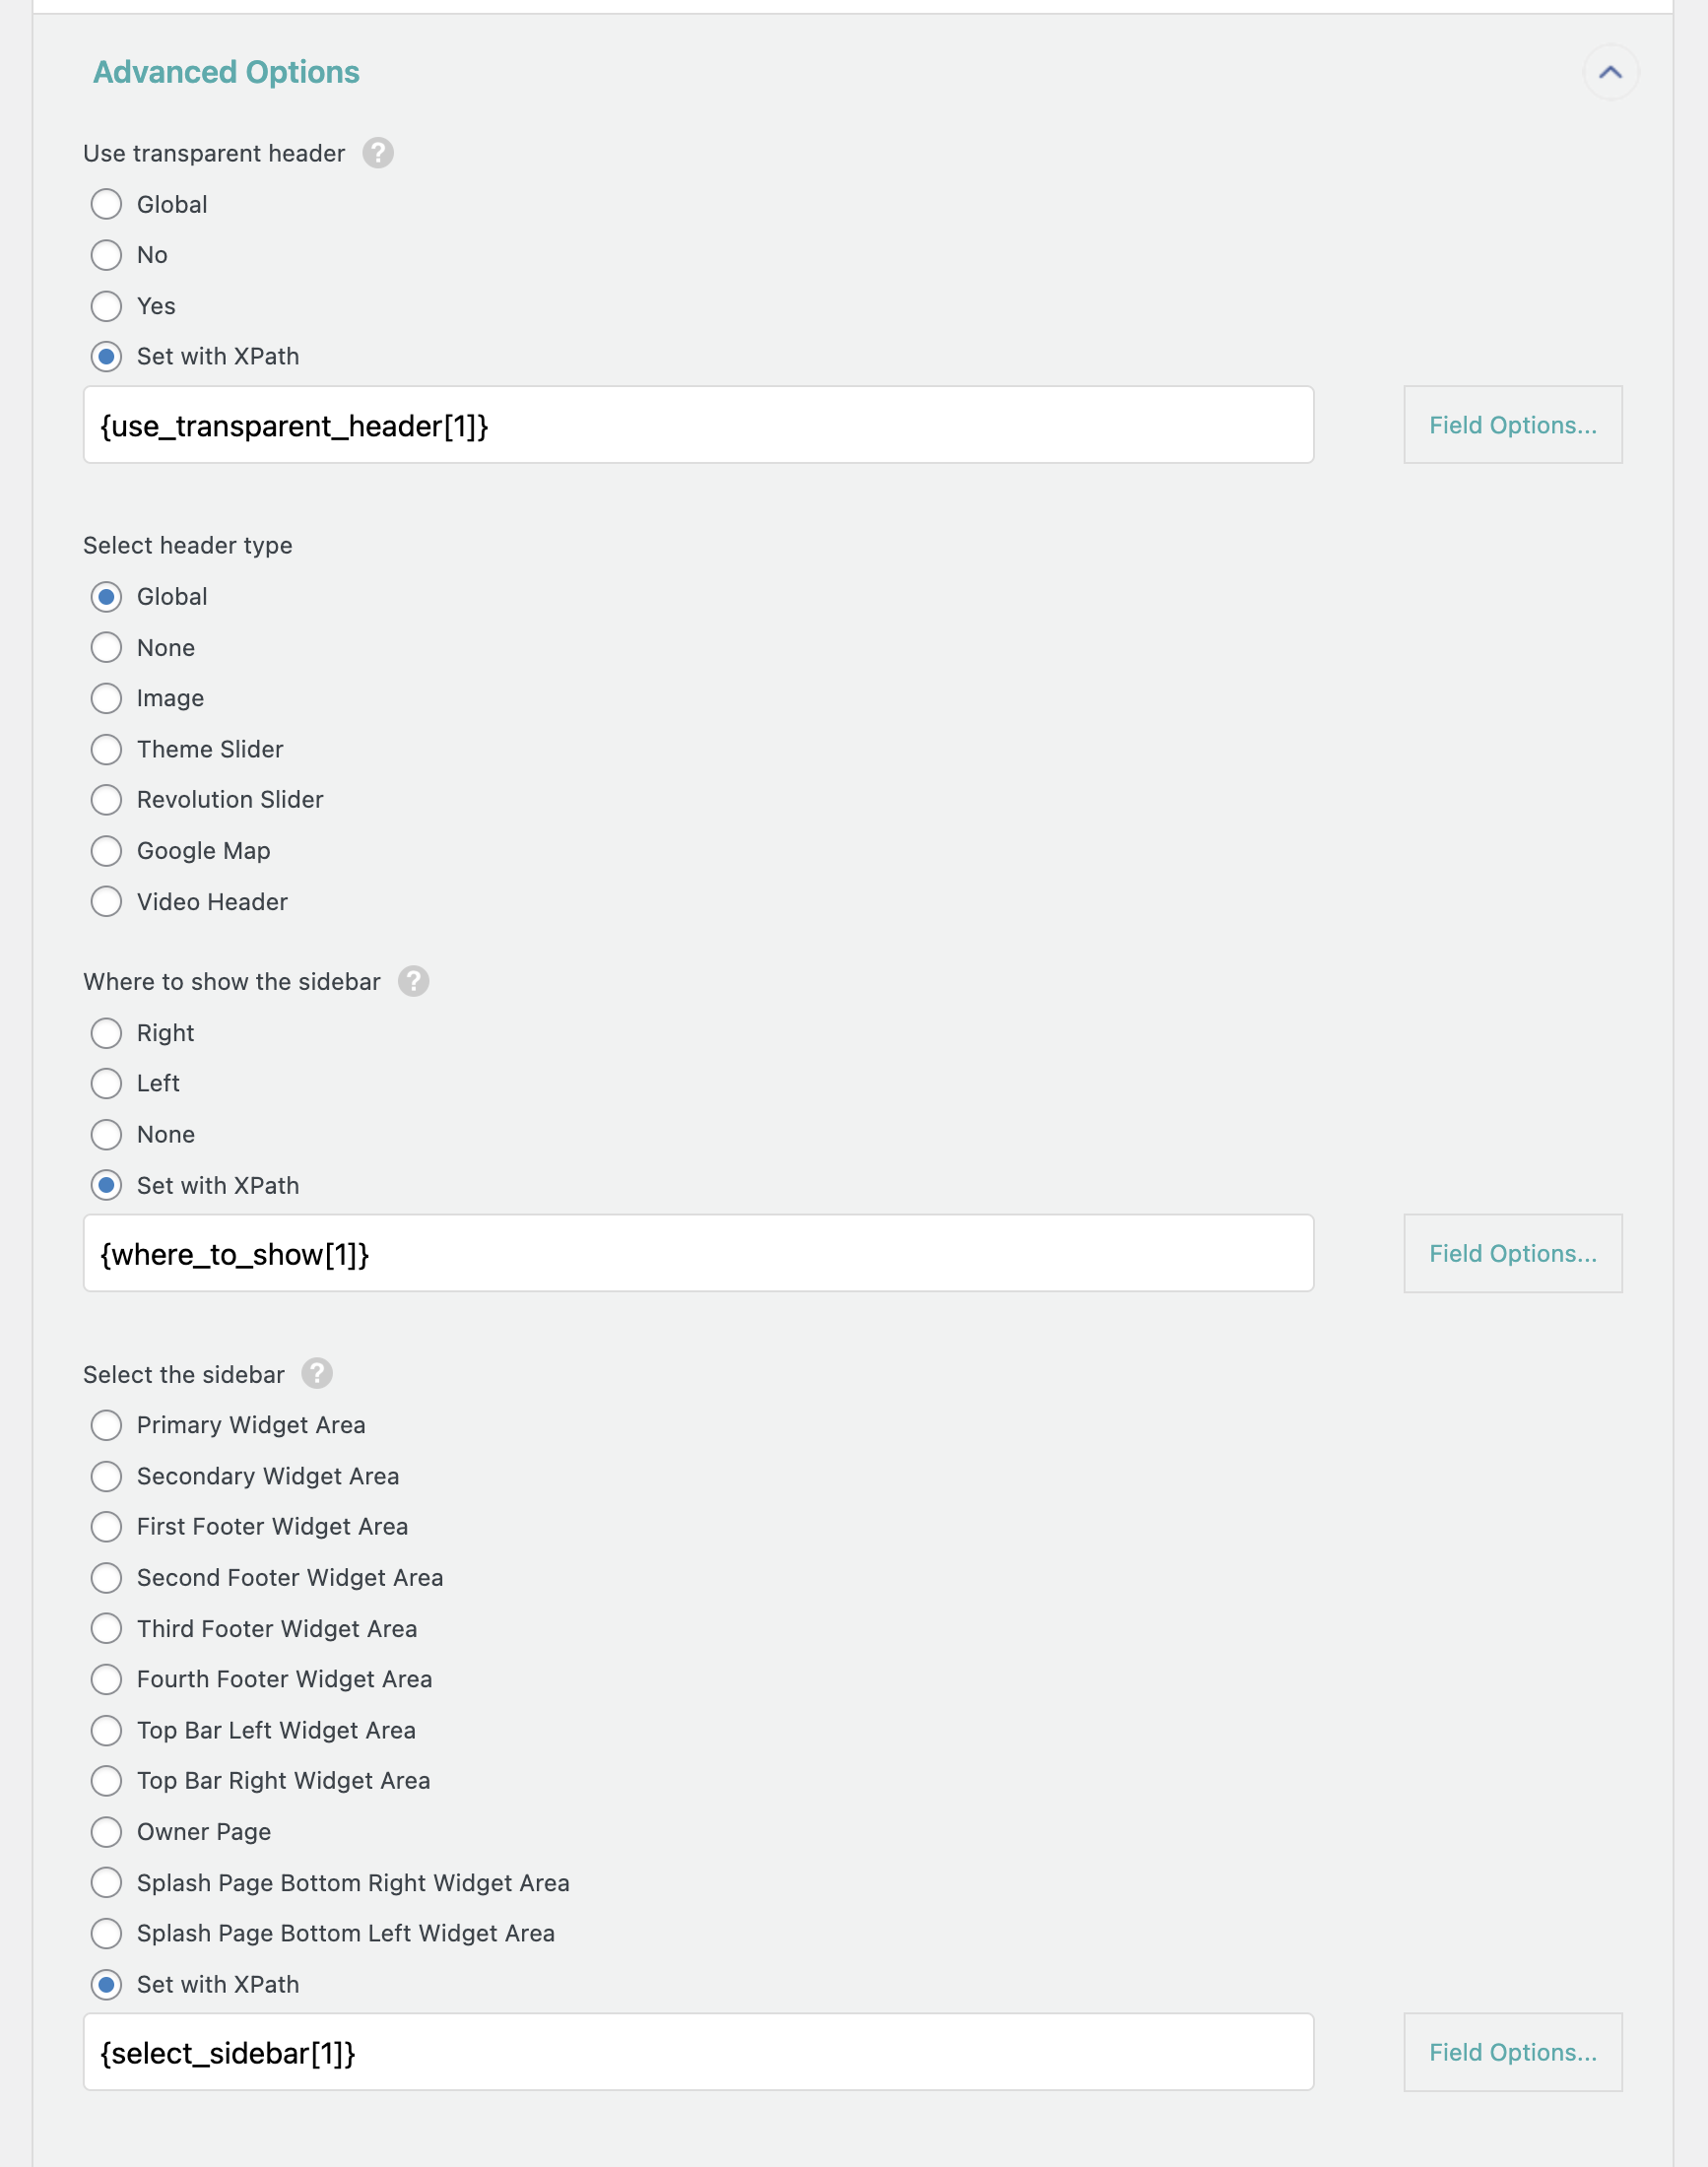
The following options are available in this section:
- Use transparent header: Accepted values are 'global', 'no', or 'yes'.
- Select header type: You can choose one of the following options: Global, None, Image, Theme Slider, Revolution Slider, Google Map, Video Header. When choosing some of these options, further fields will appear to import all the required data for that specific option.
- Where to show the sidebar: Accepted values are 'right', 'left', or 'none'.
- Select the sidebar: You can choose one of the following options:
- Primary Widget Area
- Secondary Widget Area
- First Footer Widget Area
- Second Footer Widget Area
- Third Footer Widget Area
- Fourth Footer Widget Area
- Top Bar Left Widget Area
- Top Bar Right Widget Area
- Owner Page
- Splash Page Bottom Right Widget Area
- Splash Page Bottom Left Widget Area
These advanced options can also be mapped using Set with XPath, and the tooltip found there explains what values to import.
Modify Listings During Import using PHP Code
You can modify the listing data on the fly during the import using PHP code and WP All Import capabilities.
This allows you to change some data, append new data, remove data, or otherwise make any modifications required to your listings before they are imported into WP Rentals.
You can use native PHP functions, or you can even create your own custom PHP function to run. To learn more, see Calling PHP Functions in Your Import Configuration.
Import Listings to WP Rentals — Frequently Asked Questions
How to Bulk Edit Data in WordPress?
- Export the WordPress data that you want to edit.
- Edit the export file in any spreadsheet app (Excel, Numbers, Google Sheets, etc).
- Re-import the edited file back into WordPress using the Import with WP All Import option.
- Verify your bulk edited data and the results.
To learn more about the bulk edit process, please see How to Bulk Edit WooCommerce and WordPress Data.
Can I Import Listings to Other Themes?
Yes, you can import listings into other themes because we have add-ons for other themes, such as:
- Real Homes Add-On
- Real Places Add-On
- WP Pro Real Estate 7 WP Add-On
- WP Residence Add-On
- Inventor WP Add-On
- Realia Add-On
- Reales WP Add-On
- Listify Add-On
- Listable Add-On
Even if we don't have an add-on available for the theme that you're using, you can also build your own add-on: Adding Support For Your Theme or Plugin.
Can I Export Listings Data from WP Rentals?
Yes, you can export listings from WP Rentals using the WP All Export plugin:
- In the main WordPress menu, go to All Export › New Export.
- Select Listings as the post type to export.
- Use the Drag & Drop interface to choose your export columns.
- Run the export.
- Download your file with the WP Rentals Listings.
To learn more about the export process, please see this documentation: How to Export WordPress to CSV, Excel, XML and Google Sheets.


