The best import export plugin for WordPress & WooCommerce.

How to Import JetEngine Fields
To import JetEngine fields, navigate to All Import › New Import and start a new import process for the post type that contains the JetEngine fields. Use the JetEngine Add-On section and map the incoming data to their corresponding JetEngine fields.
JetEngine fields should be created and set to show for Posts in the field settings before you import their data.
Table of Contents
- Step 1: Create New JetEngine Fields Import
- Step 2: Check the Import File
- Step 3: Map Incoming Data Elements to JetEngine Fields
- Step 4: Configure Import Process
- Step 5: Run Import and Verify Imported JetEngine Fields
Advanced Topics
- Import to Custom Content Types (CCTs)
- Import JetEngine Relations
- Create Meta Boxes and Meta Fields in JetEngine
- What's The Difference Between JetEngine And ACF?
Step 1: Create New JetEngine Fields Import
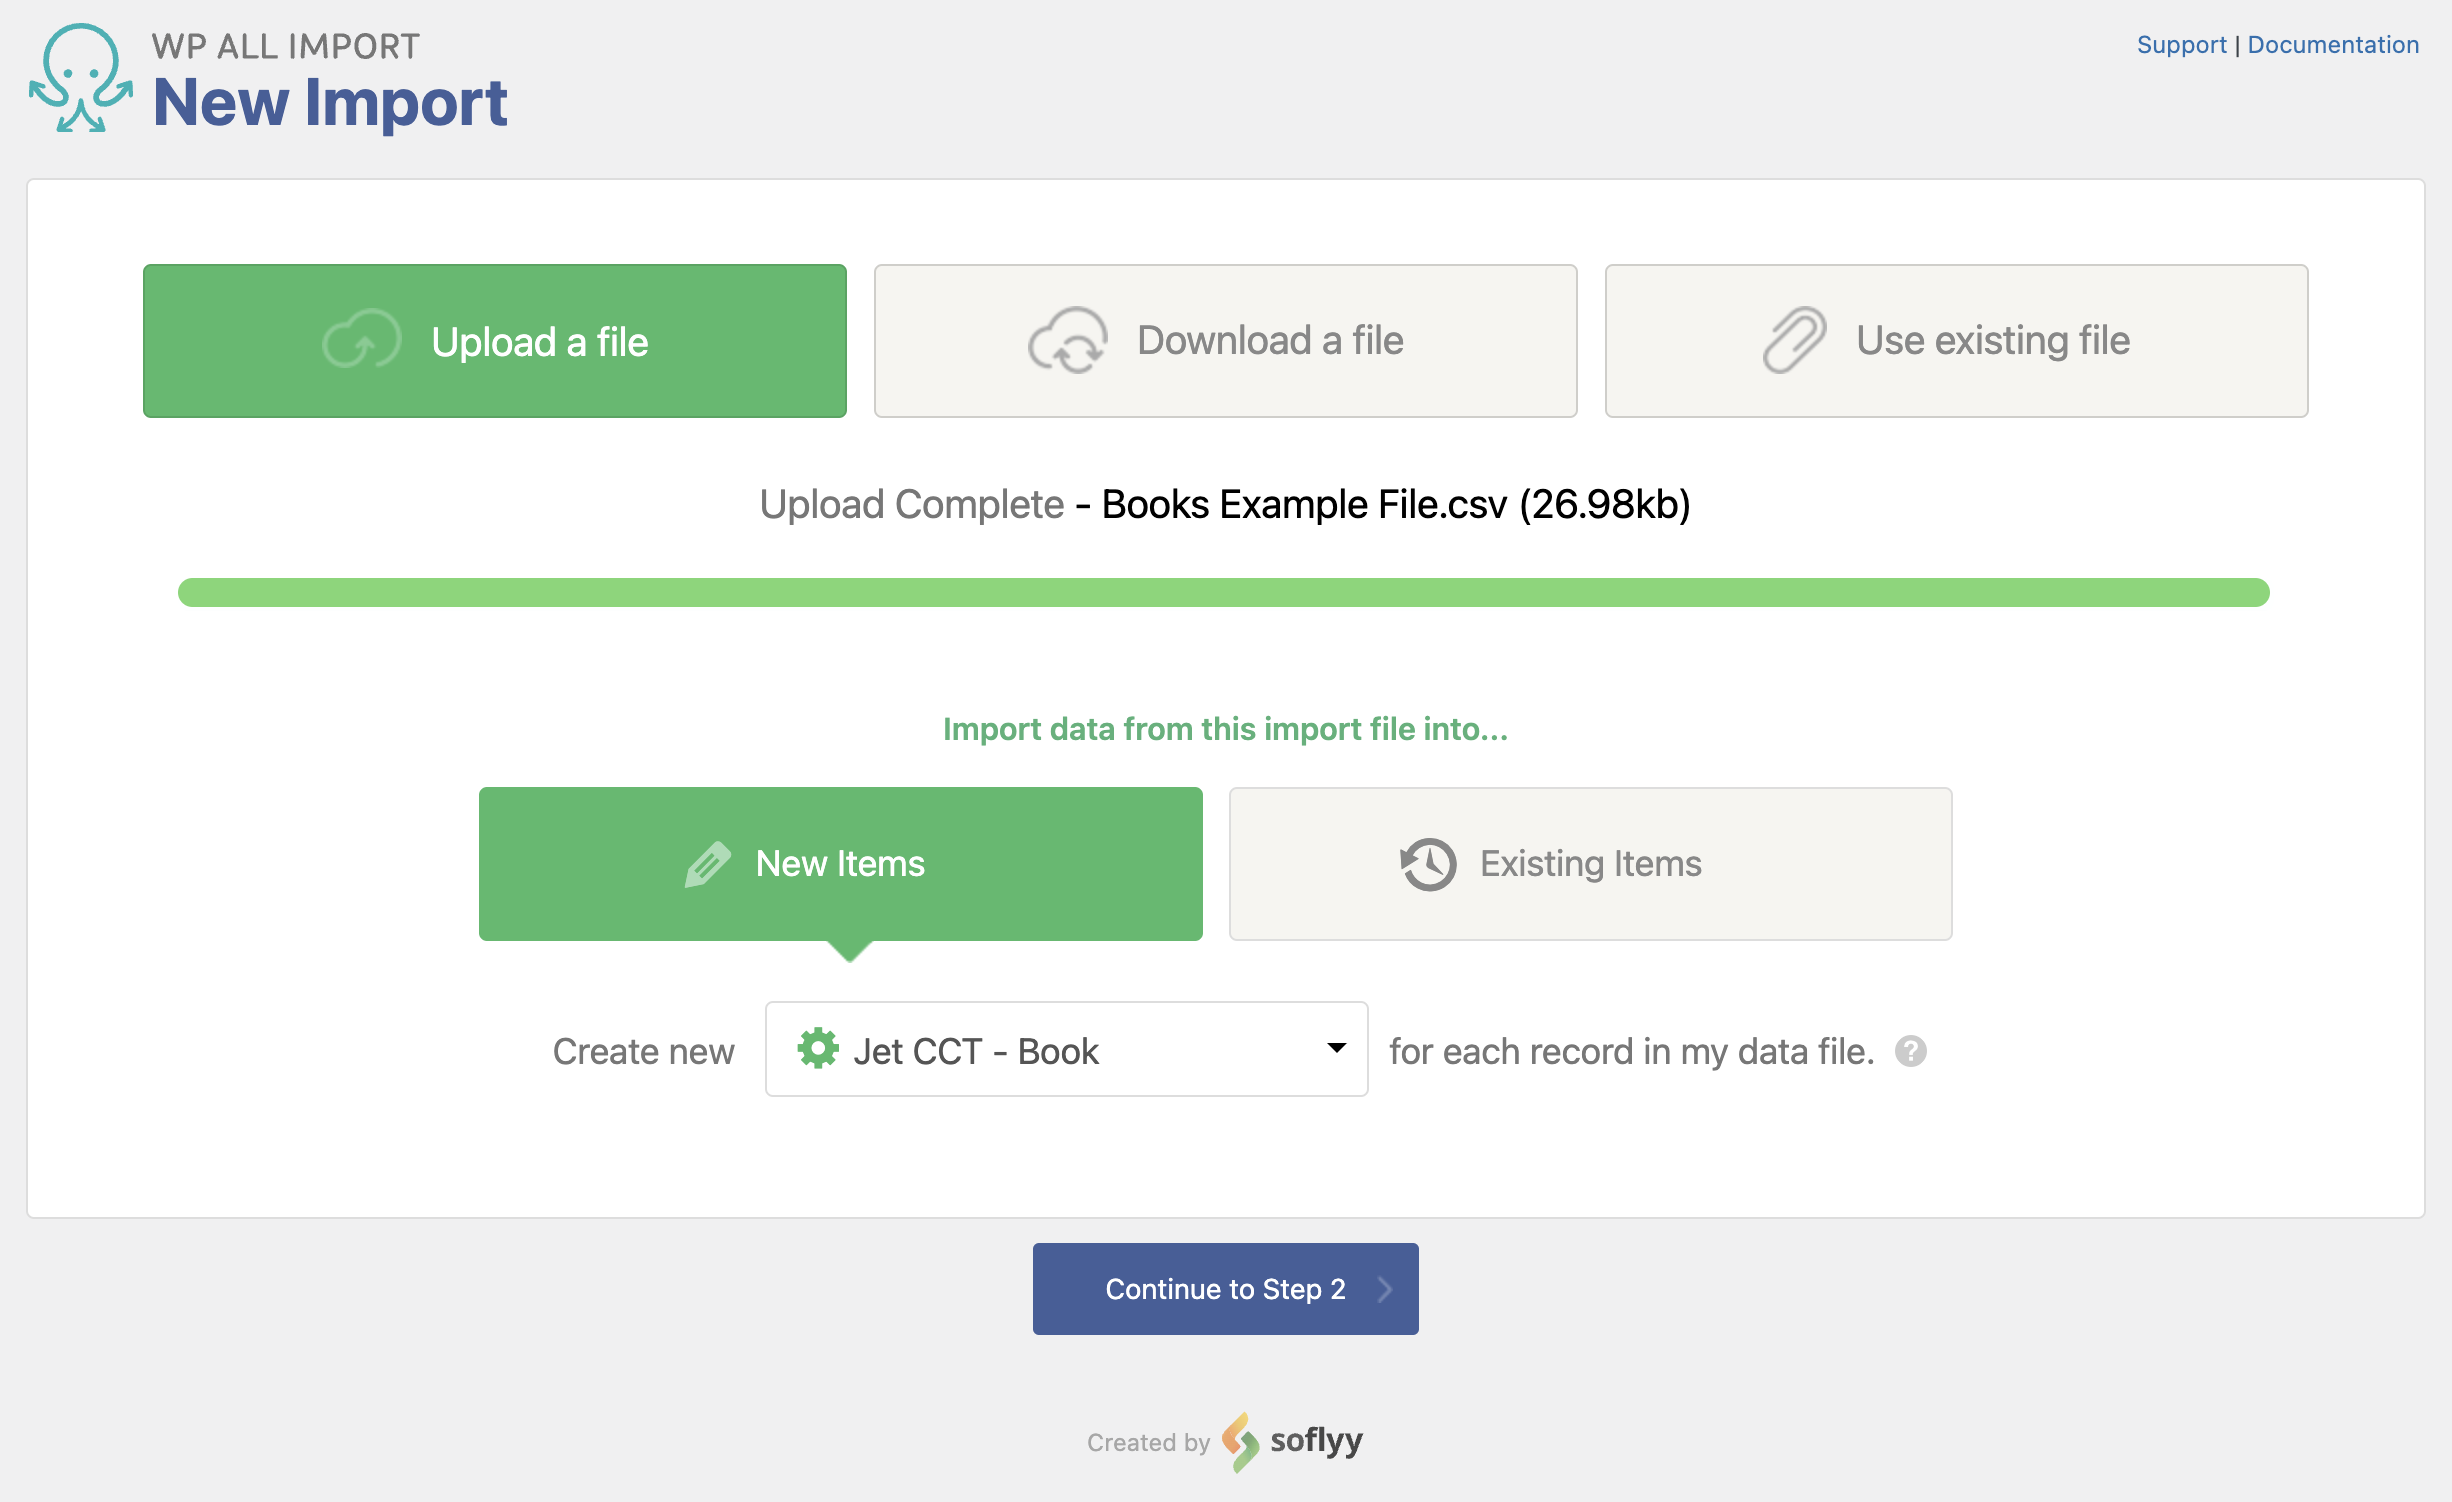
Navigate to All Import › New Import and provide a valid import file to WP All Import. Then, choose the post type with the attached JetEngine fields from the dropdown.
In this example, we're importing JetEngine fields to Posts.
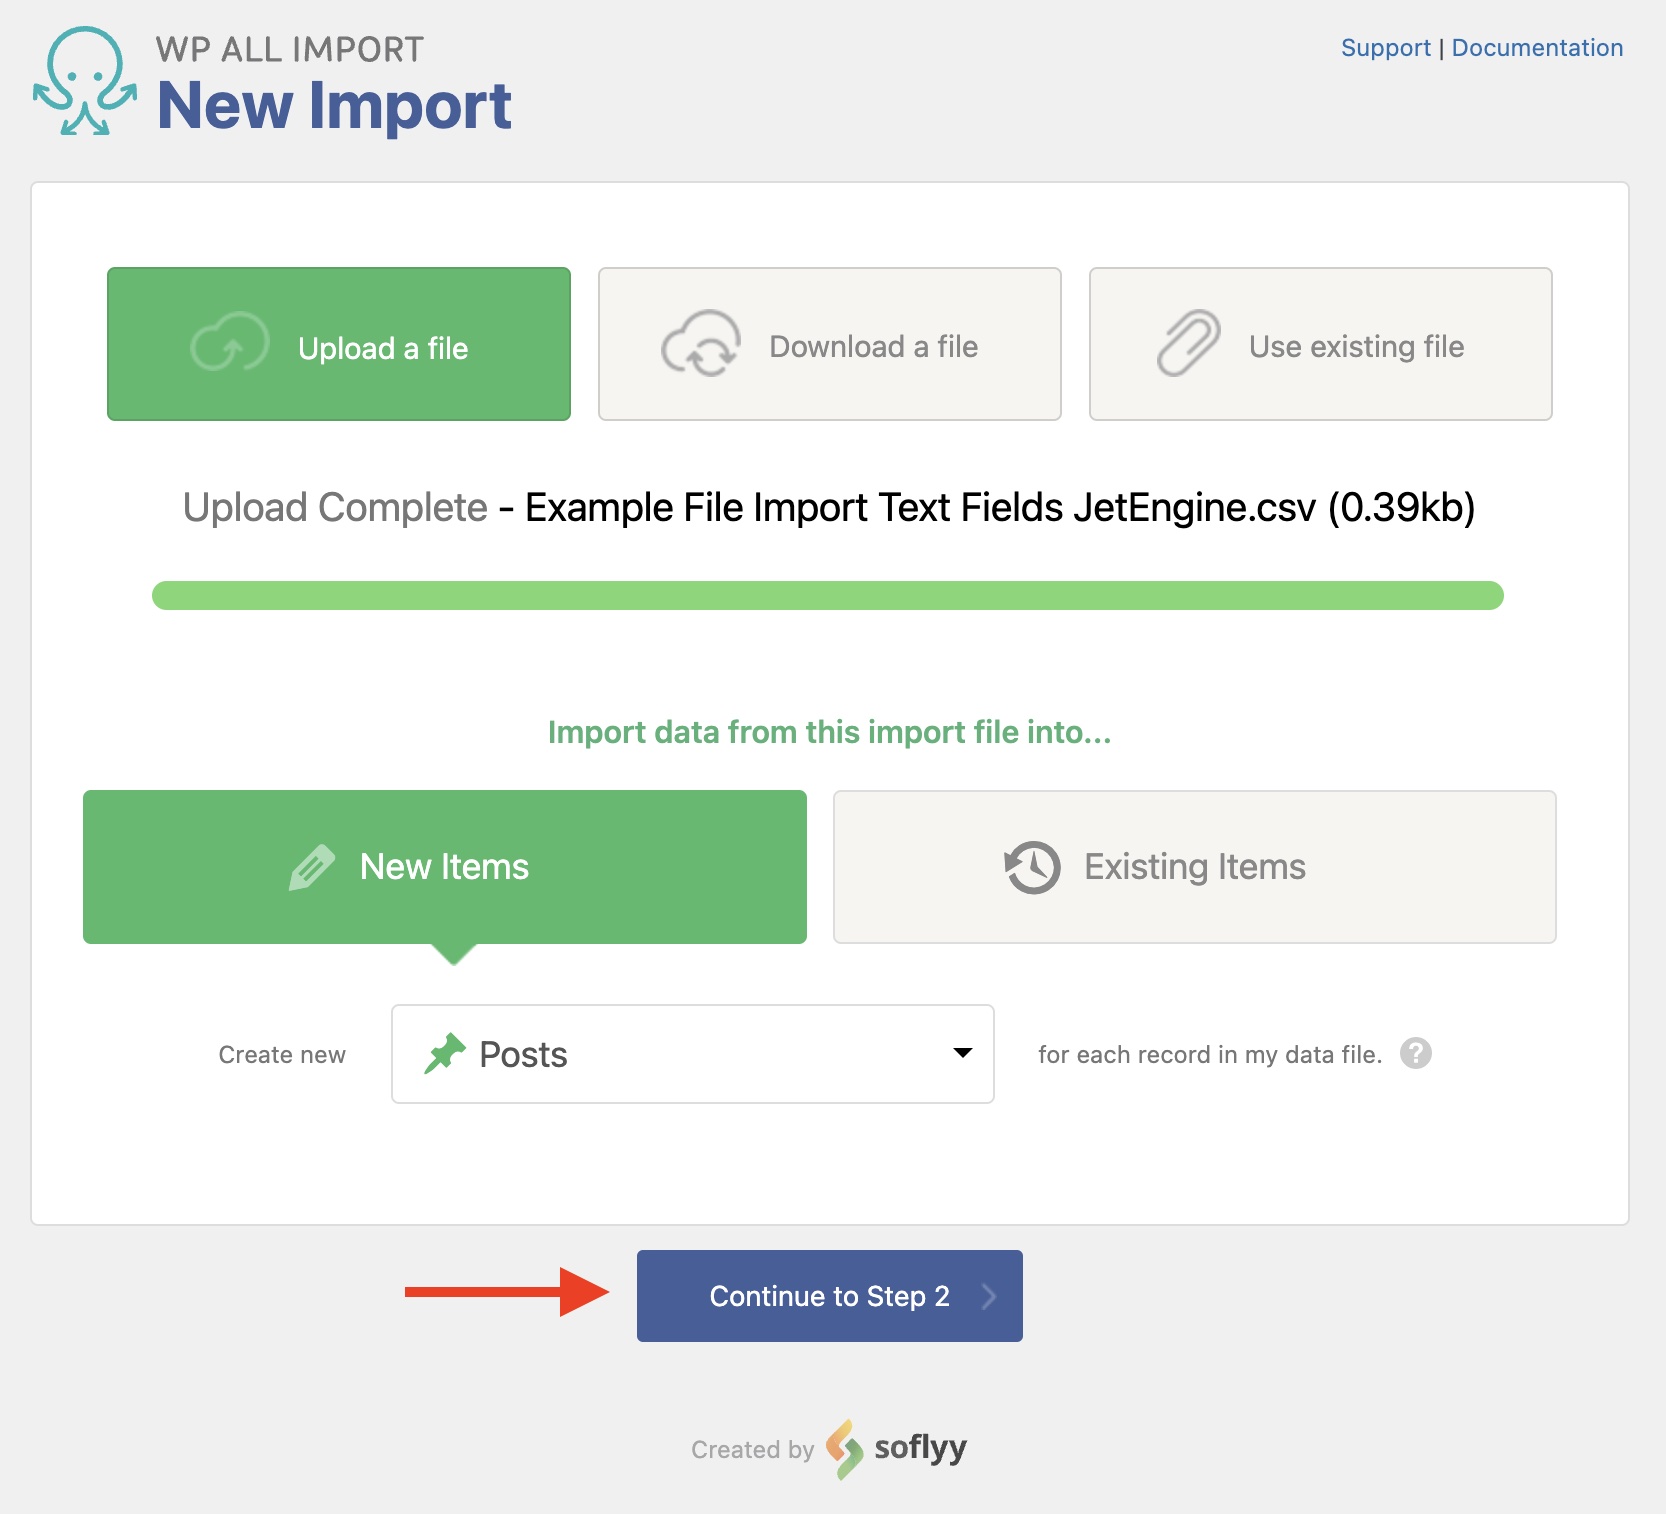
Click Continue to Step 2.
Step 2: Check the Import File
You now see the Review Import File, where you validate that the import file has been correctly interpreted.
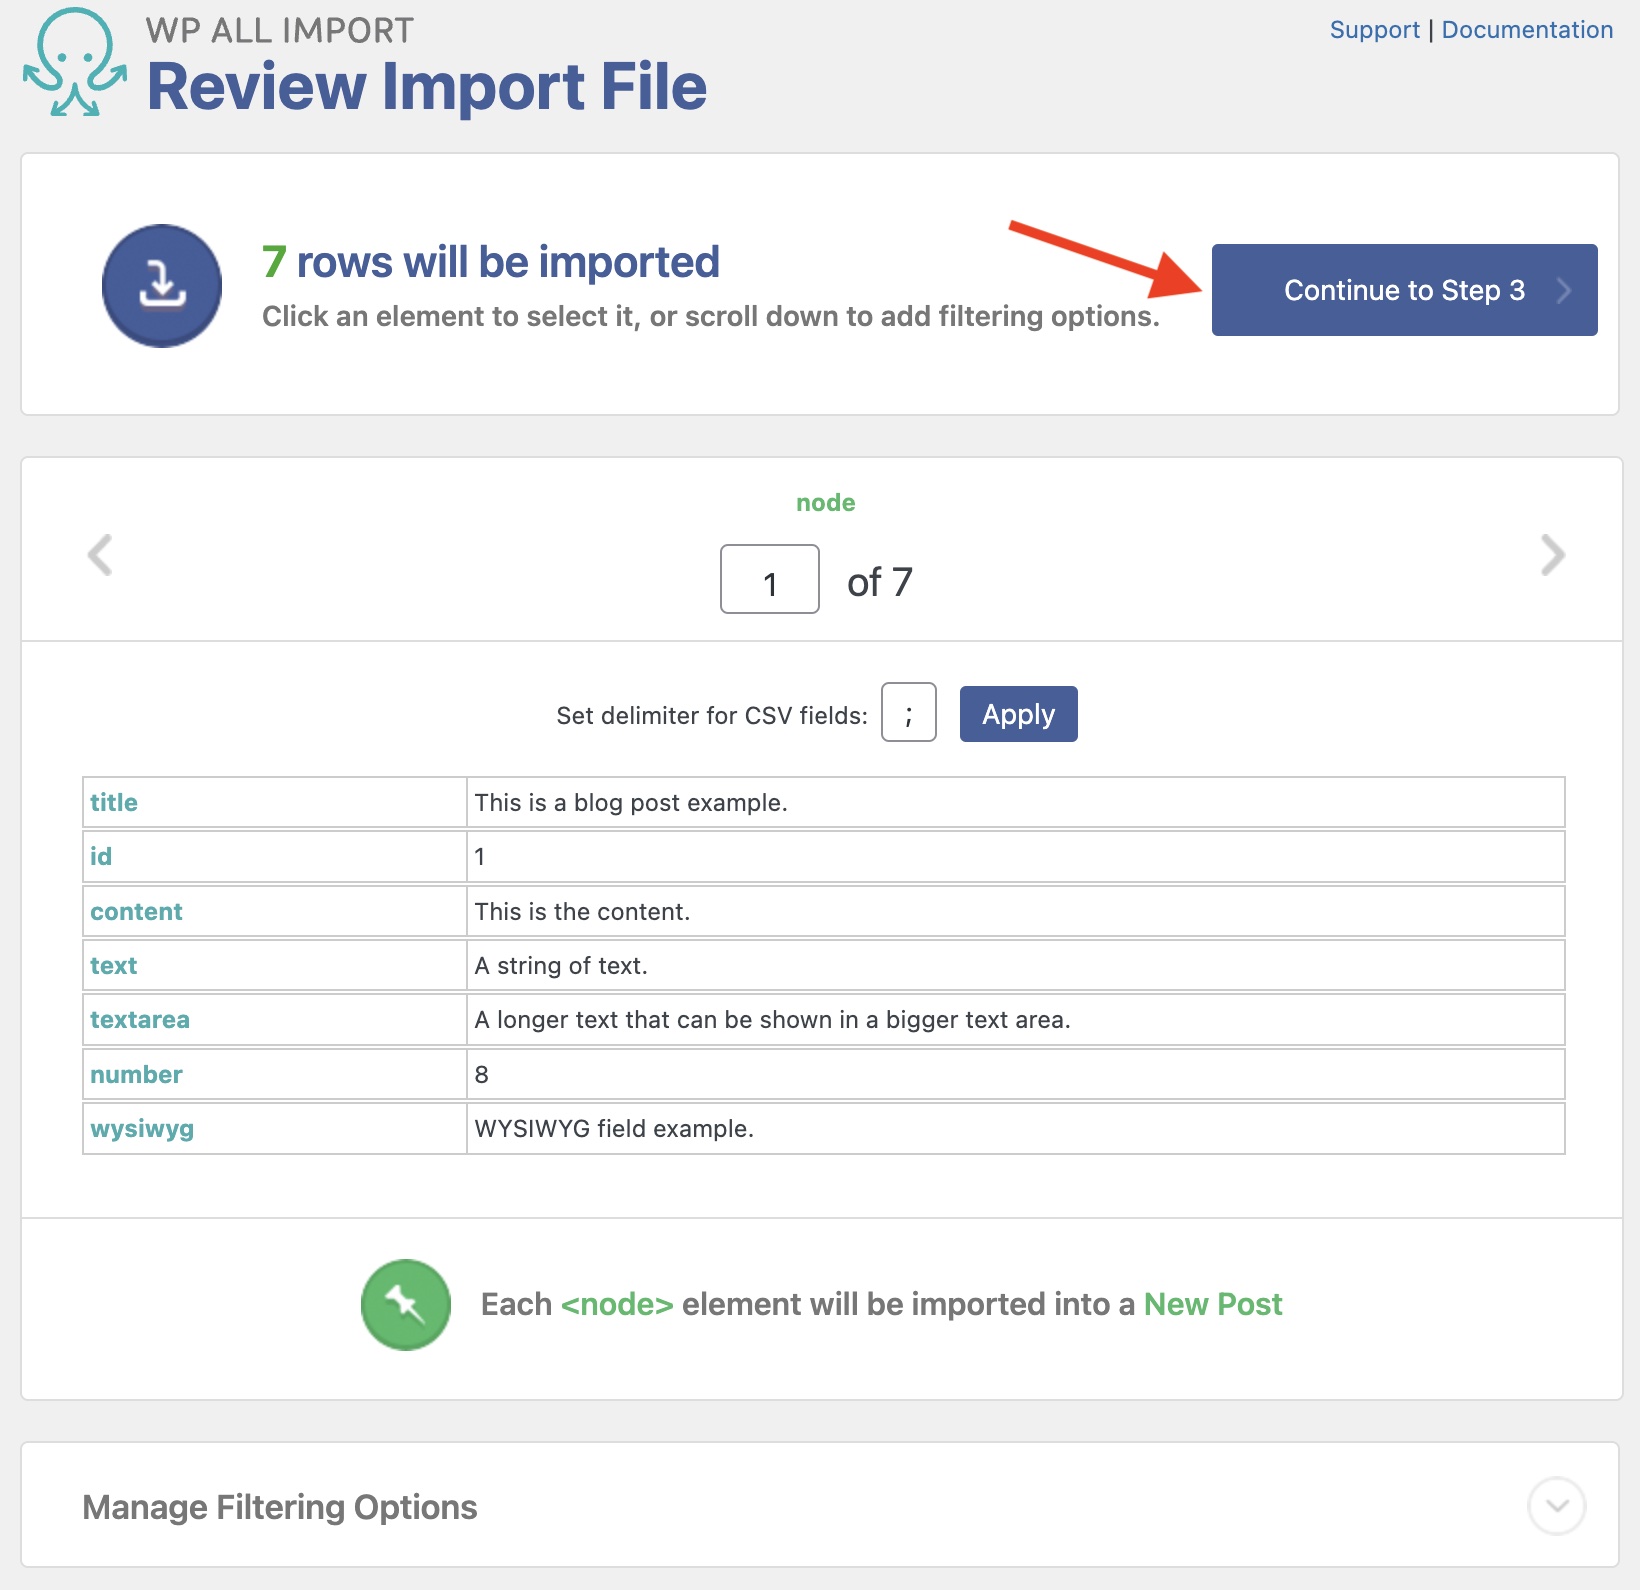
You can see the number of records recognized and browse through them. In this step, you can also add filters via the Manage Filtering Options section.
After reviewing your data, click Continue to Step 3.
Step 3: Map Incoming Data Elements to JetEngine Fields
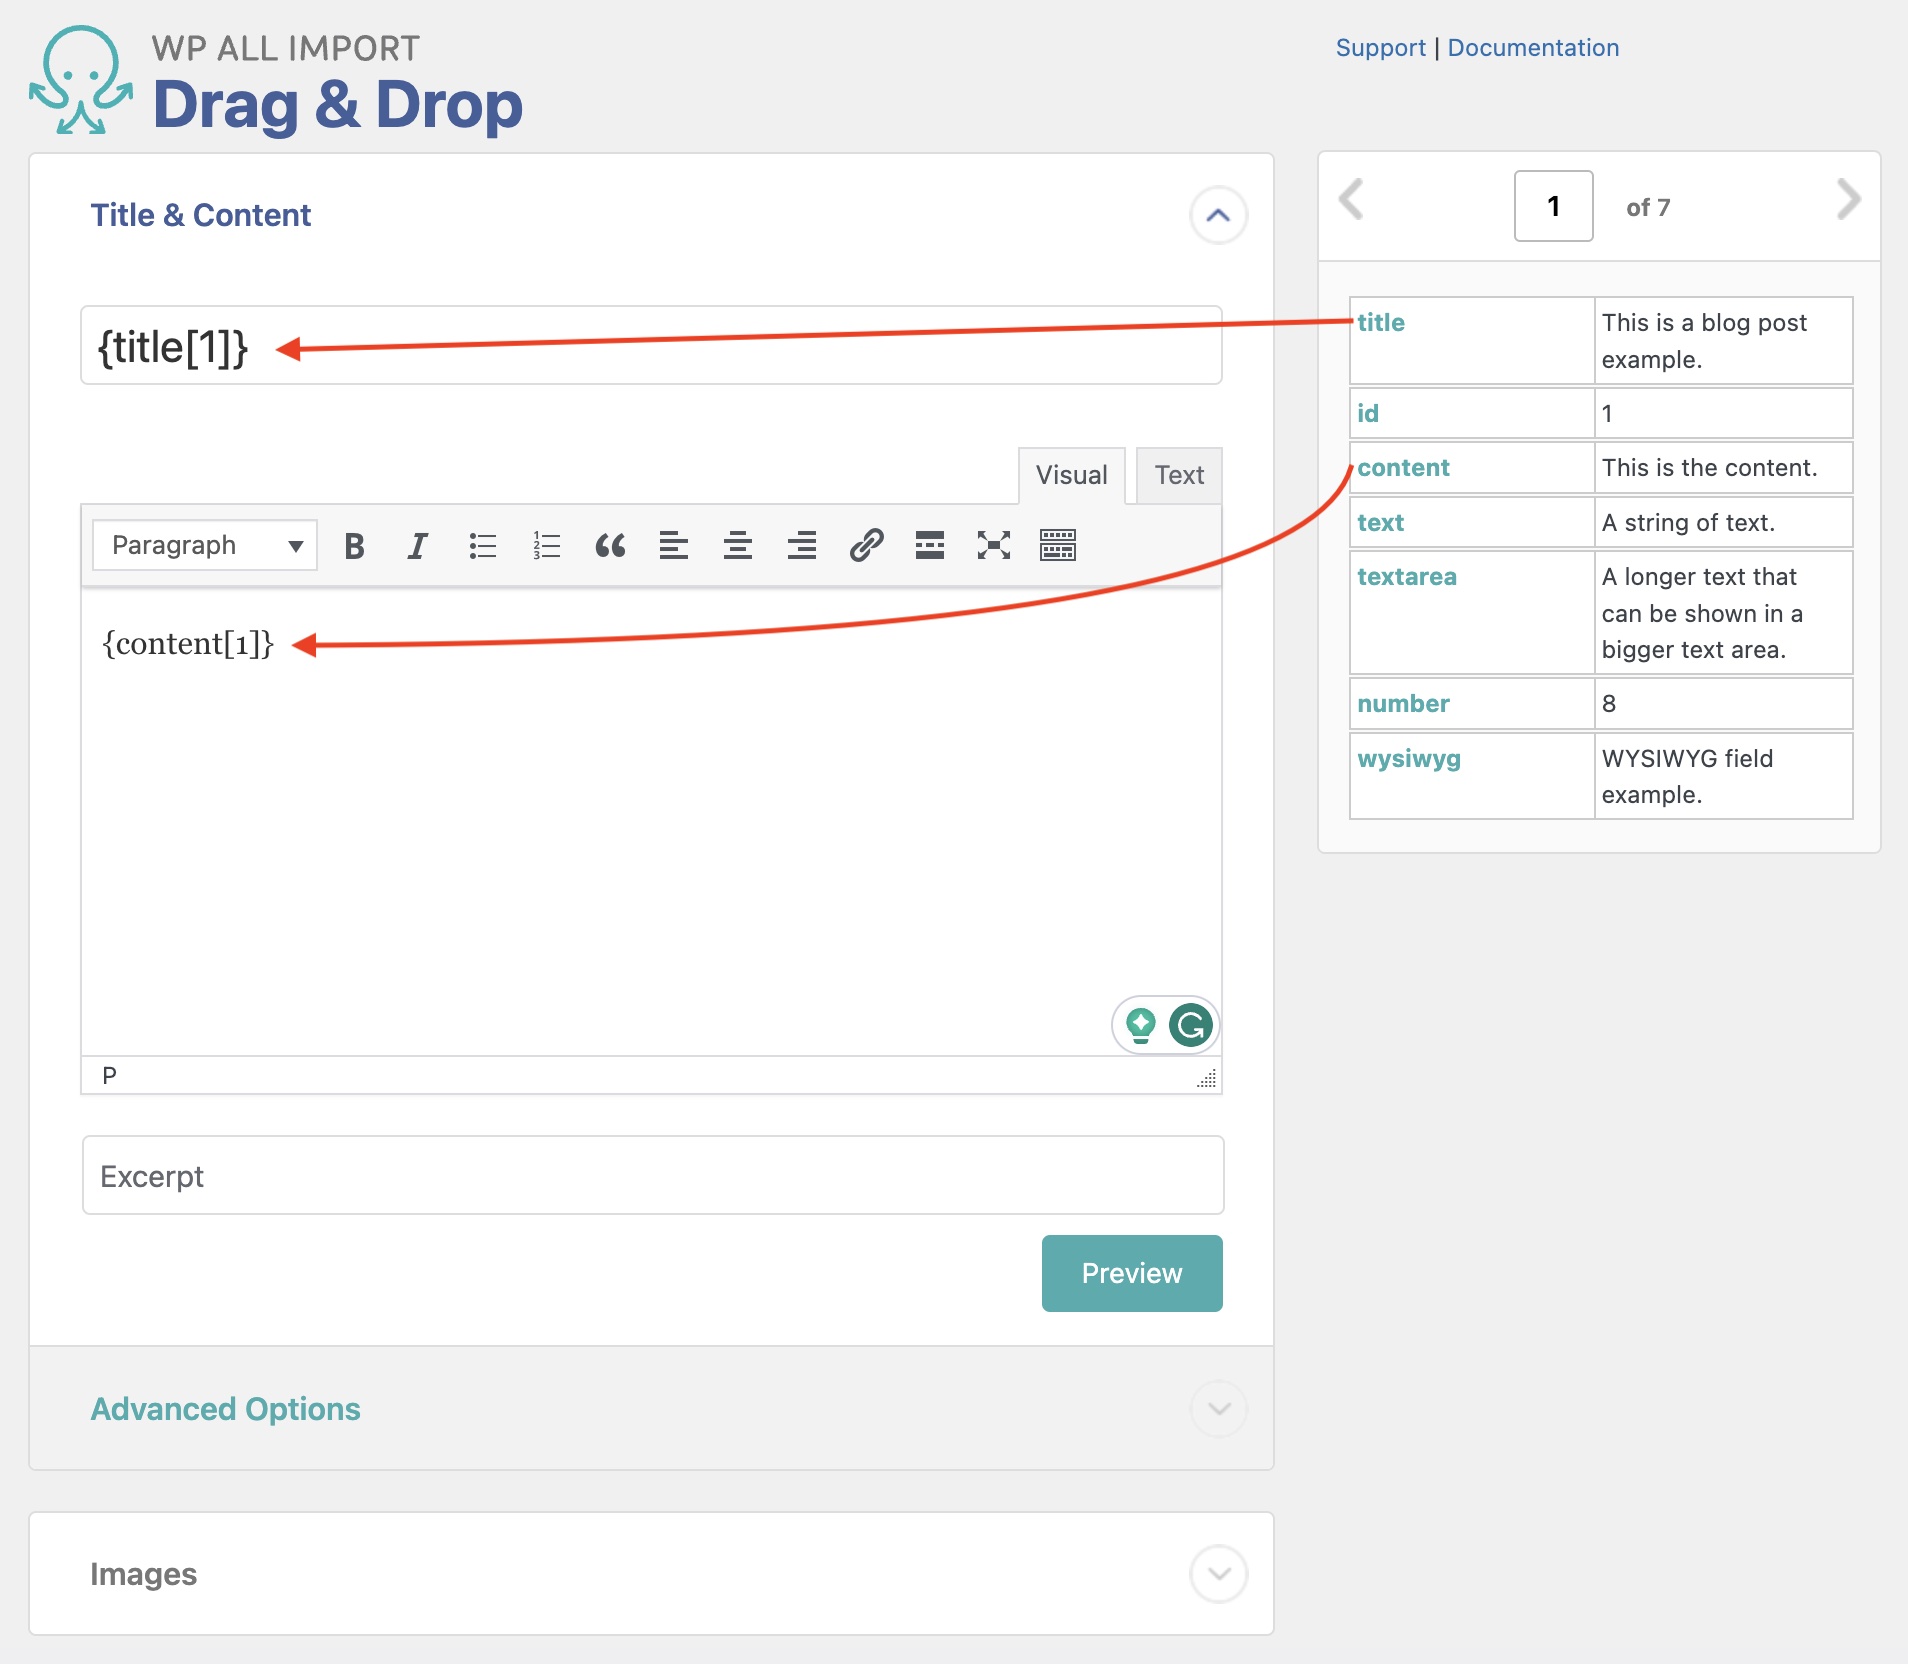
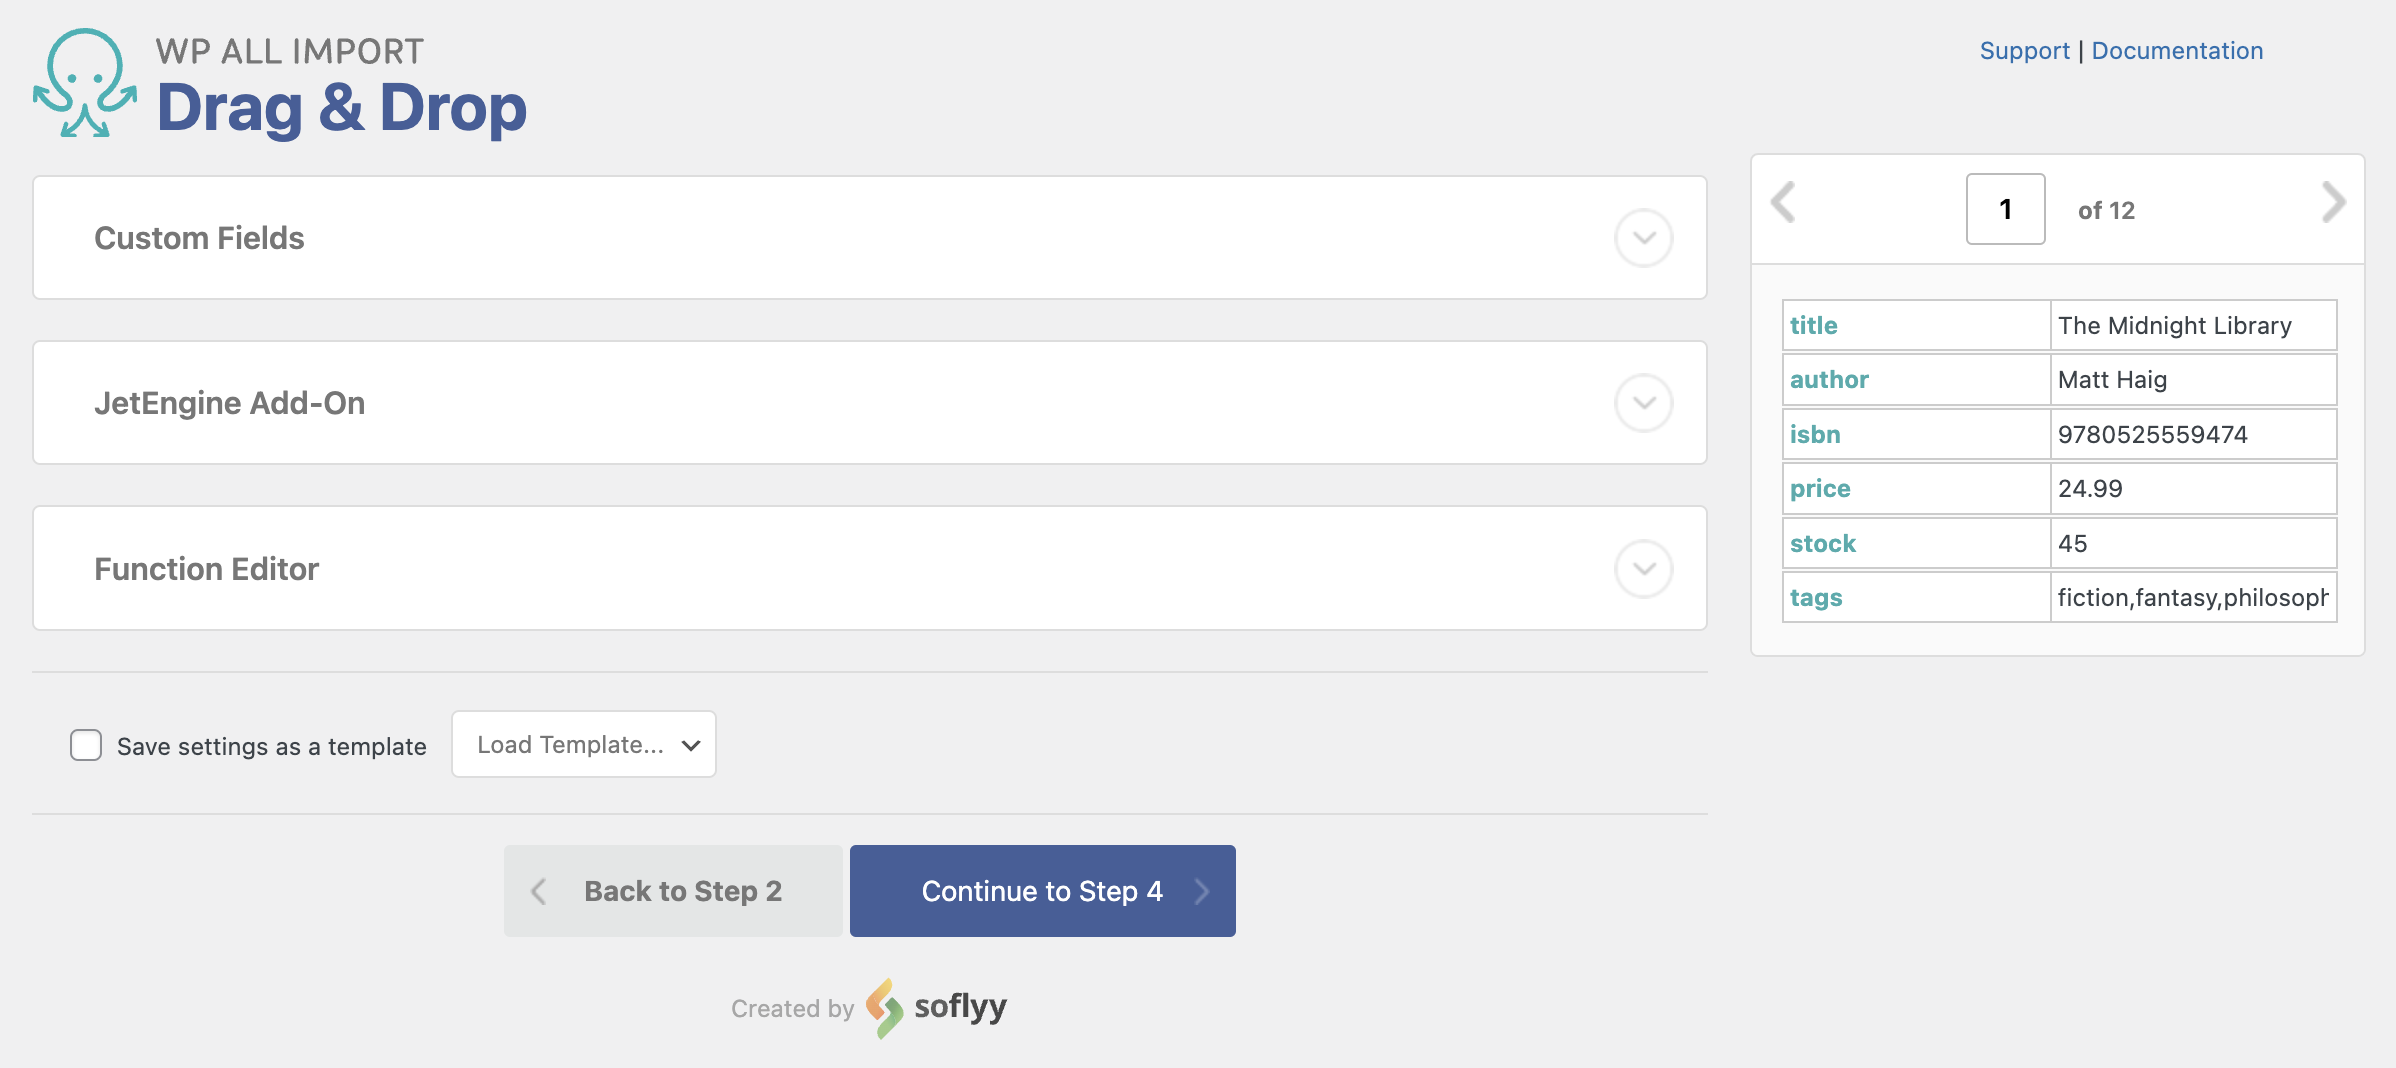
The Drag & Drop screen lets you map the import elements to their respective target fields on your site.
To map the data, move each relevant data item from the right panel to its matching field on the left.
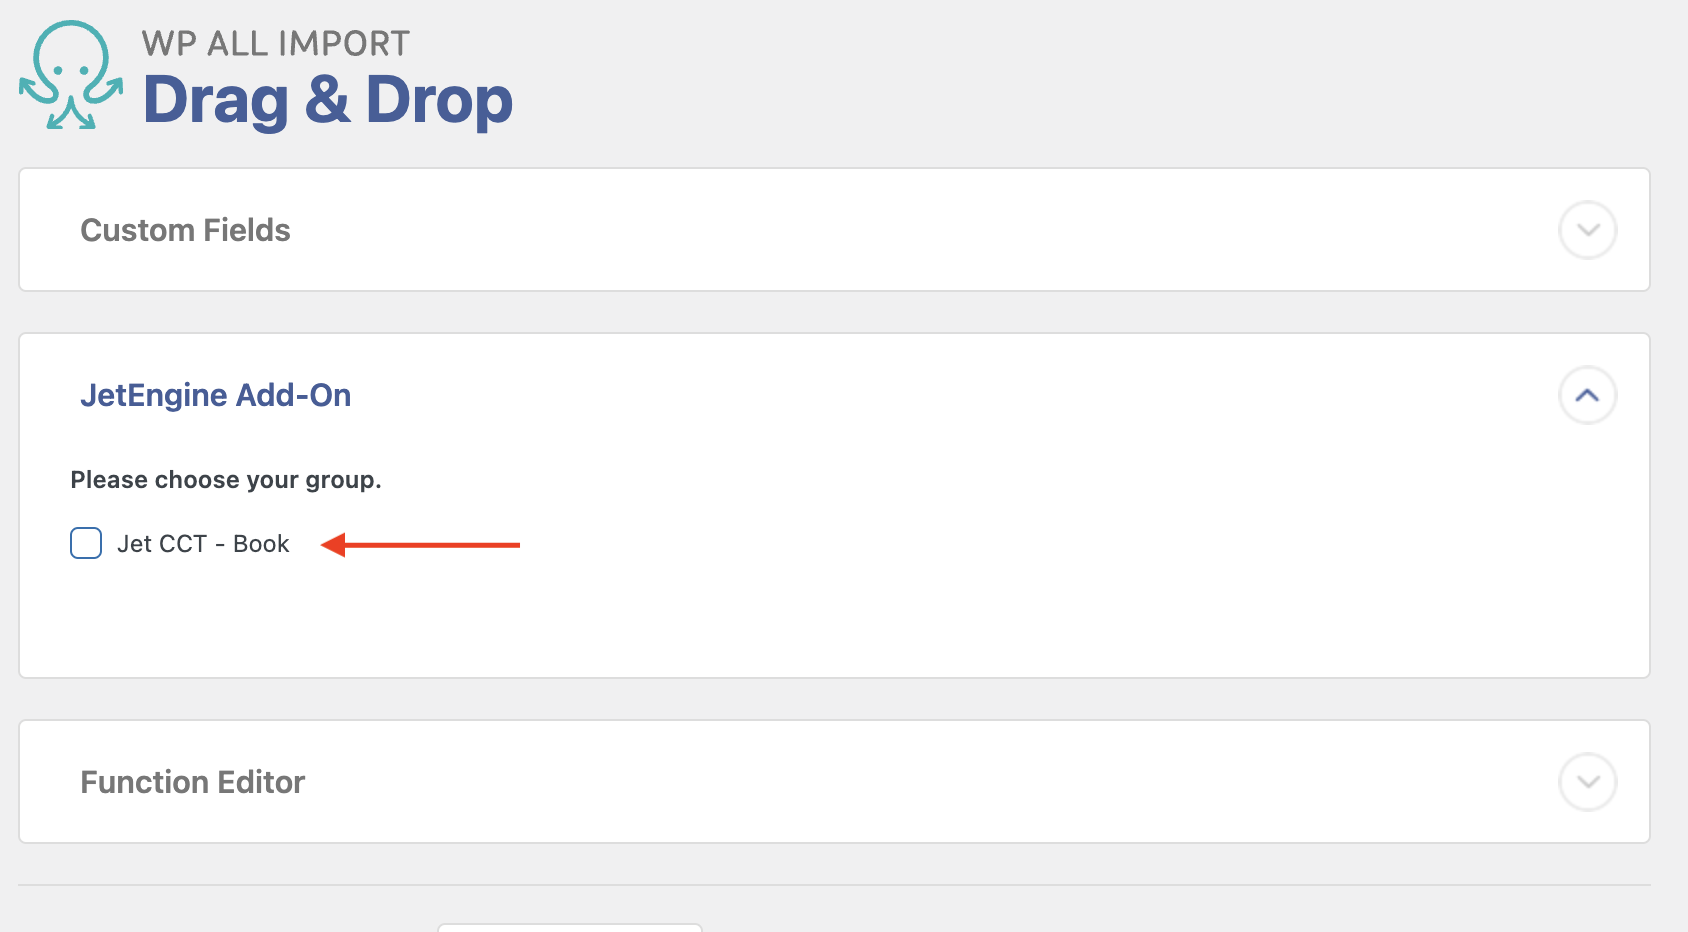
The JetEngine Add-On section is where you define the JetEngine fields. Locate that section:
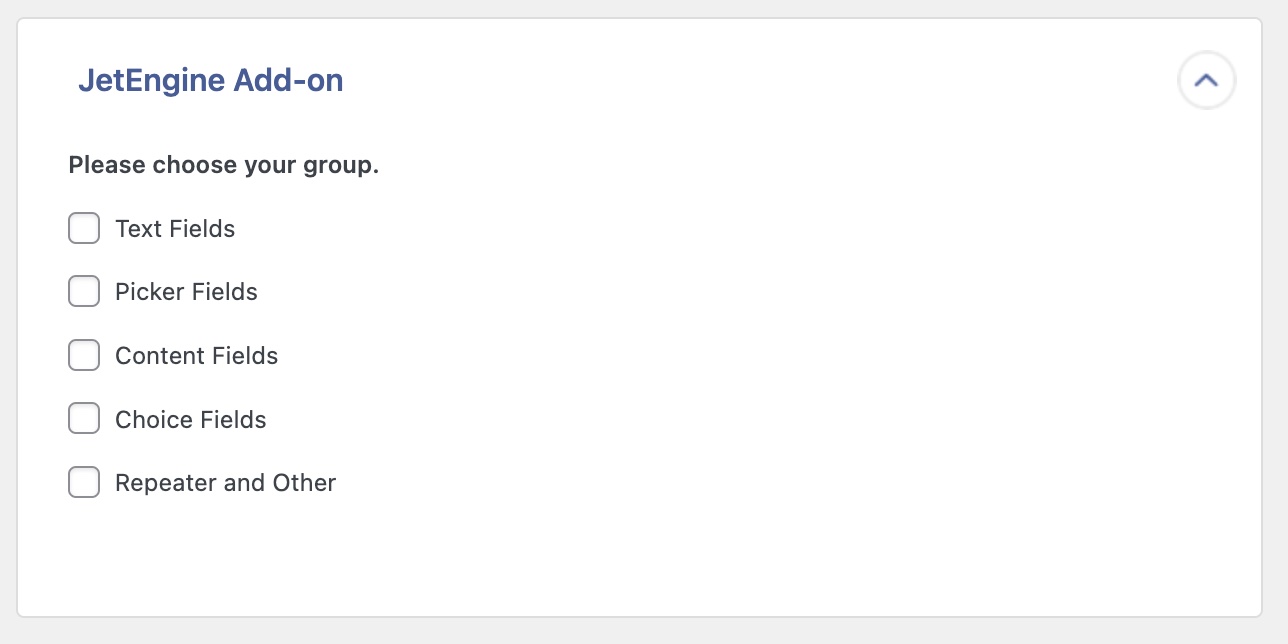
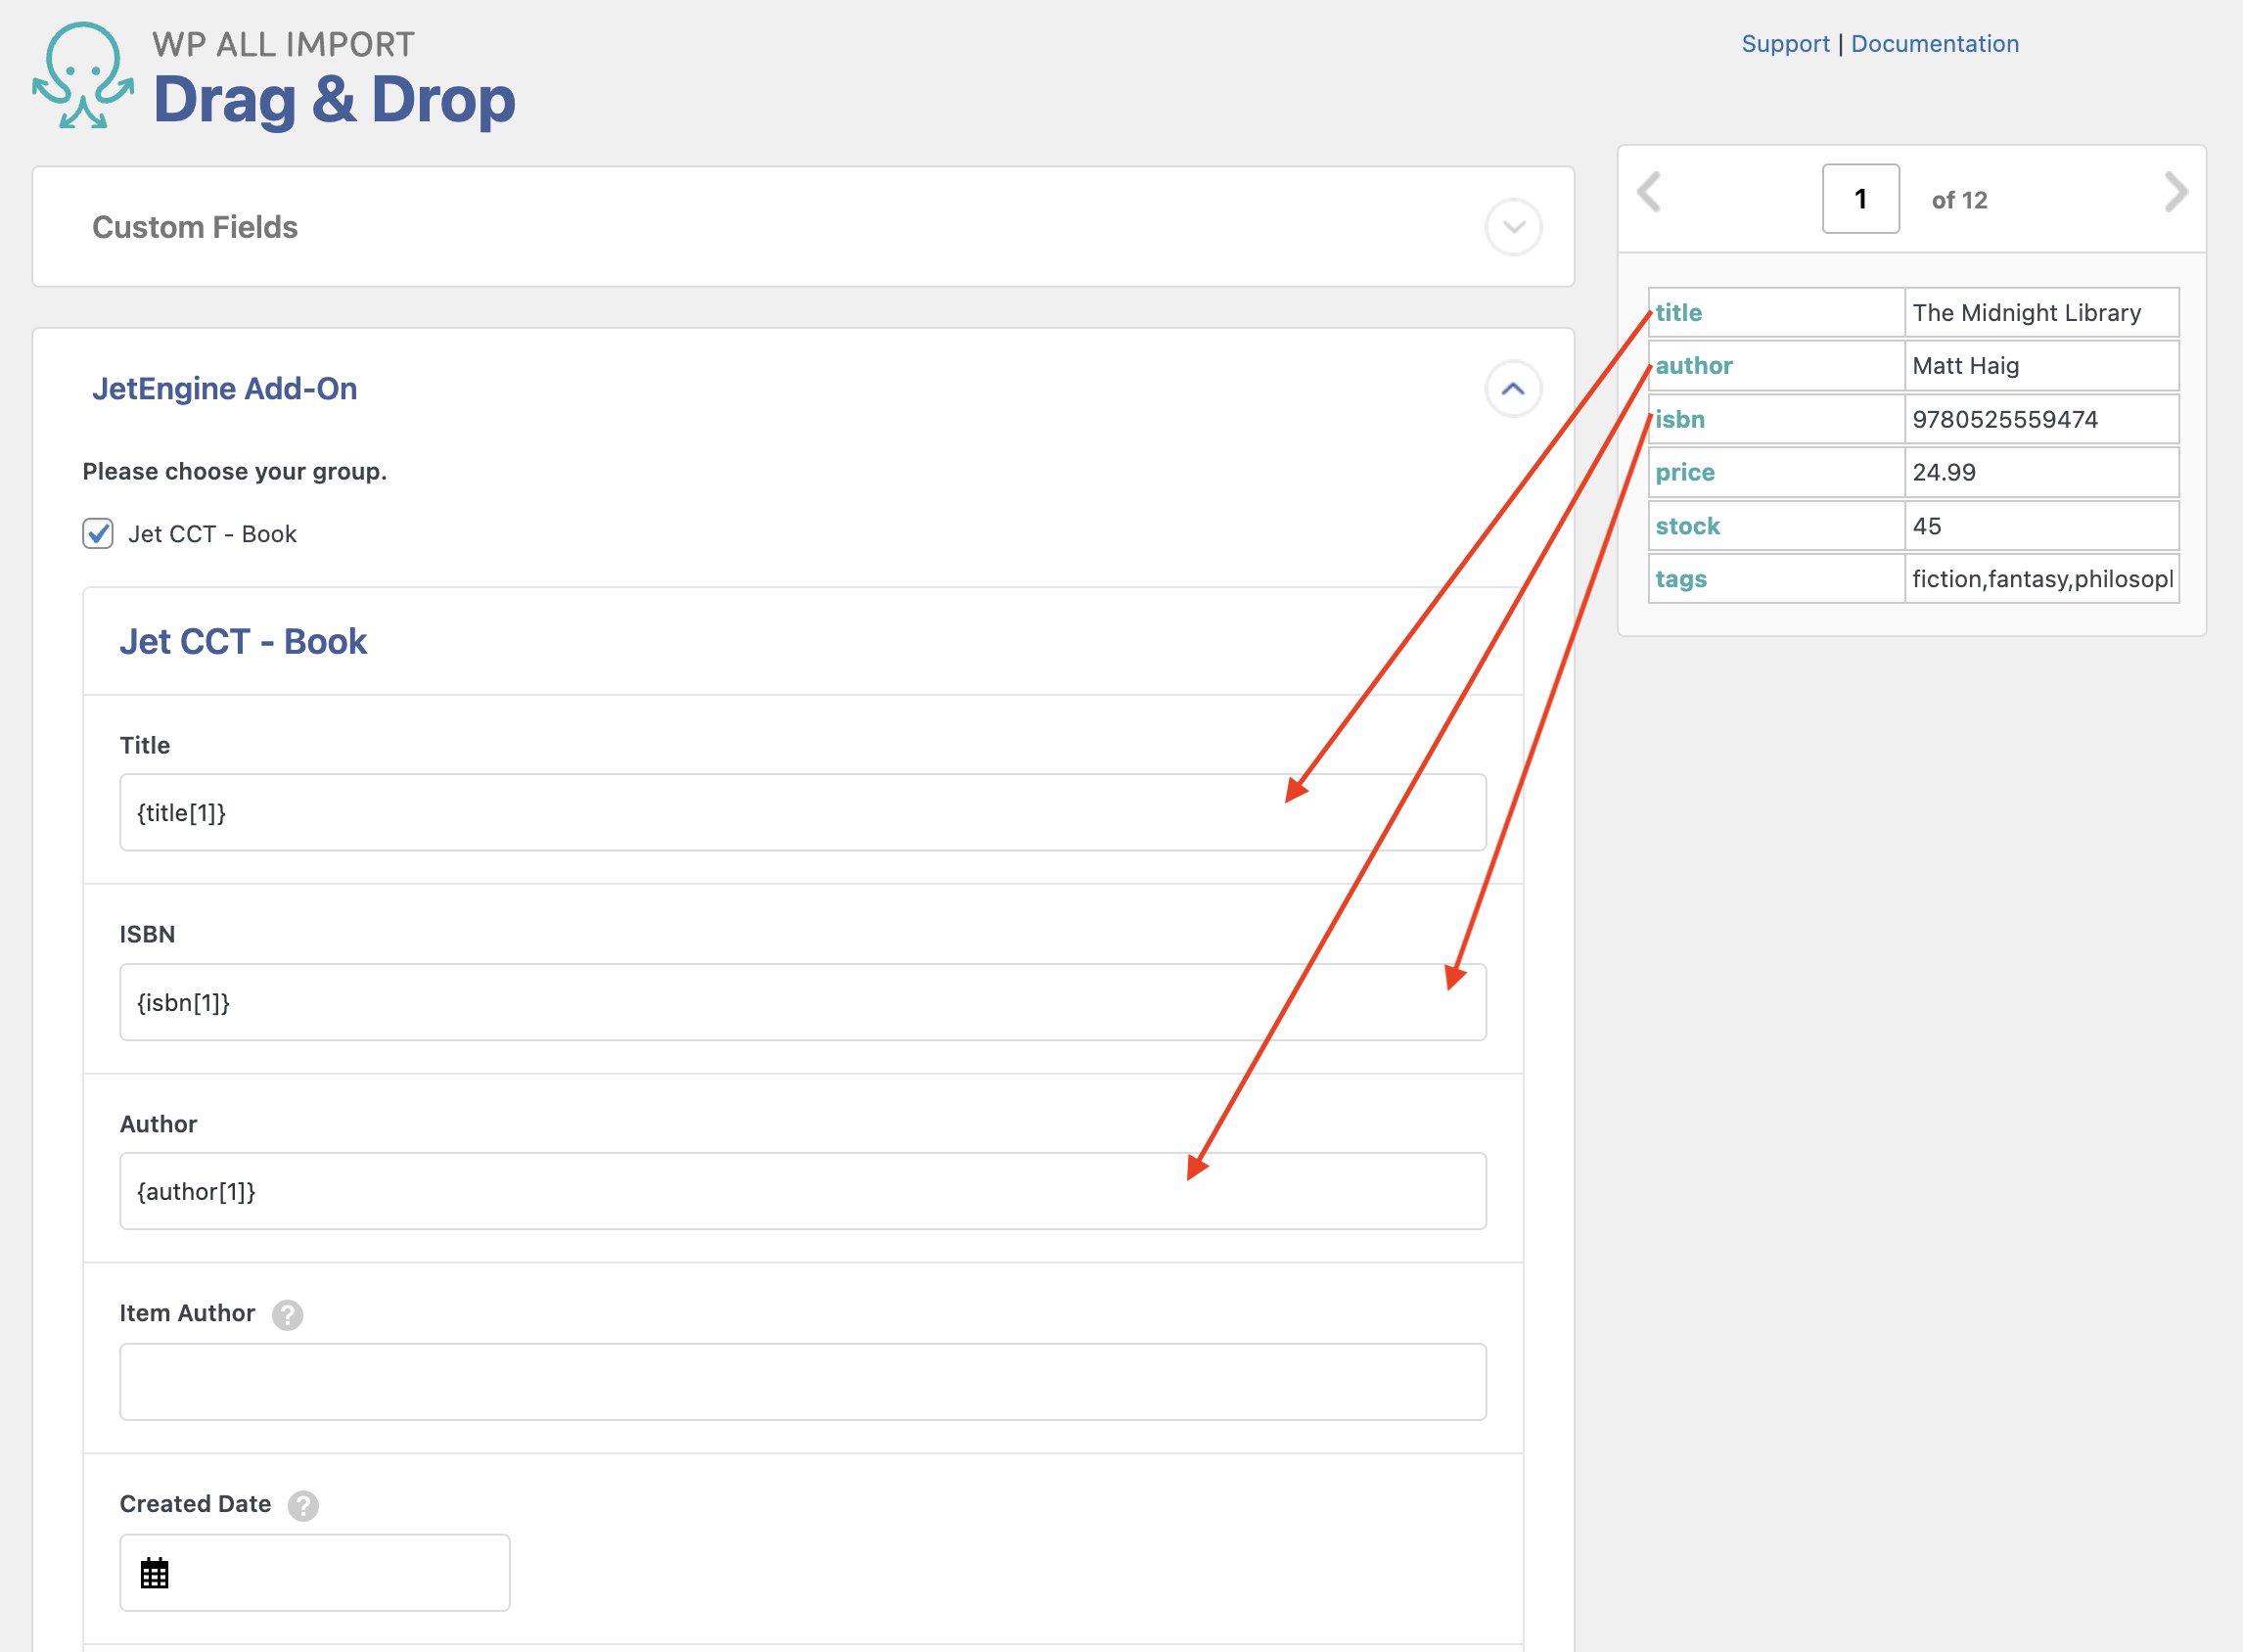
Enable the groups where you want to import the JetEngine fields, then map each field as required. For example, here are some example JetEngine fields:

Click Continue to Step 4 (not shown) at the bottom once you've finished mapping all the import fields.
If you need to make changes to the import template, you can do so afterward via All Import › Manage Imports › Edit Template.
Step 4: Configure Import Process
Next, you see the Import Settings interface, where the remaining import settings and other options can be set up:
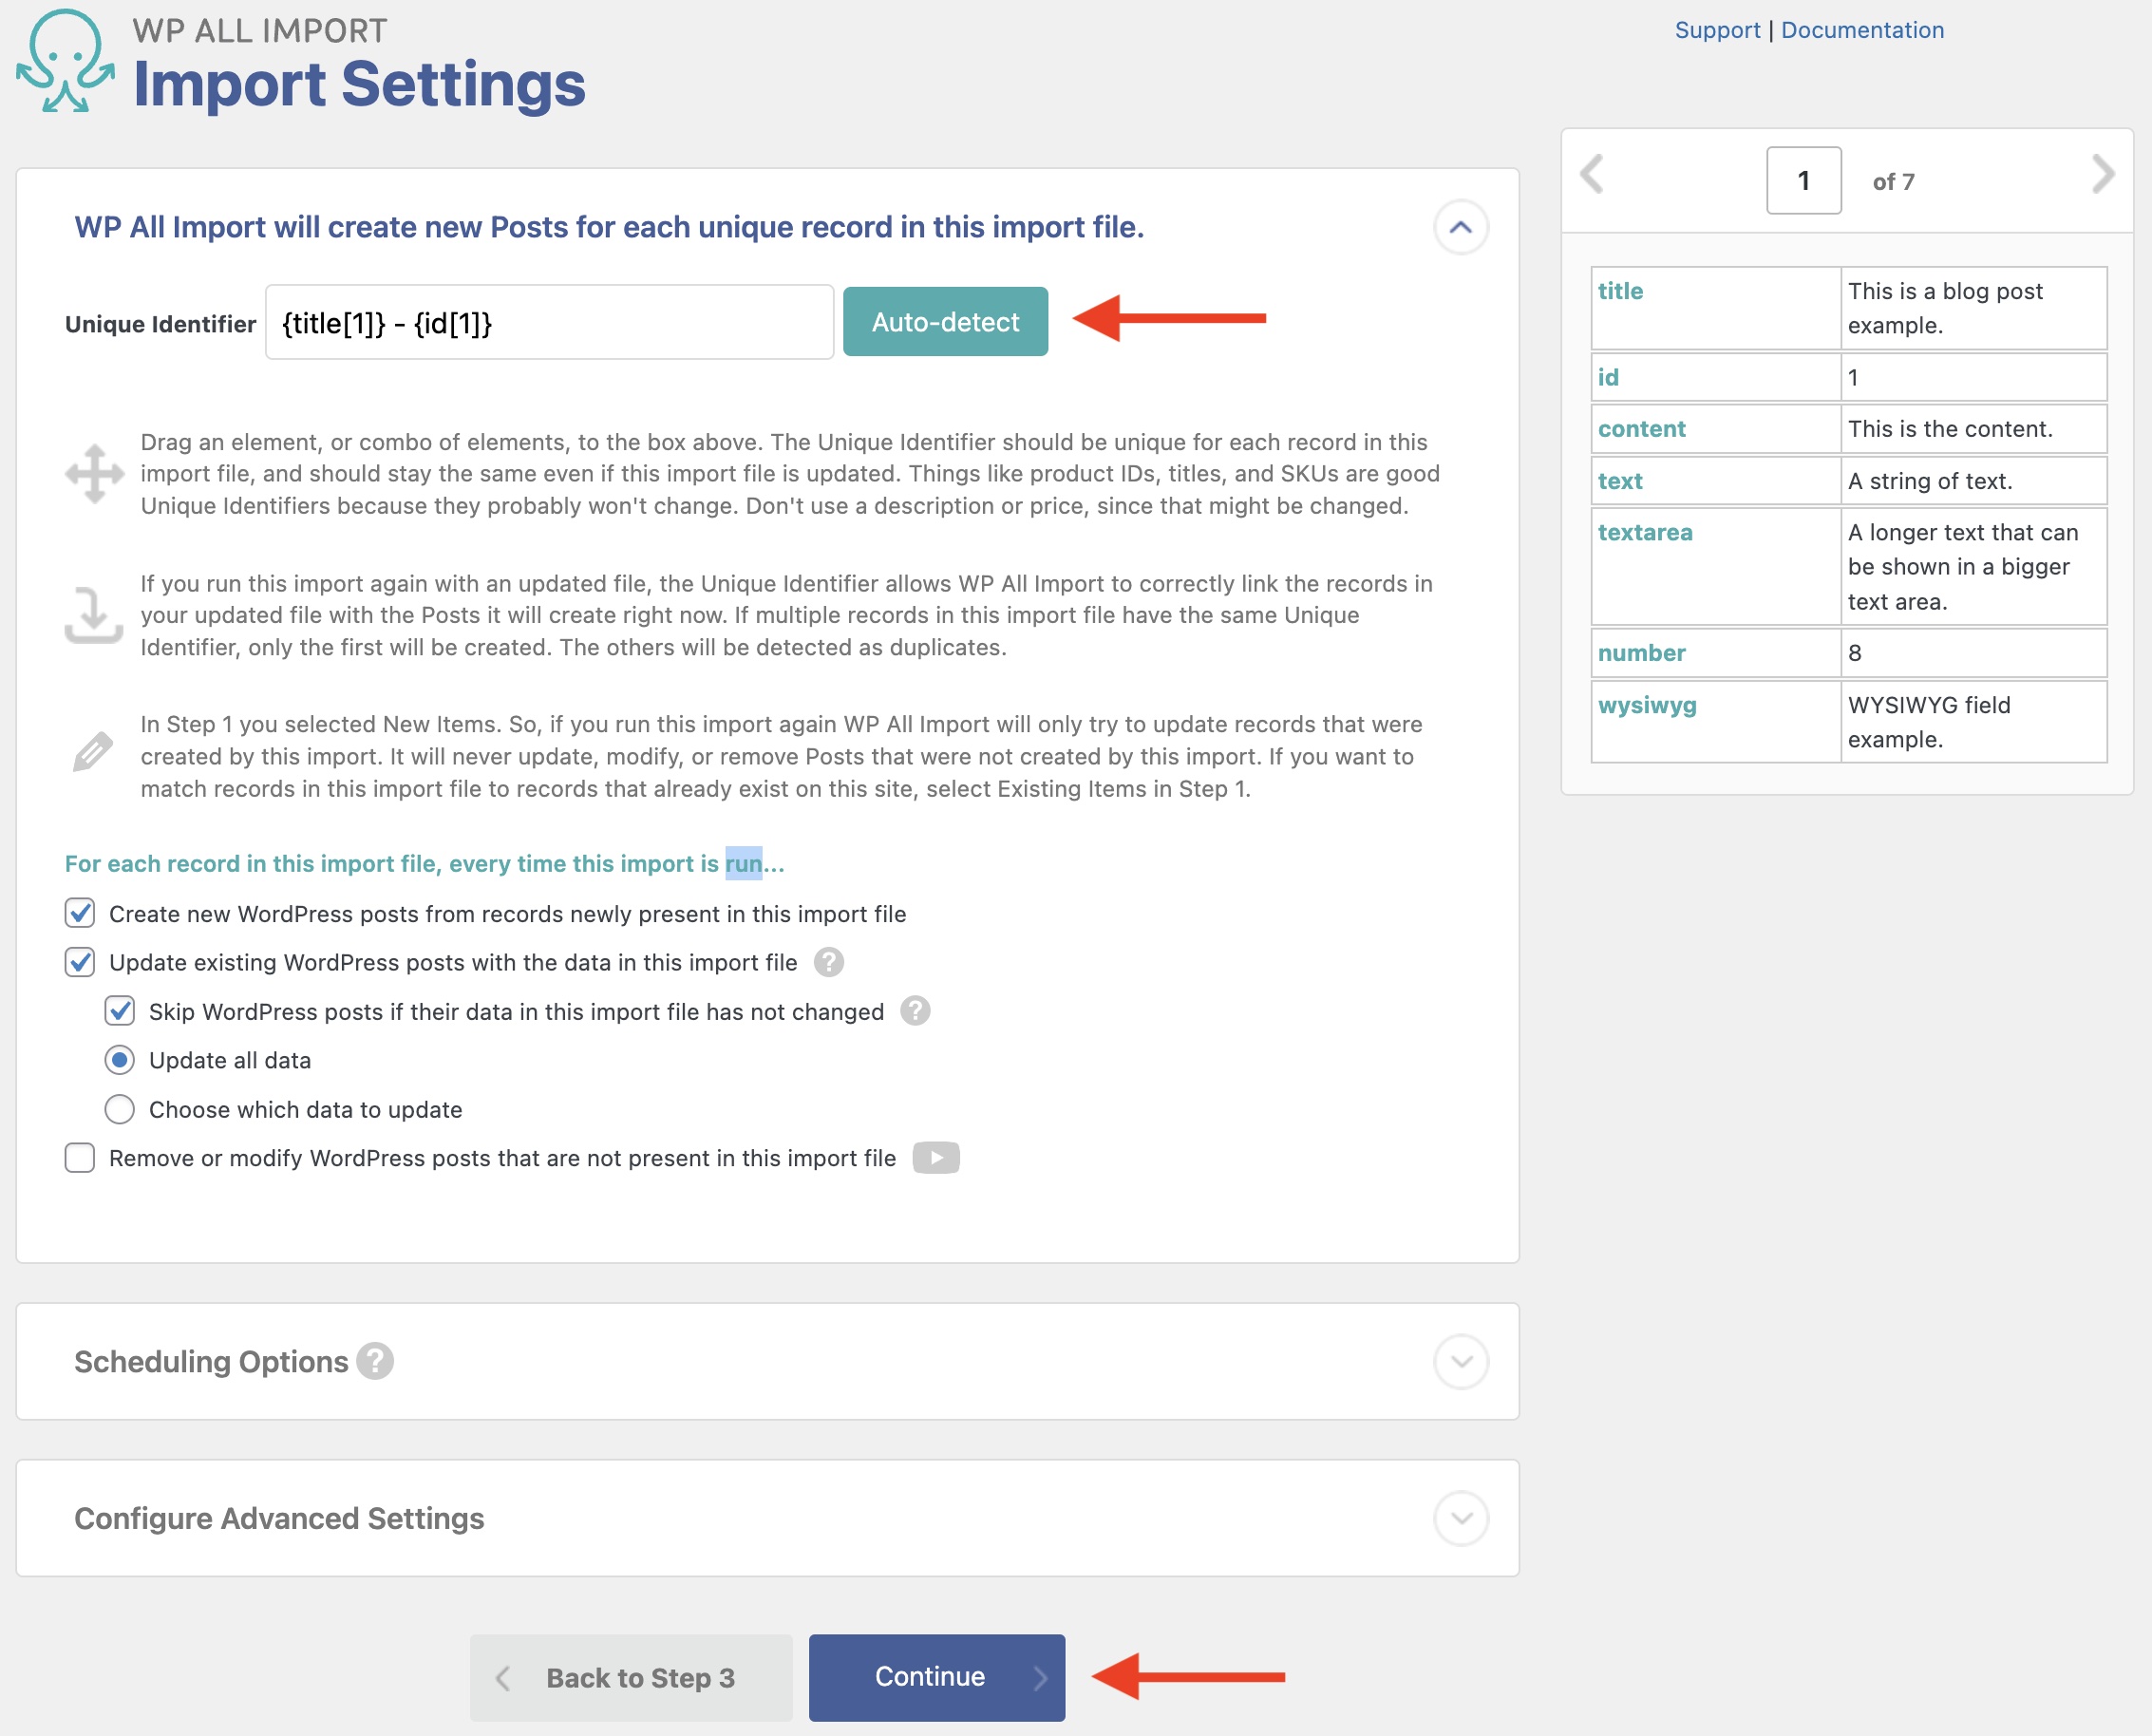
In this step, you need to define a Unique Identifier for your import process. This is used internally to keep track of records.
To do this, just click on Auto-detect. You can also define this using import fields.
You also have the option in this section to adjust how the import behaves on subsequent runs, i.e., whether to update, remove, or add new records from the import file. You can establish Scheduling Options and delve into Configure Advanced Settings. For many imports, adjustments here aren't typically necessary.
To proceed, click the blue Continue button at the bottom.
Step 5: Run Import and Verify Imported JetEngine Fields
You now see the Confirm & Run interface, along with an Import Summary section where you can review what the import will do.
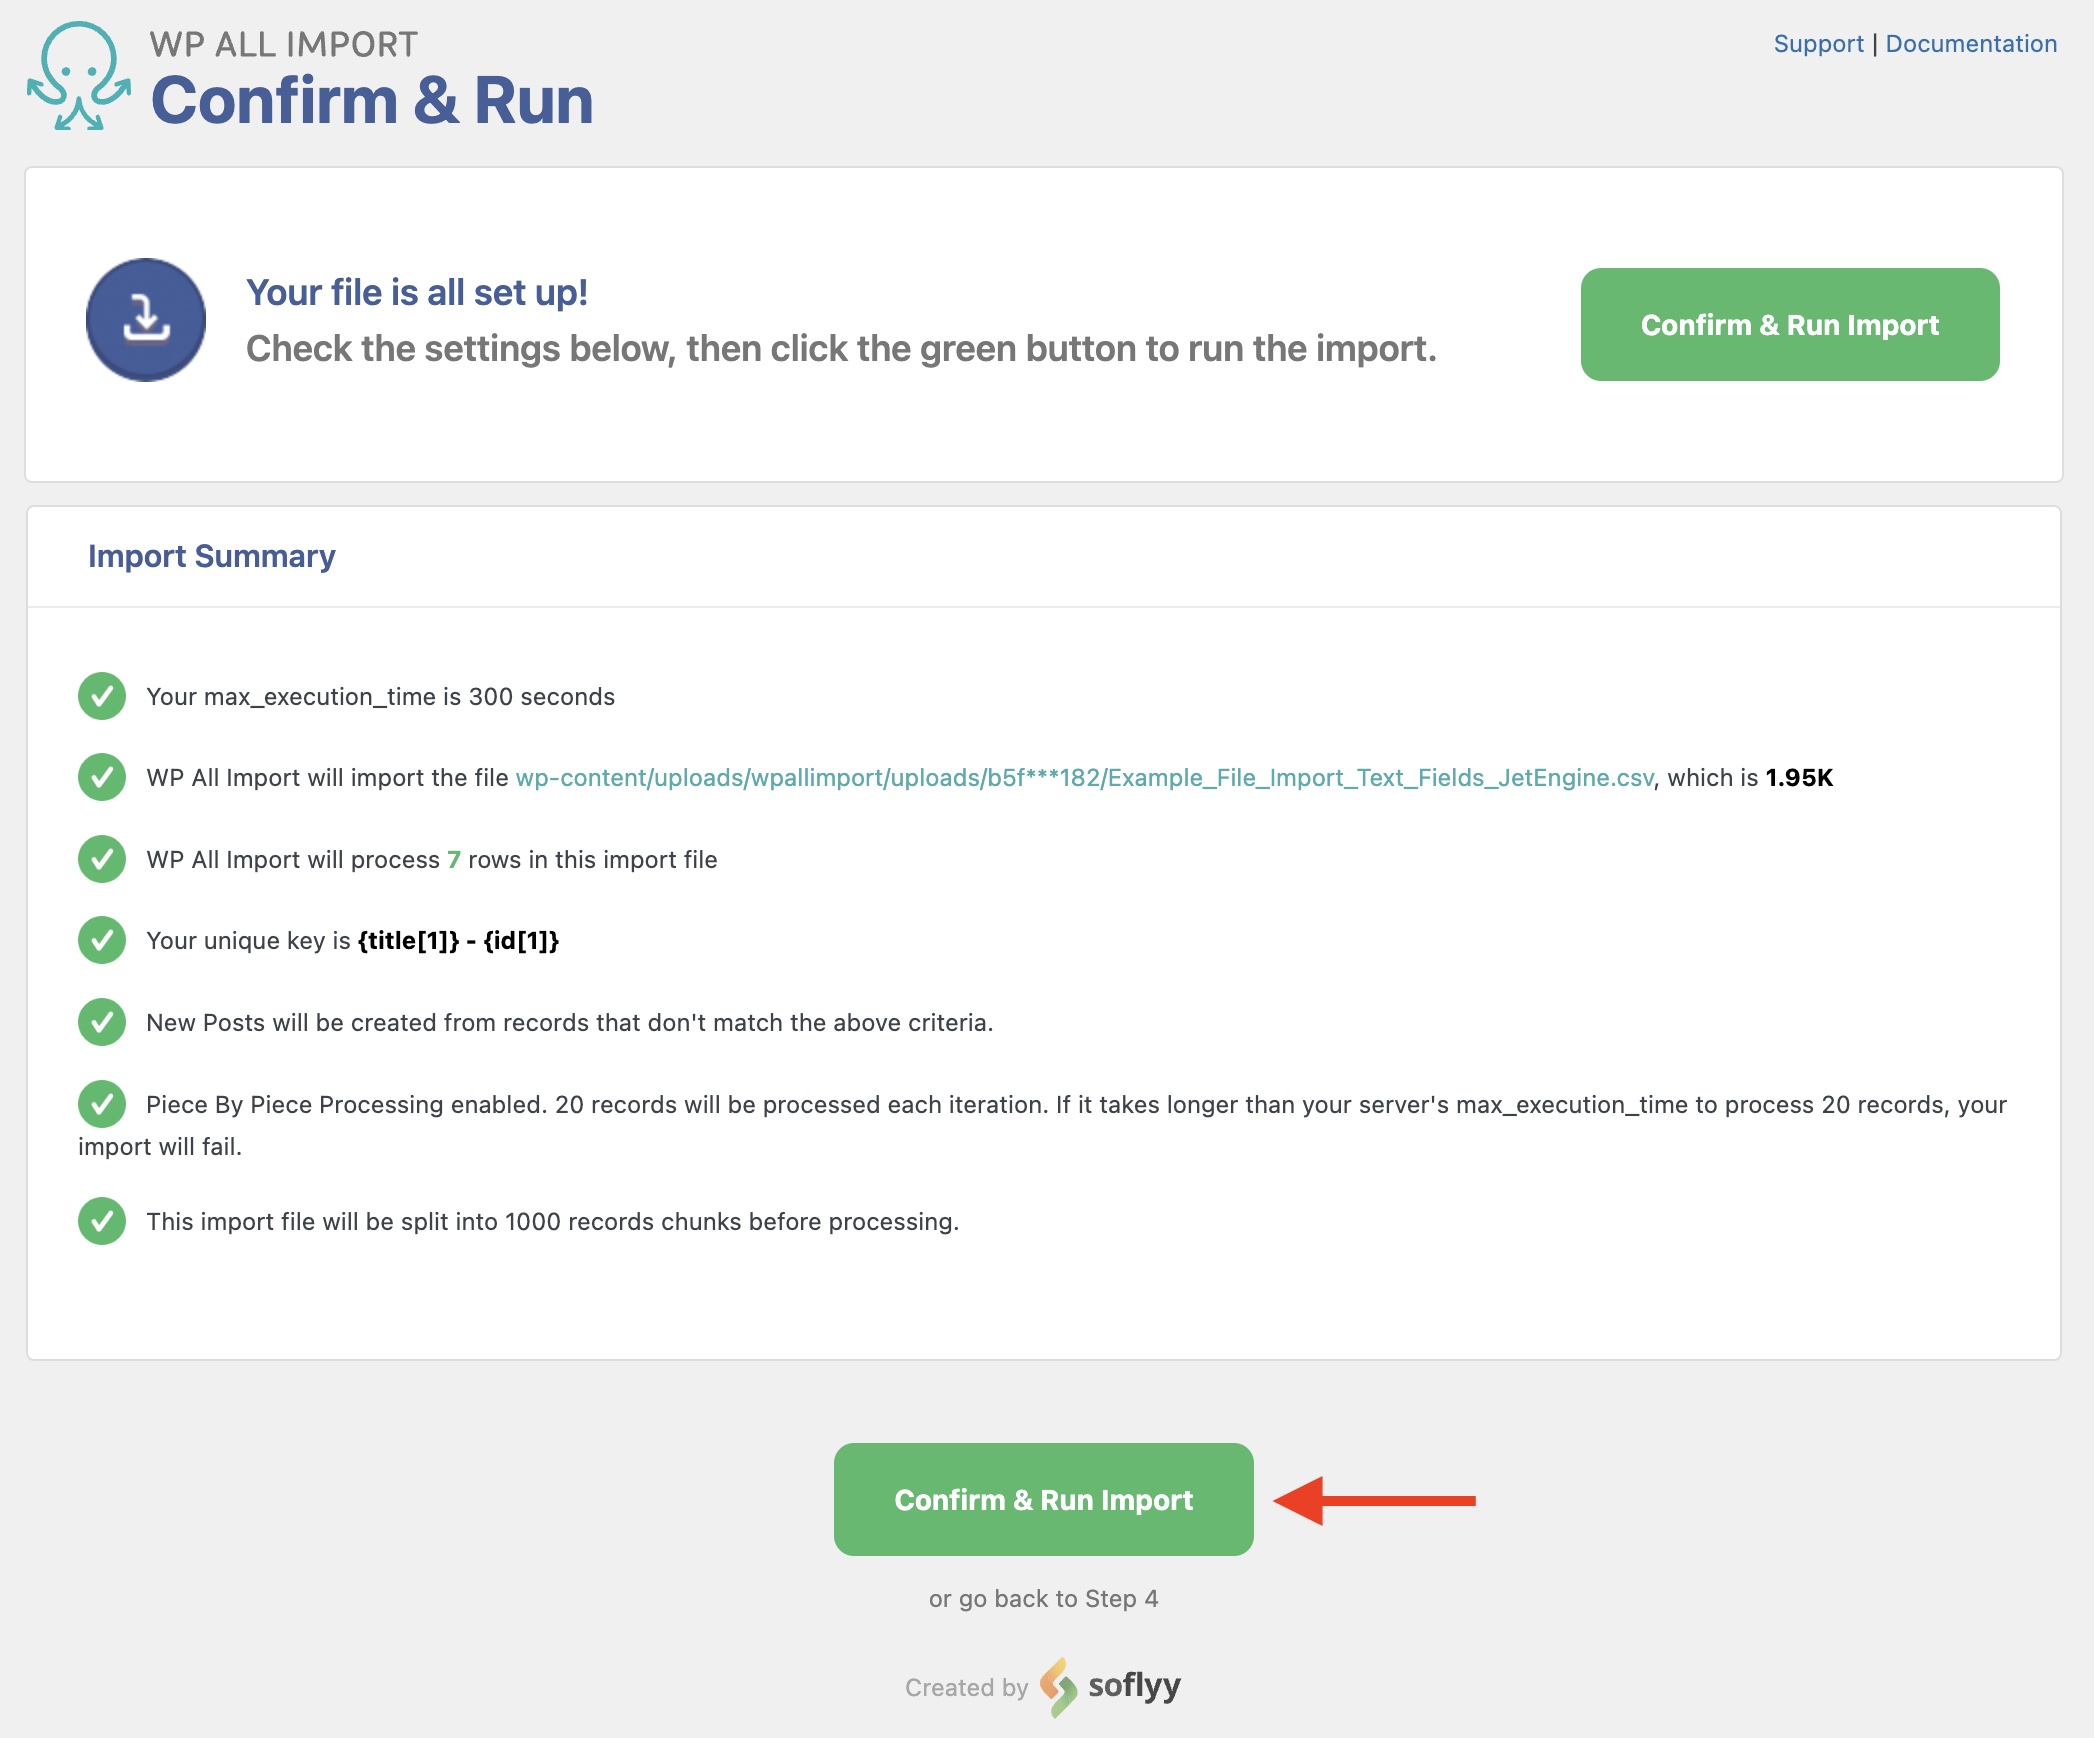
To run the import process, click the Confirm & Run Import button.
Once the import is finished, you will see the Import Complete screen:
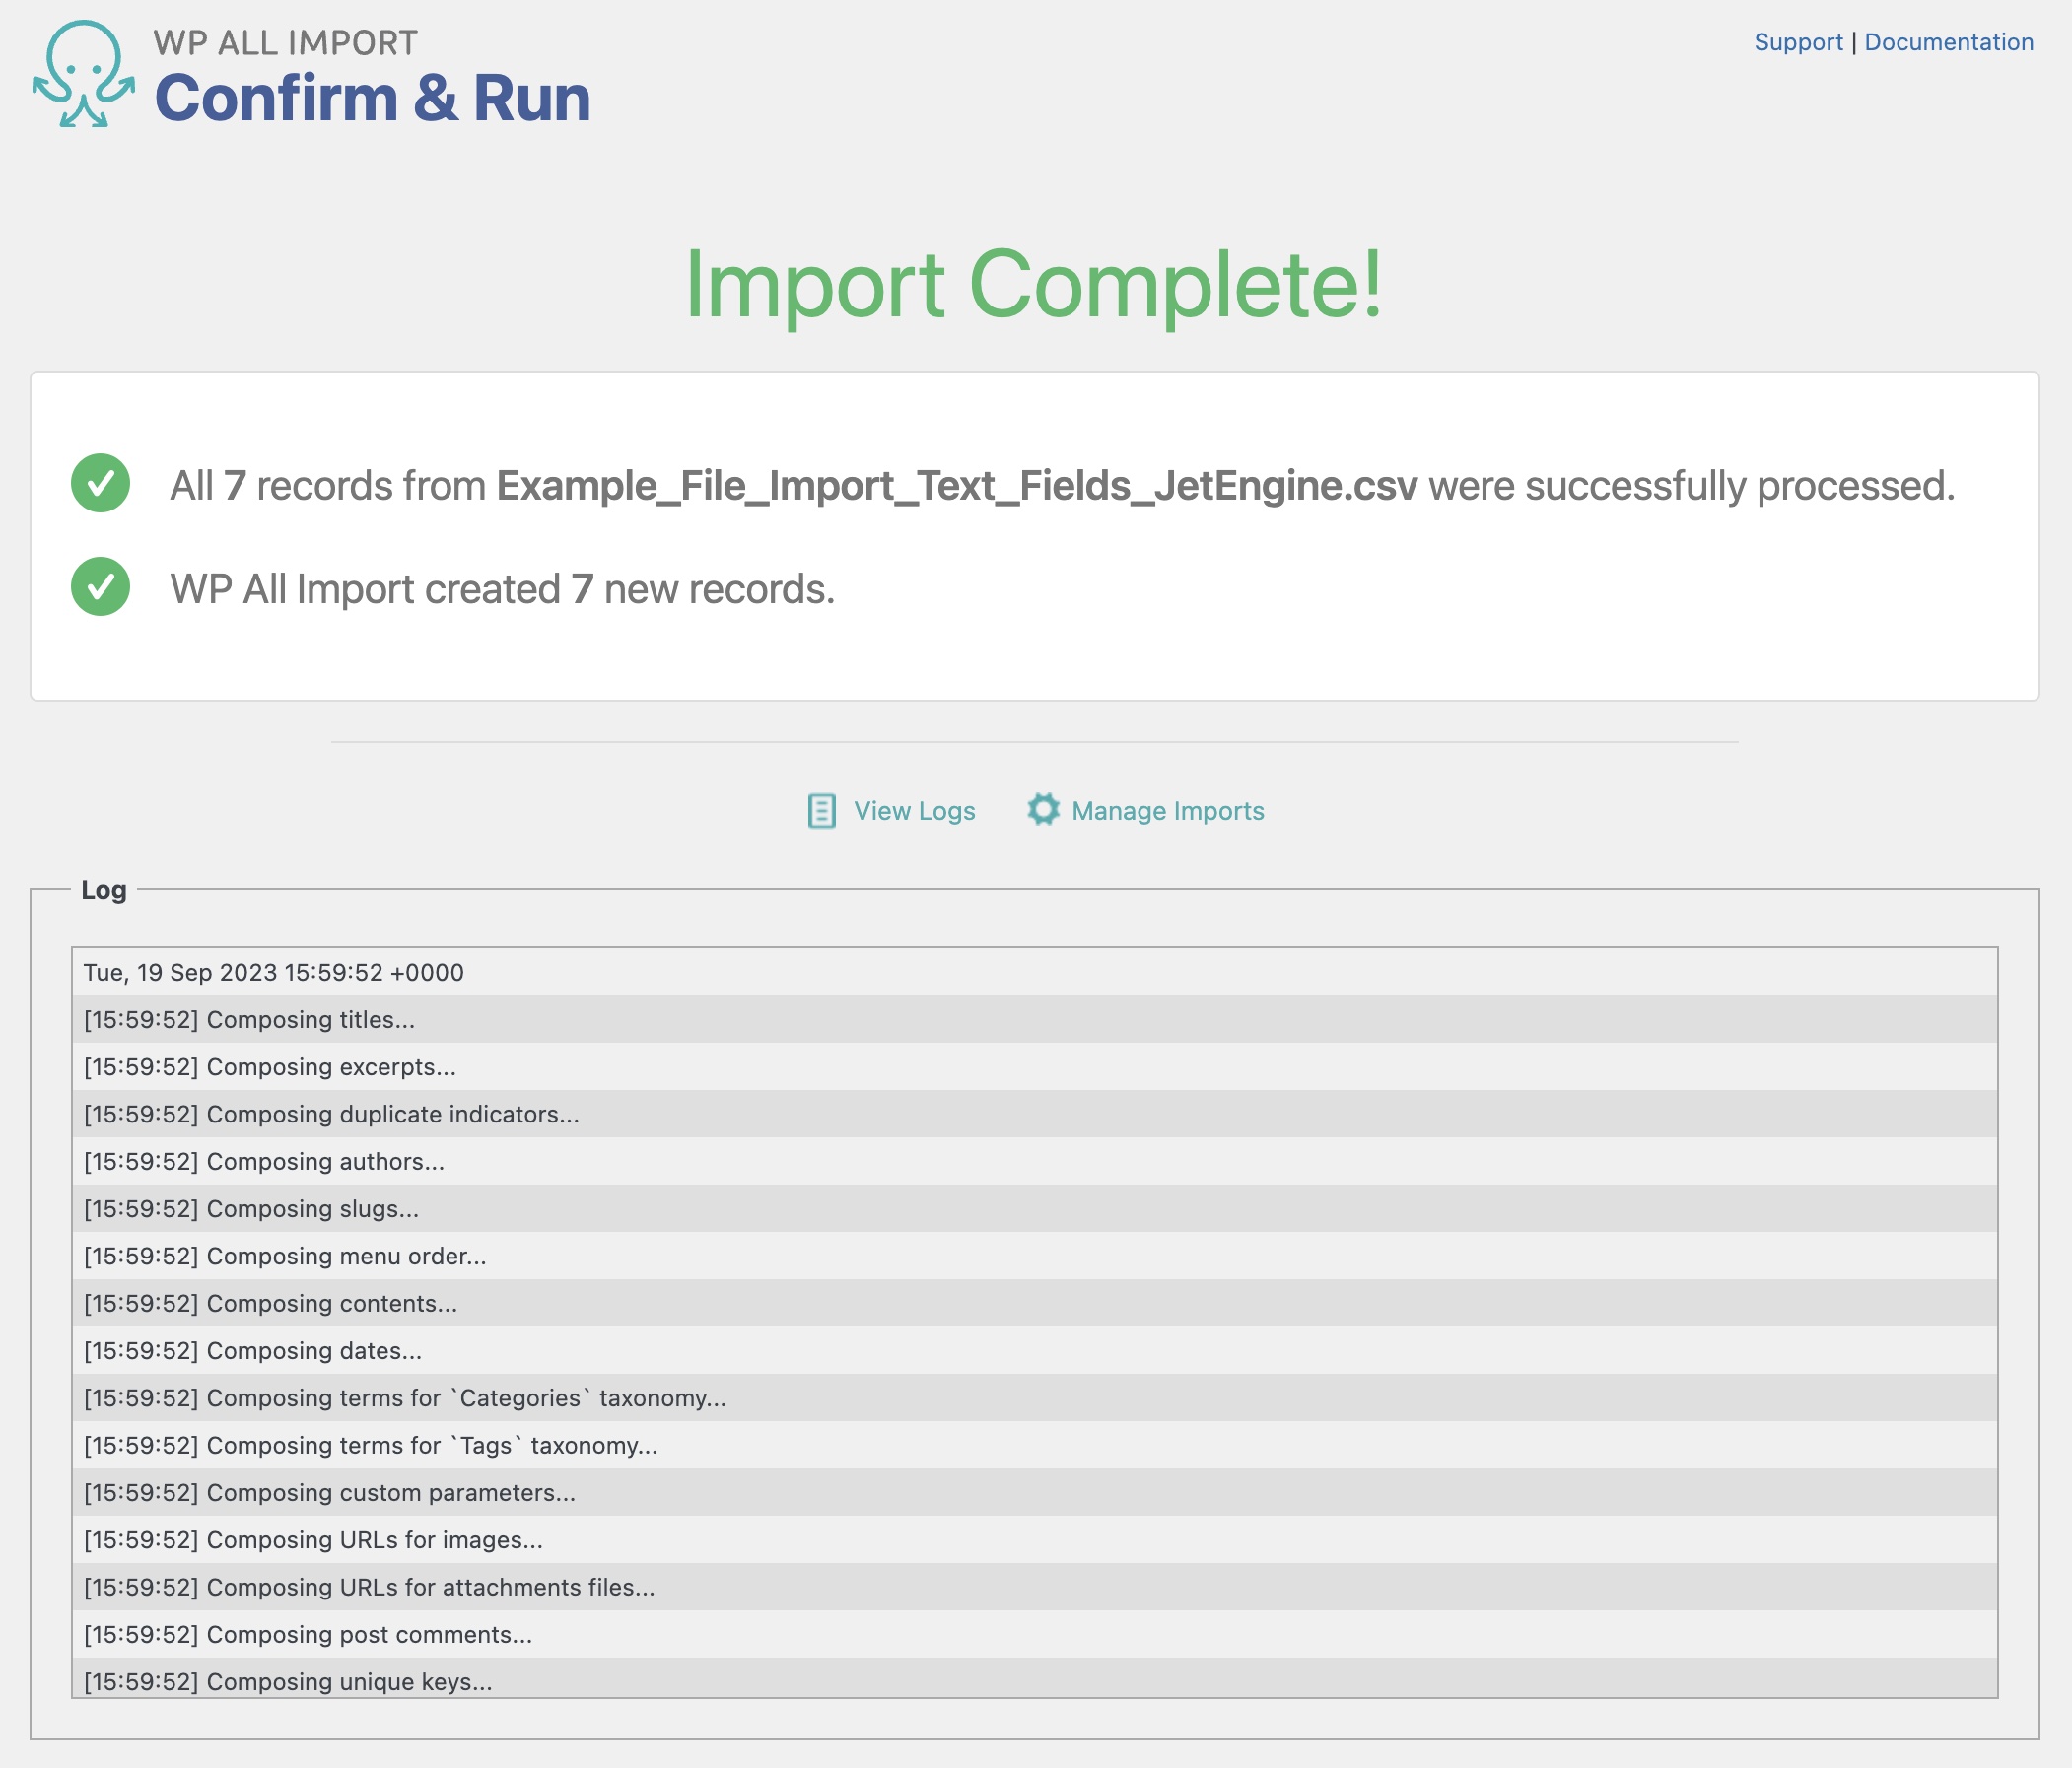
Then, just review the newly imported fields and posts in Posts › All Posts.
That's how you import JetEngine fields into WordPress posts using WP All Import!
Import to JetEngine from any CSV, Excel, and XML
- Every JetEngine field
- Any file format / data structure
- Inline PHP
- Images, galleries, cloneables, etc
- Woo, ACF, Meta Box
- Any theme or plugin
Import JetEngine Fields — Advanced Topics
Import to Custom Content Types (CCTs)
What Are Custom Content Types (CCTs)
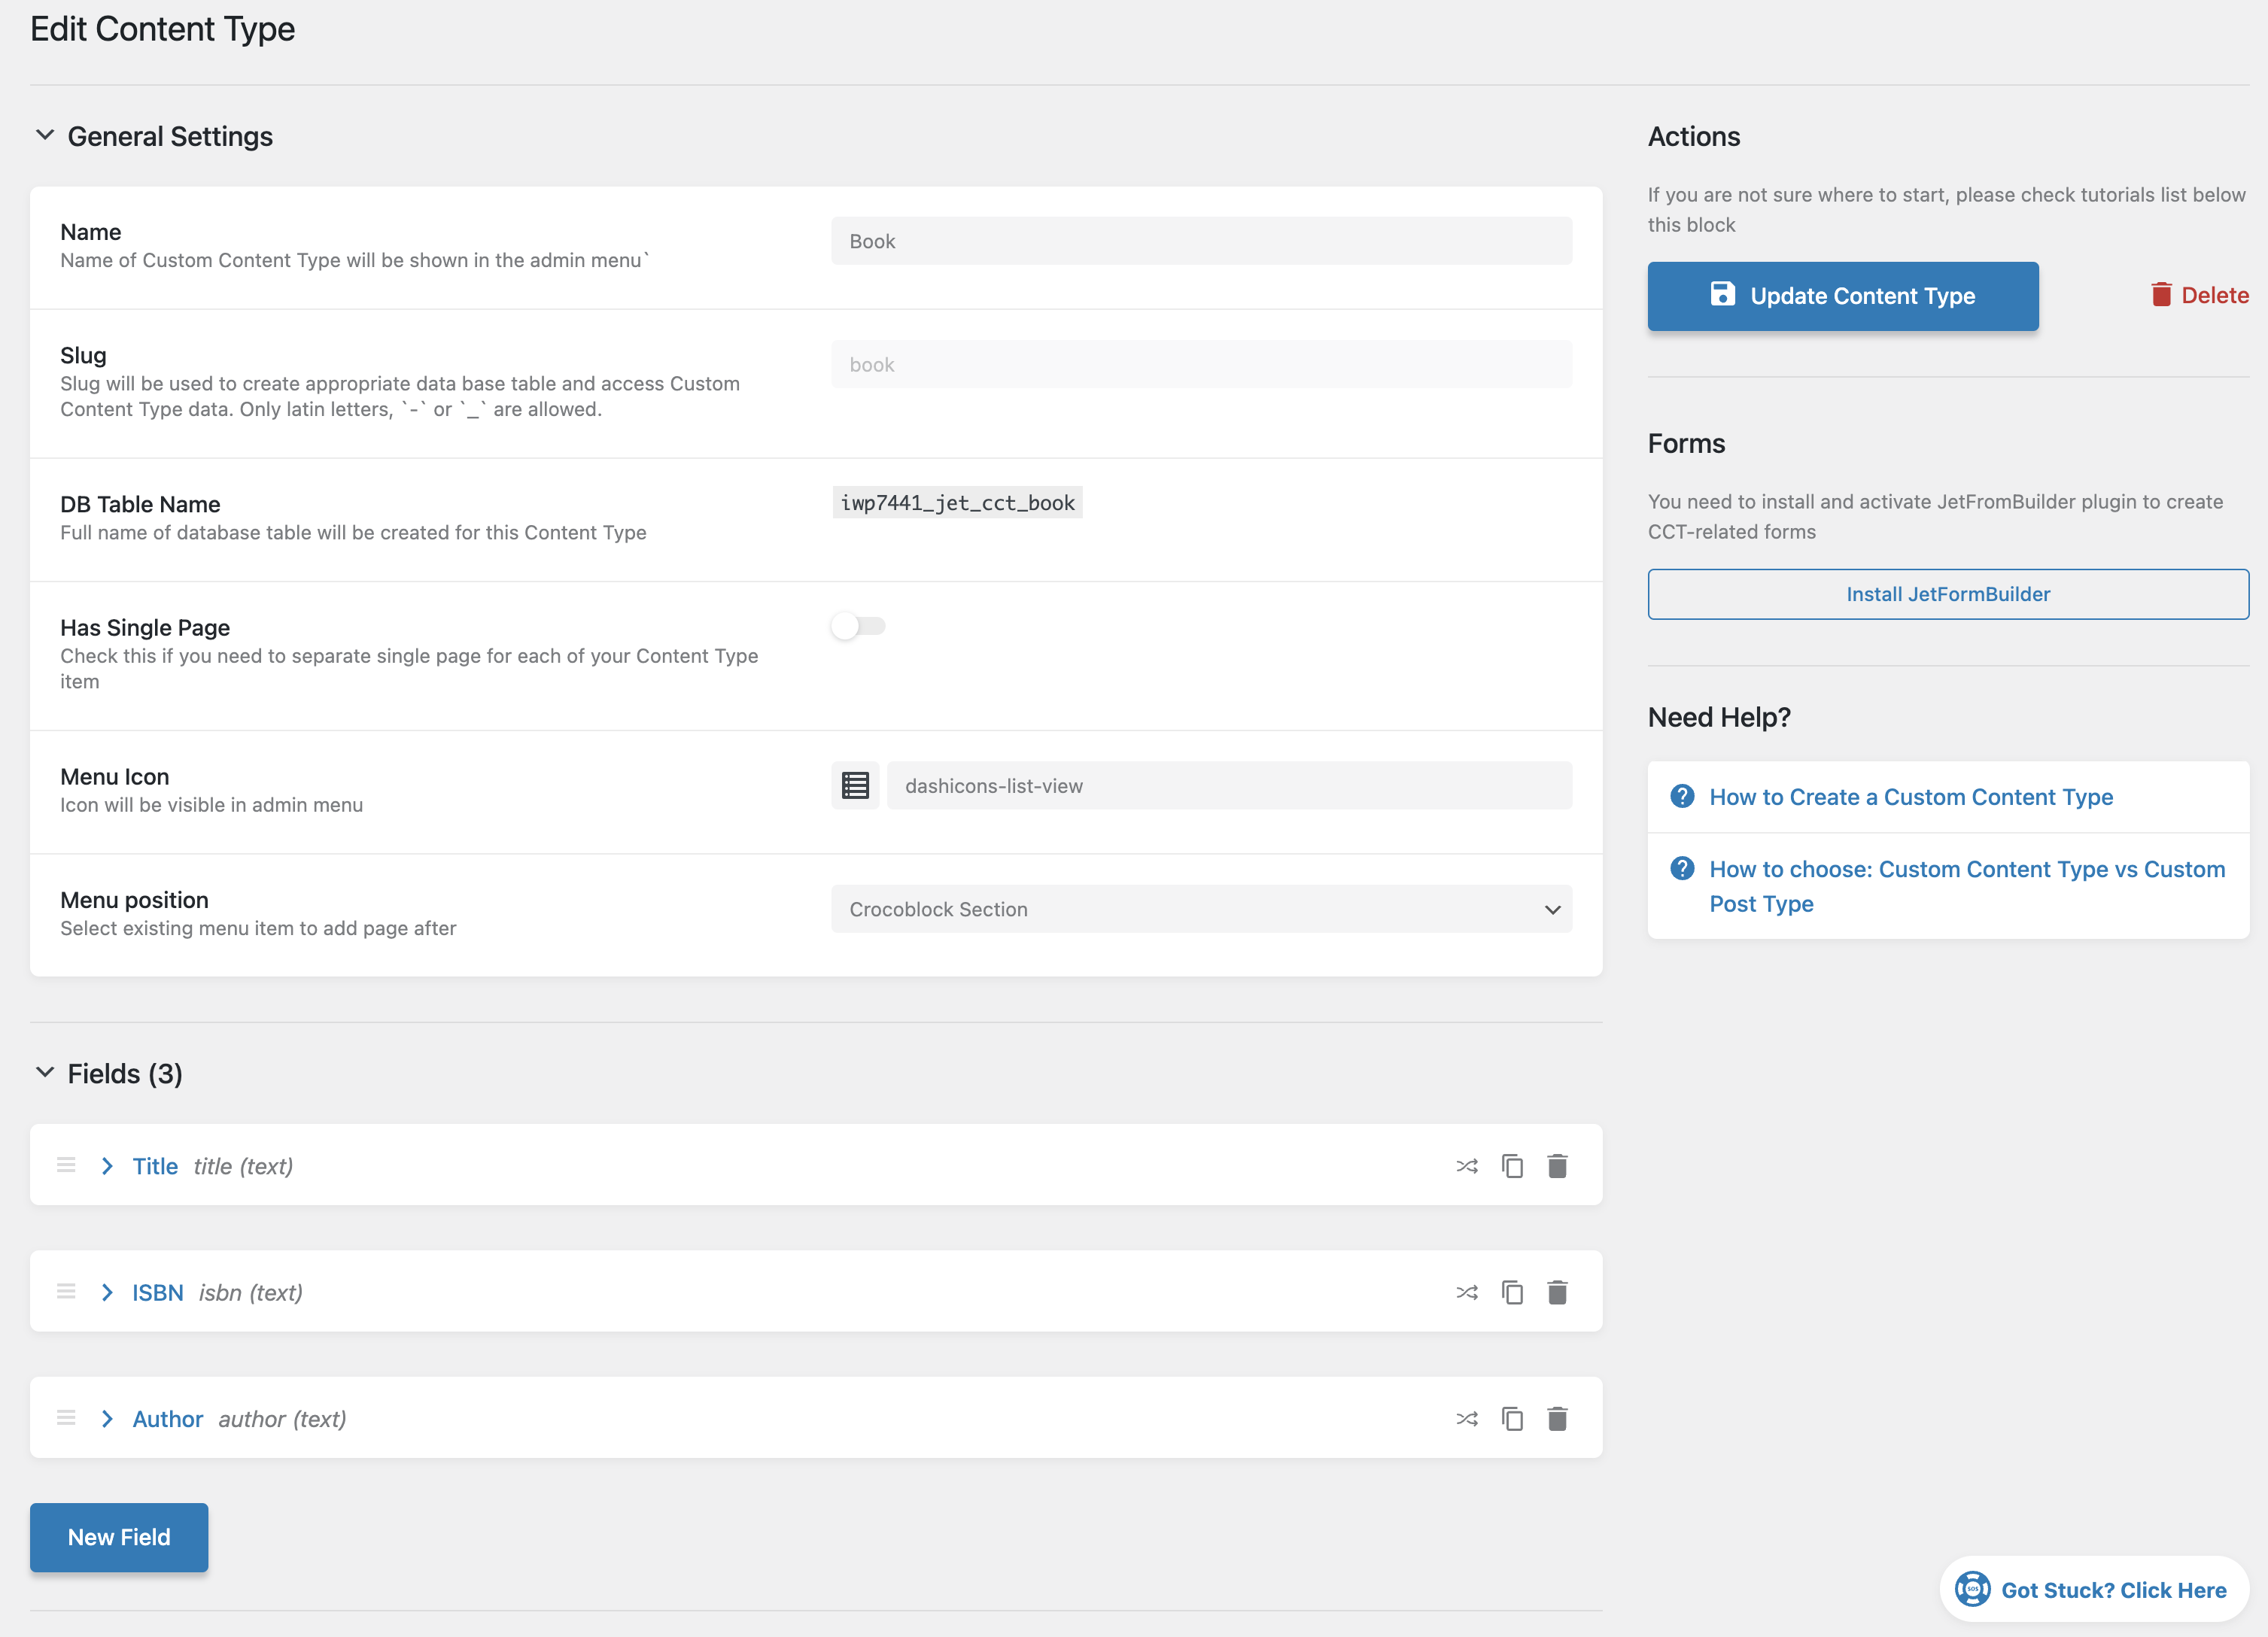
Custom Content Types (CCTs) are JetEngine database structures that allow you to store and manage data independently from WordPress's standard post types and taxonomies system. Unlike regular post types that are stored in WordPress's default tables, CCTs create their own custom database tables, making them ideal for specialized data that doesn't fit the traditional WordPress content model.
For example, you might use a CCT to store employee records, event bookings, or product specifications that need their own unique structure. Each CCT can have multiple fields of various types (text, number, date, etc.) and can be related to other WordPress content or other CCTs through relationship fields. Here's an example of Book CCT:
Choose Custom Content Type in WP All Import
CCTs are imported in the same way as you would import any other post type or custom post type. Let's import into that same Book CCT shown above. Since this is like a new post type, we are going to start a brand new import and choose that option in Step 1 of the import process:
Once you choose Jet CCT - Book, you can click on Continue to Step 2 and continue the import process, as explained in this guide above. The main difference is going to be in Step 3, where you map the import data:
In this section, you would not have any title or description to map (since CCTs don't have that), but you can map Custom Fields and any field defined inside that CCT:
The mapping is done in the same way as you map any other JetEngine field, by dragging the data from the right panel and dropping it in the corresponding field on the left.
You would then continue and finish the import process as usual (see Step 4 and Step 5 from the guide above).
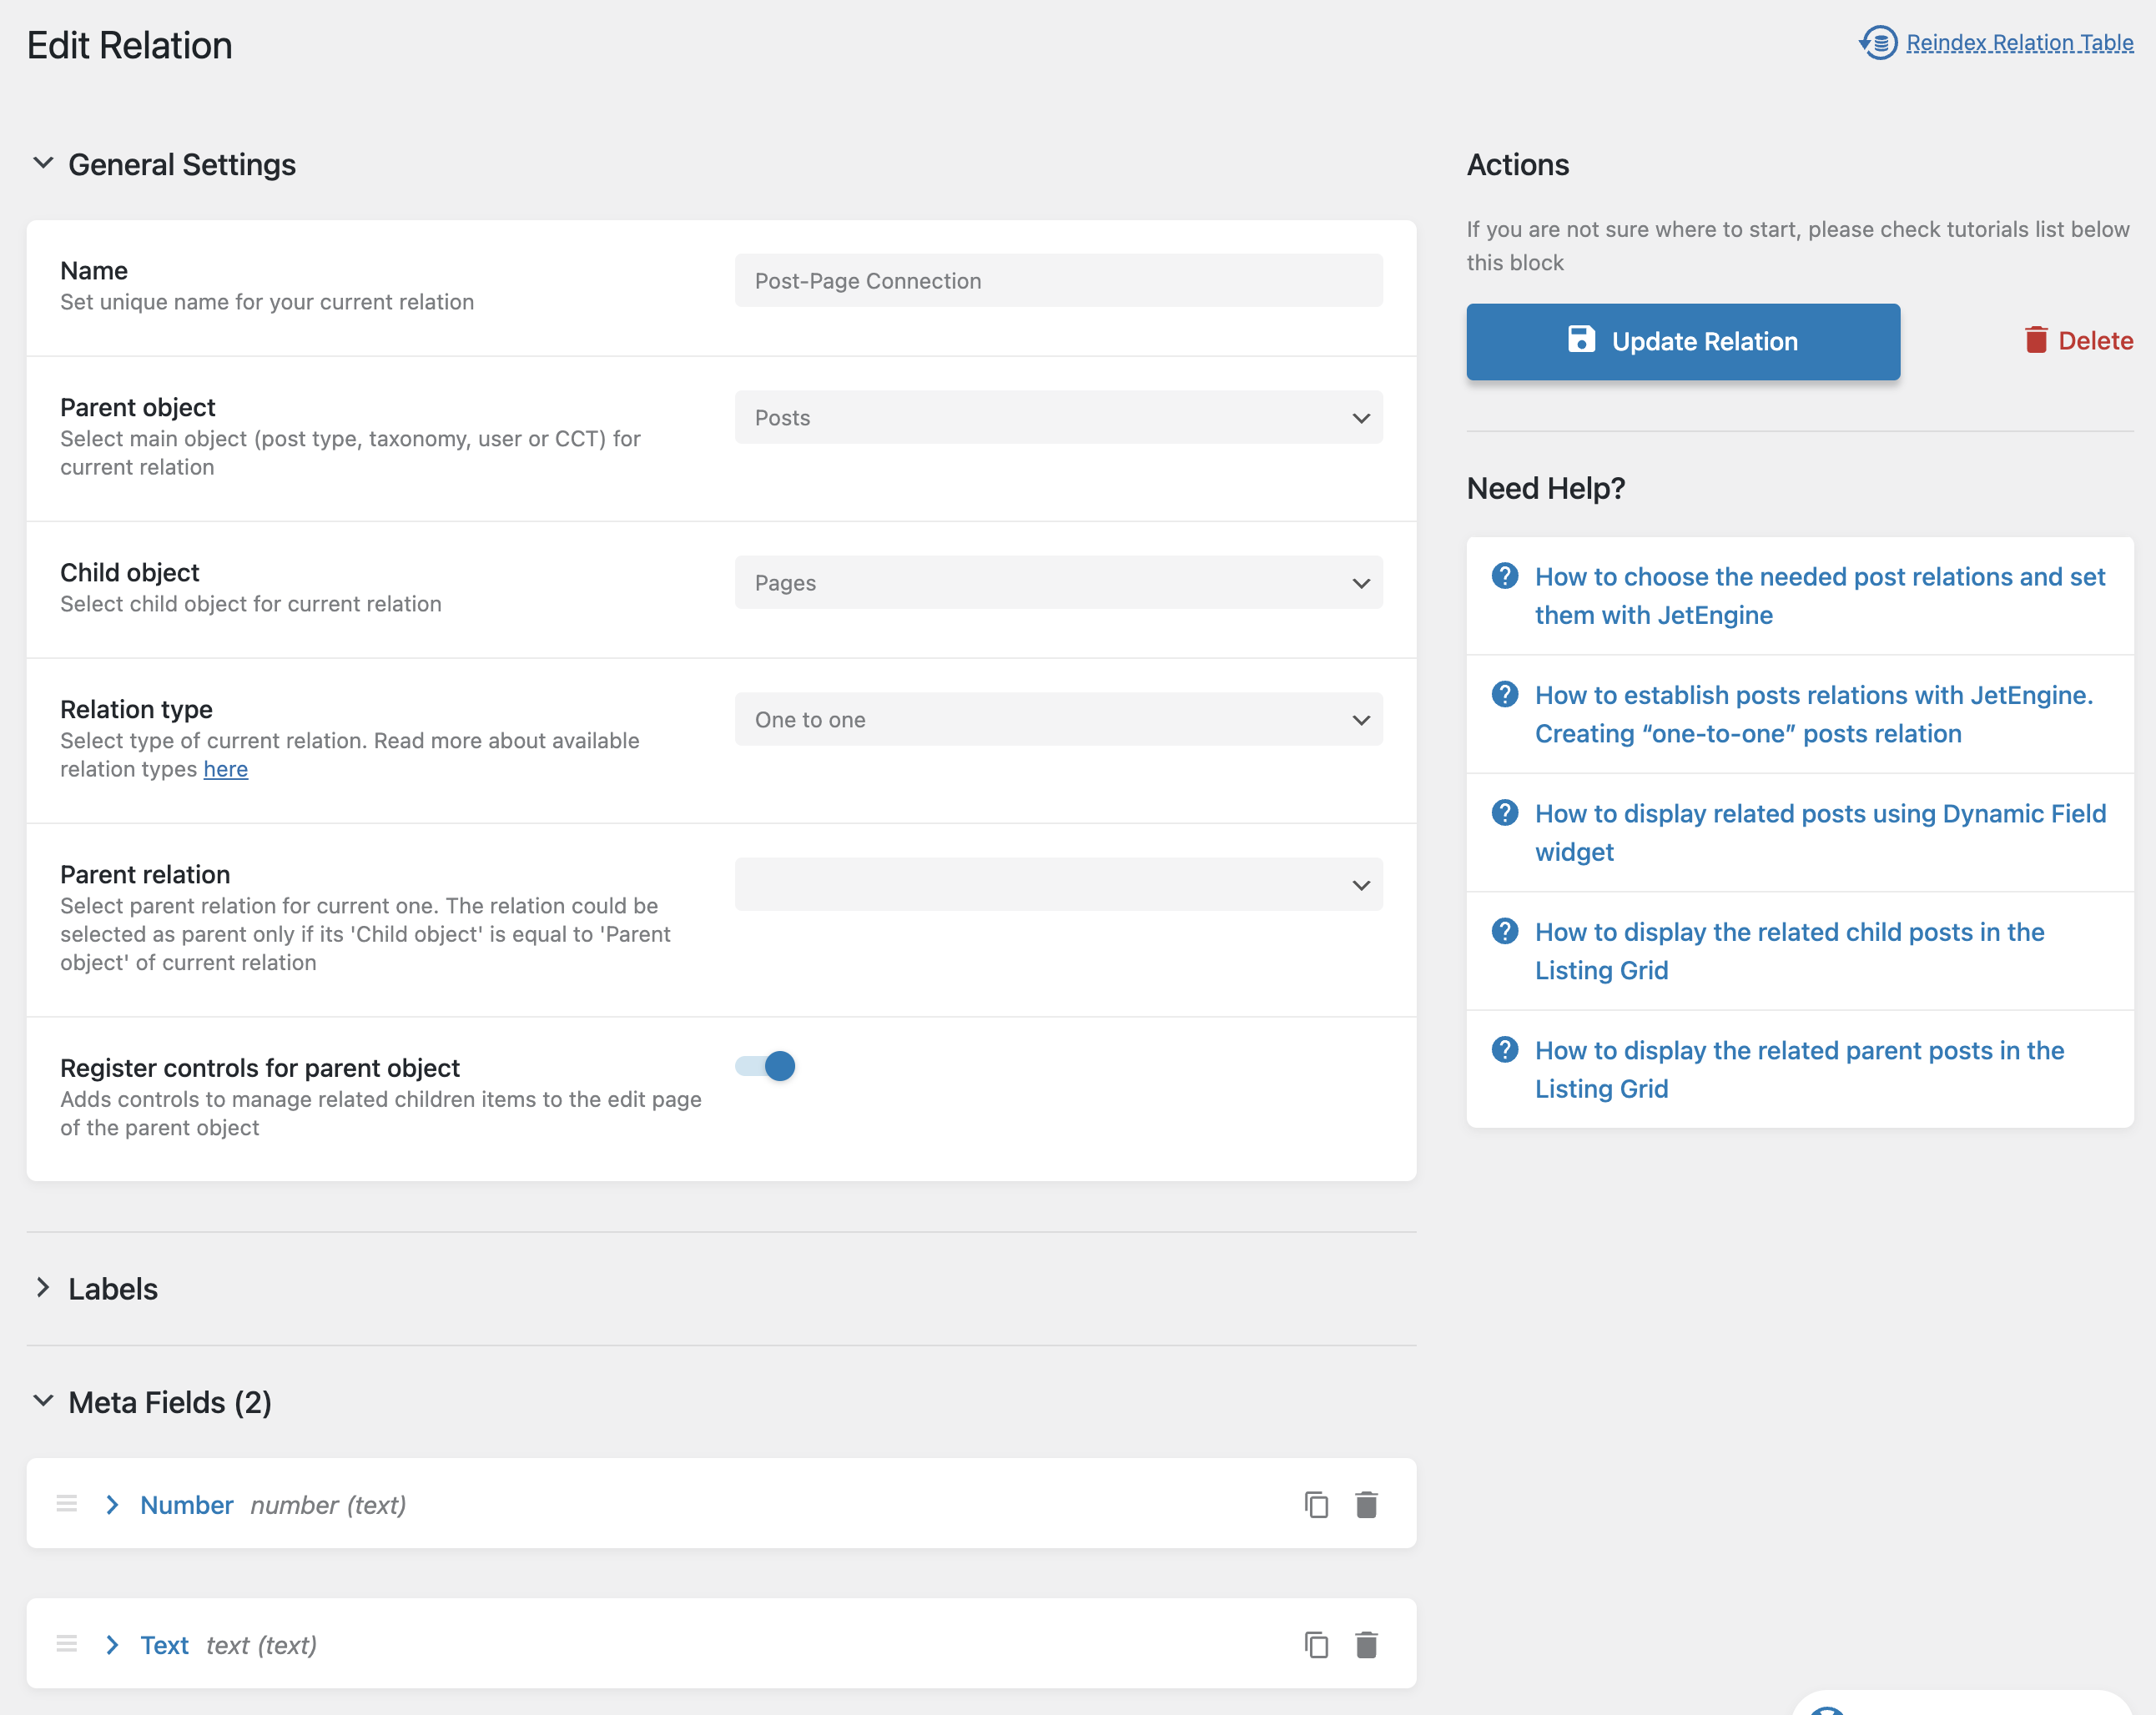
Import JetEngine Relations
Relations in JetEngine allow you to create connections between different types of content on your WordPress site. Think of Relations as a way to establish "belongs to" or "has many" relationships between posts, pages, custom post types, users, etc.
For example, you might want to connect Products to their Manufacturers, or Courses to their Instructors. Instead of duplicating this information across multiple posts, Relations create a direct link between them. This makes it easier to manage and display related content throughout your site, and ensures your data stays consistent when information changes.
JetEngine supports both one-to-many and many-to-many relationships, giving you the flexibility to create complex content structures while keeping your data organized and efficient. WP All Import provides you the ability to import these relations:
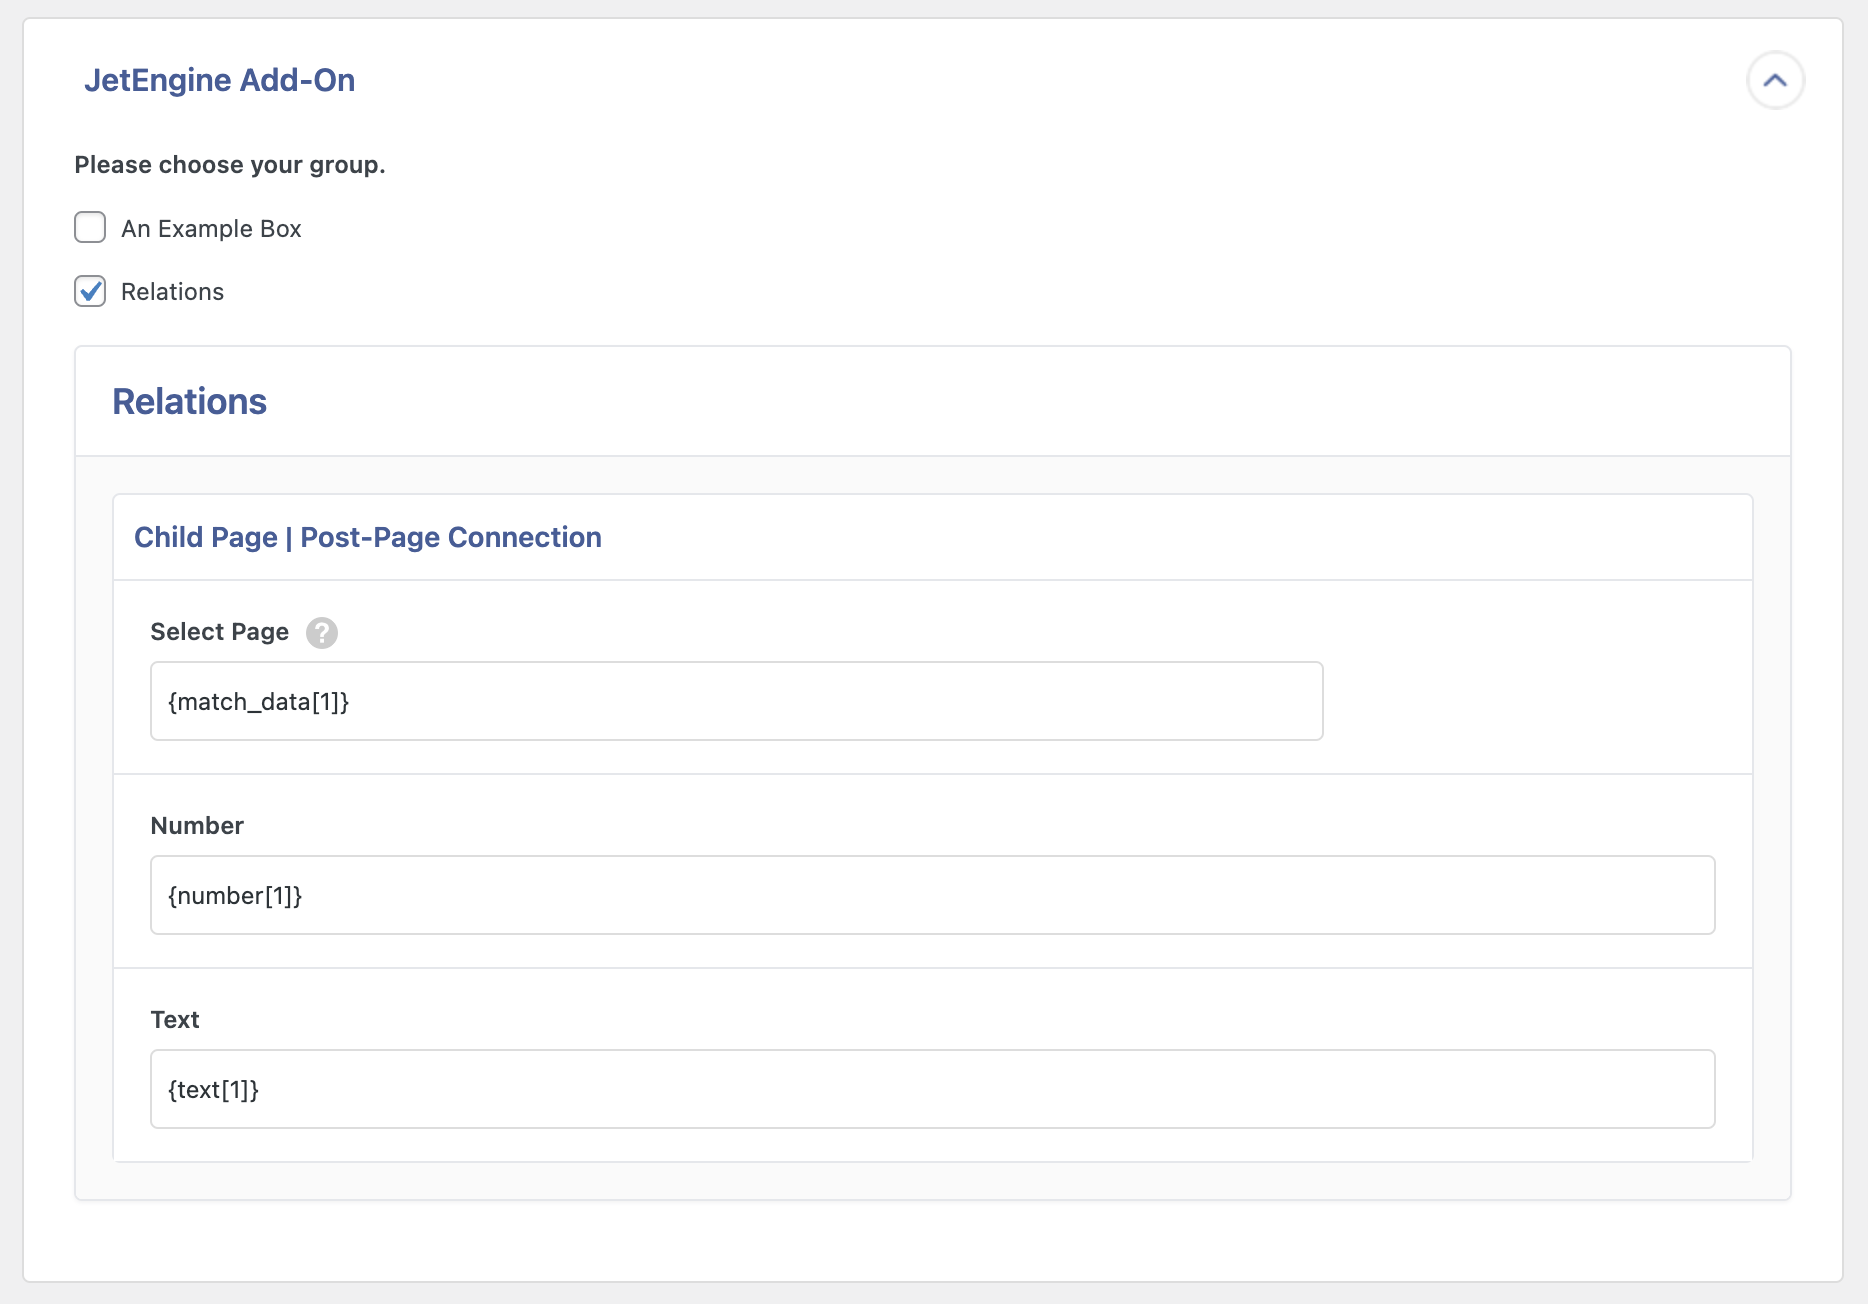
You can import these relations either via the parent object (so you import the children):
Or the child object (so you import the parents):
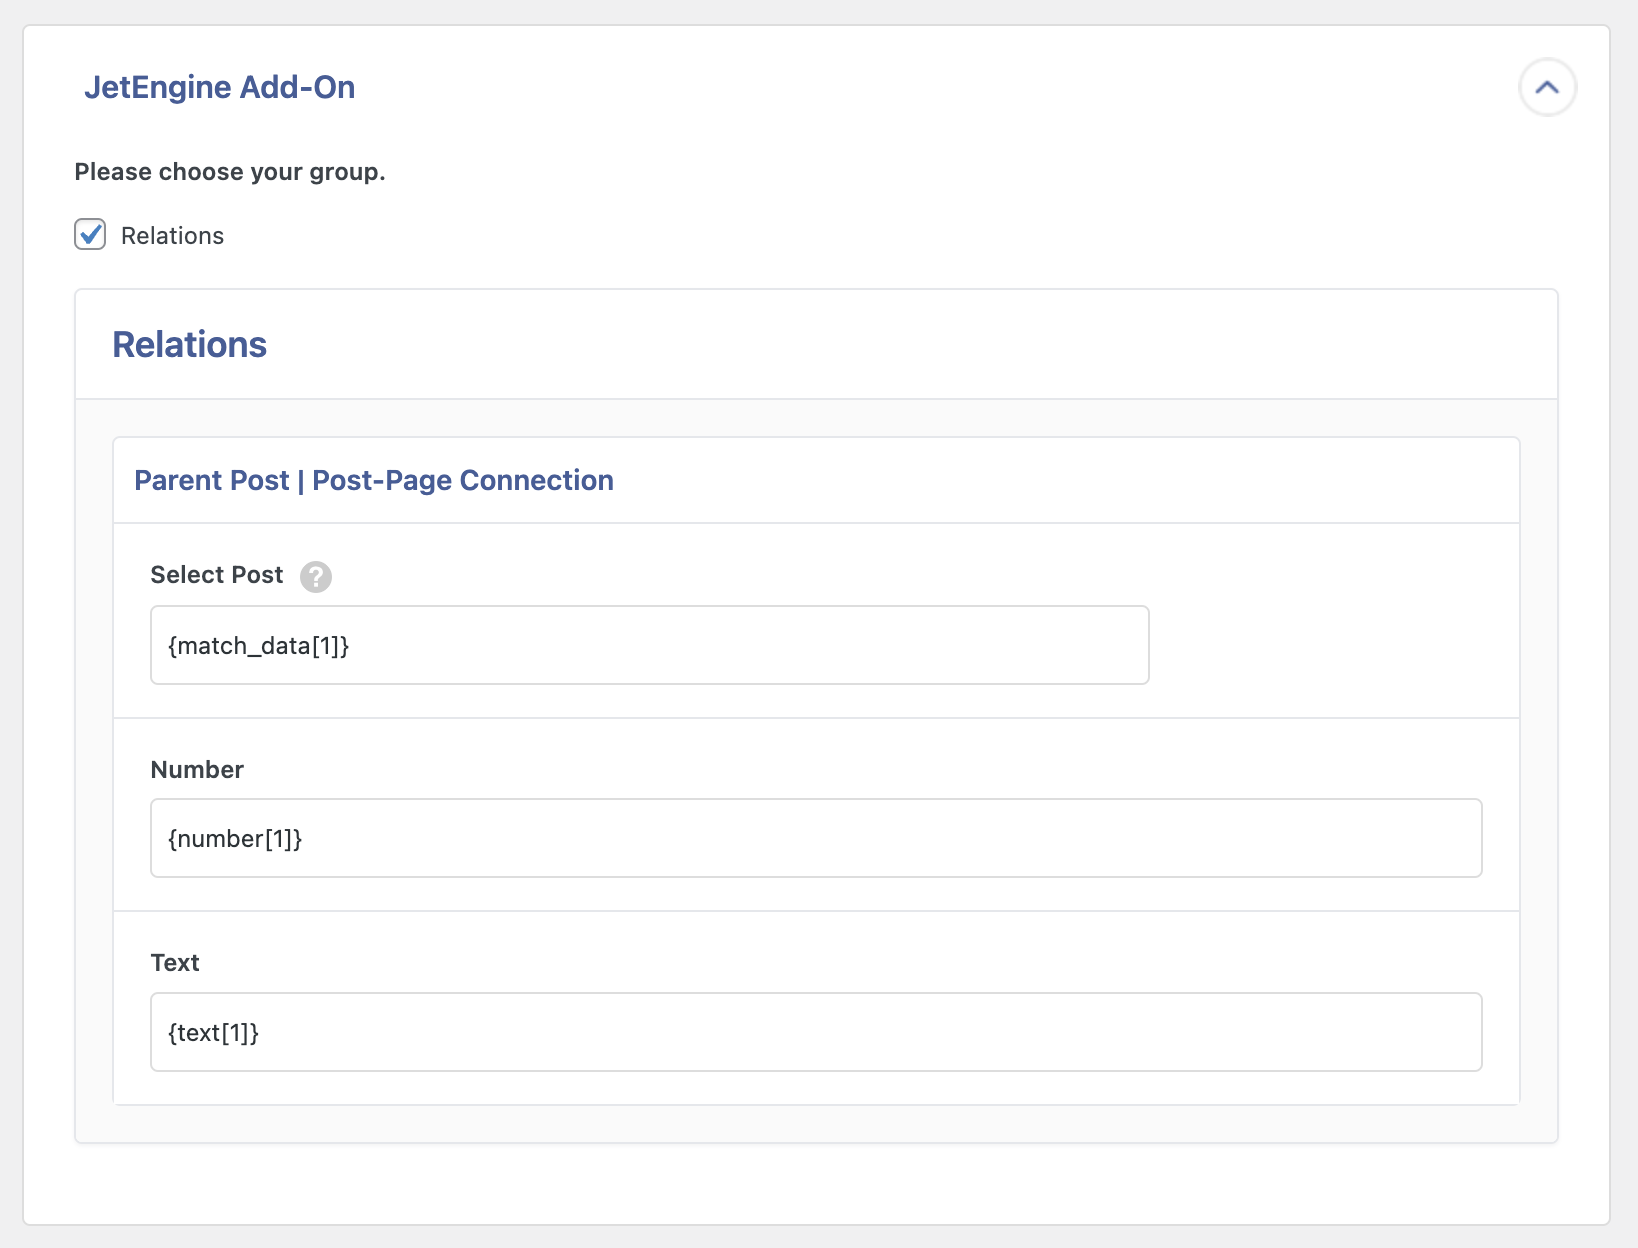
In both cases, you can match against ID, slug, or title to import the relation, and then just import the relation fields (if required). The rest of the import process is performed as usual (please refer to the guide above).
How to Create Meta Boxes and Meta Fields in JetEngine
To create new meta boxes, do the following:
- Go to JetEngine › Meta Boxes and click Add New.
- Input a Meta Box Title to name the group of fields
- Define where the fields are going to appear
- Add your new fields under Meta fields, which you can do by clicking New Meta Field and inputting the details. You need to input at least the Label and change the Field type.
Click Add Meta Box to add the group, and you're done! You will see this meta box when editing the chosen post type or when importing into it.
What's The Difference Between JetEngine And ACF?
JetEngine and Advanced Custom Fields (ACF) both cater to custom content needs but with distinct focuses. JetEngine is tailored for the Elementor page builder. It's a comprehensive solution for creating custom post types, taxonomies, and meta boxes, all without delving into code.
On the other hand, ACF zeroes in on adding custom fields to WordPress edit screens. Its primary mission is to provide a robust platform for custom fields and meta boxes, and it does so with a flexibility that has made it a staple among developers. While ACF can be integrated with various themes and plugins, the visual design of its fields often requires additional tools or page builders that support ACF.
Those are the main differences between these popular WordPress plugins. JetEngine leans towards a comprehensive, user-friendly approach for Elementor enthusiasts, whereas ACF stands as a specialized, developer-favored tool for custom fields in general.
Import JetEngine Fields — Frequently Asked Questions
Can You Export JetEngine Fields?
Yes, you can use WP All Export Pro and the JetEngine Export Add-On to export your JetEngine fields from your WordPress site.
How to Modify Import Data with PHP Function
You can use PHP functions to modify the import data and adjust it however you need. Besides native PHP functions, you can also create your own custom PHP functions. Learn more about PHP functions here: https://www.wpallimport.com/documentation/inline-php/.
Are All JetEngine Fields Supported?
Yes, the JetEngine Import Add-On supports all custom fields available in JetEngine. To import your fields, you must have installed both WP All Import Pro and the JetEngine Import Add-On.
Import JetEngine Fields — Related Docs
Quickstart guide showing you how to import any file into WordPress using WP All Import.
Learn more about importing ACF fields into WordPress.
Learn how to export JetEngine fields from WordPress using WP All Import.
Execute PHP or custom code to modify ACF data during import.


